Getting Started: GravityView Entry Approval
How do I approve or reject entries?
You can moderate whether entries are approved or disapproved in three ways:
- By using the Entries page of Gravity Forms on your Dashboard: Moderate entries from the Gravity Forms entries screen
- From the front end of your site in a View: Moderate entries from the front-end of your site
- Or via form notifications: Moderate entries from directly from an email notification
There's also a fourth option, which consists of adding a special GravityView field to your form to manually control when the form submission (entry) is approved or not.
This can be achieved by adding one of these two special fields to your form:
- Approve/Reject - an Administrative field by default. Aimed at Administrators to approve an entry using the Entries screen of Gravity Forms. When this field is present on the form, entries are automatically submitted as "Disapproved". To approve them, an administrator must edit that entry and check this field.
- User Opt-In - gives the approval control to the user submitting the form. Perfect for getting user consent before displaying the entry to the public. If the user checks the field, the entry will be "Approved" by default. If the user doesn't check that field, the entry is "Disapproved" by default.
How to add these special fields to your form:
- Edit the form (Form Editor screen) connected to your View;
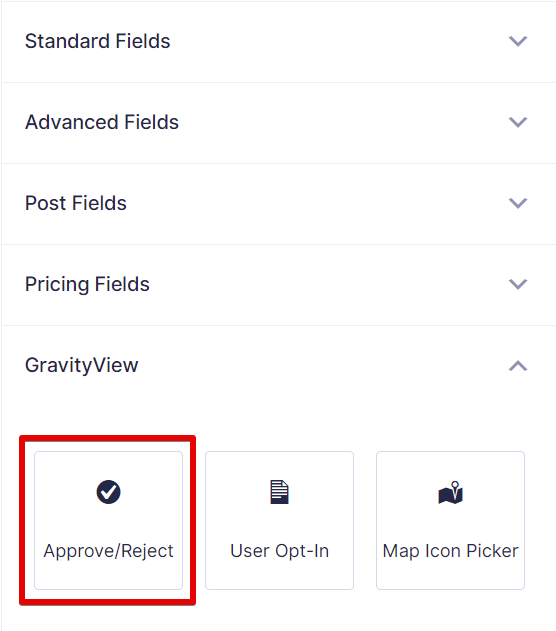
- Look for the GravityView field panel on your form editor:
- Drag (or just click) one of these two fields (
Approve/Reject
field or theUser Opt-In
field) to your form;

- Save the form.
How to show only approved entries in a View
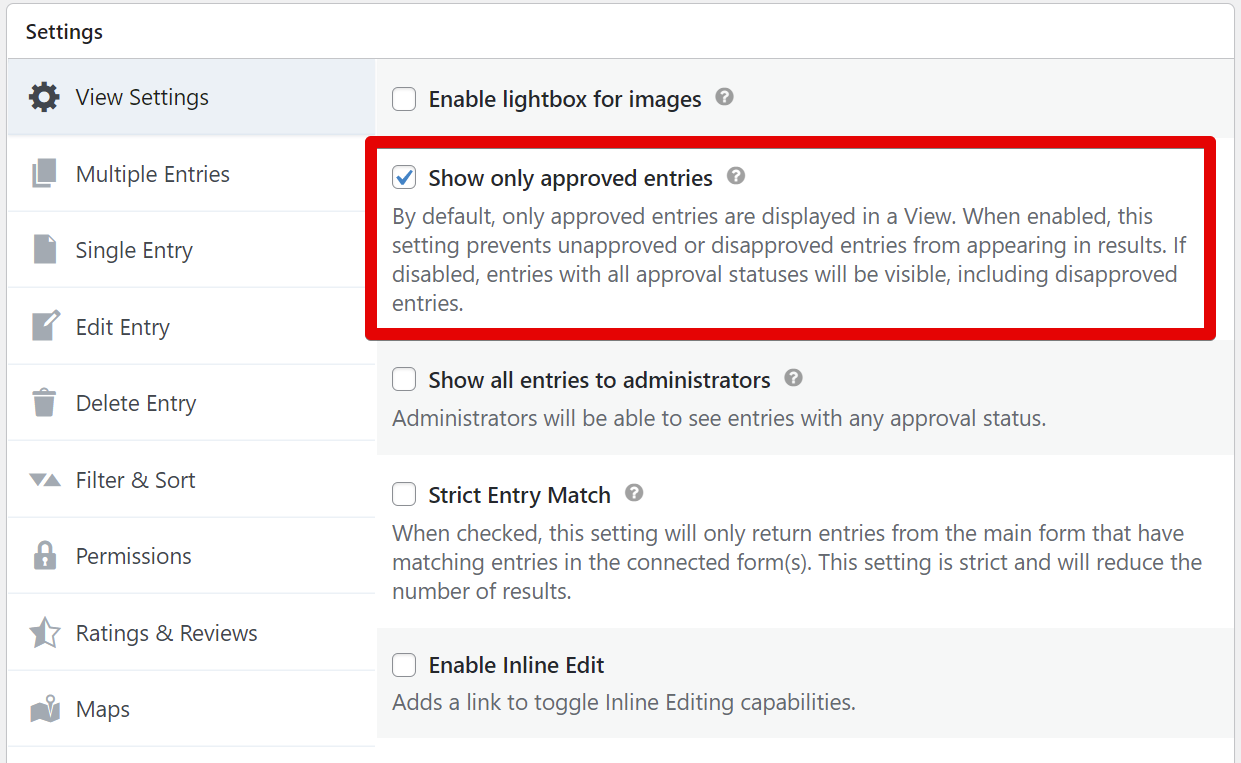
In the View Editor page of your View, find the View Settings
box and check the checkbox named "Show only approved entries":

Now, only approved entries are going to show up on your View!
Troubleshooting
If the Approve Entries field isn't showing for some users, see Approve Entries Field Not Showing for Non-Admin Users.
_1@2x.png)