_1@2x.png)
Front-end entry approval
GravityView has always allowed you to choose what entries to show and hide from the Dashboard. Since Version 1.19, GravityView also allows you to approve and disapprove entries from the front-end too!
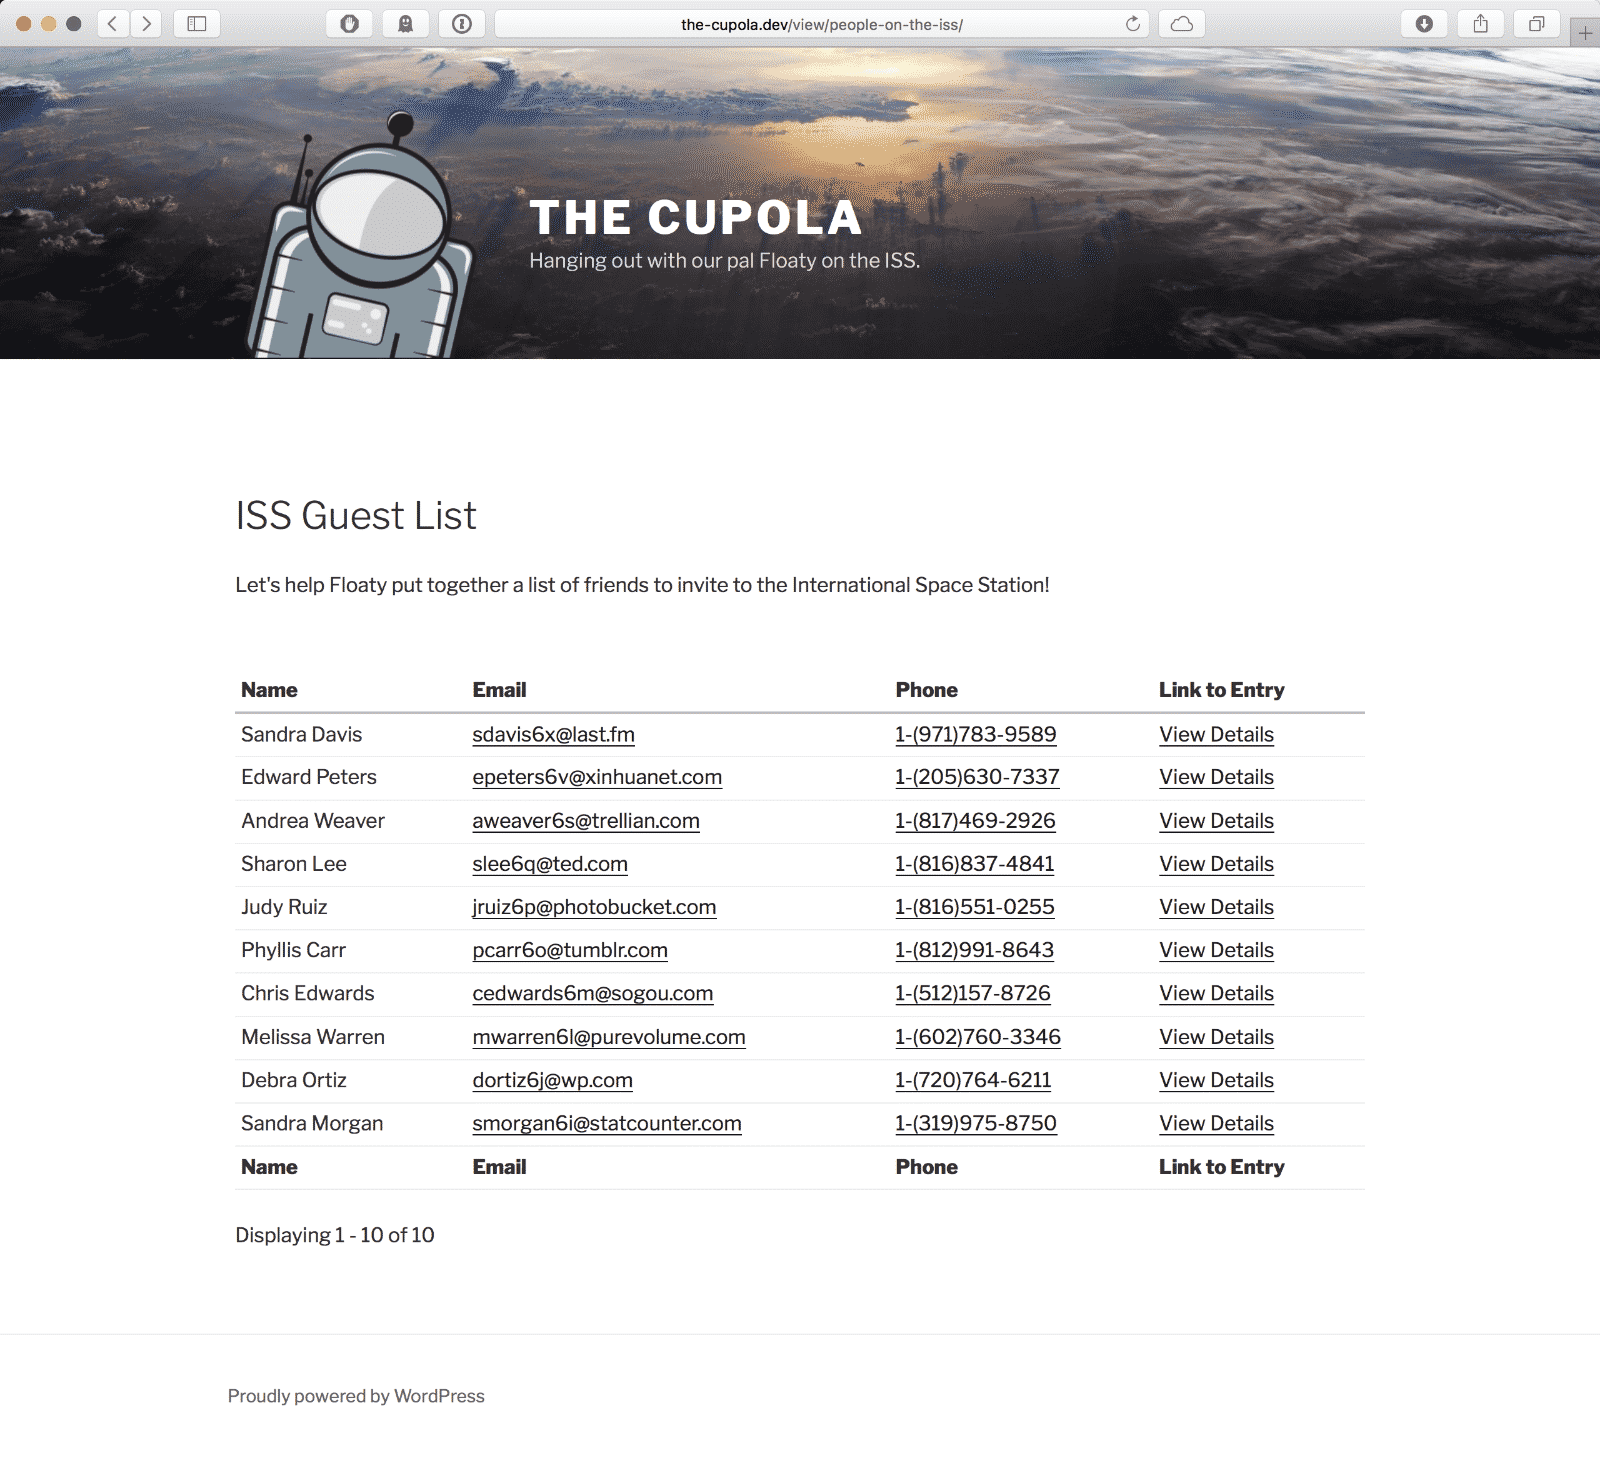
In this example, we'll help Floaty the Astronaut put together a guest list of people to invite to the International Space Station.
Note: the data displayed in this demo is randomly generated
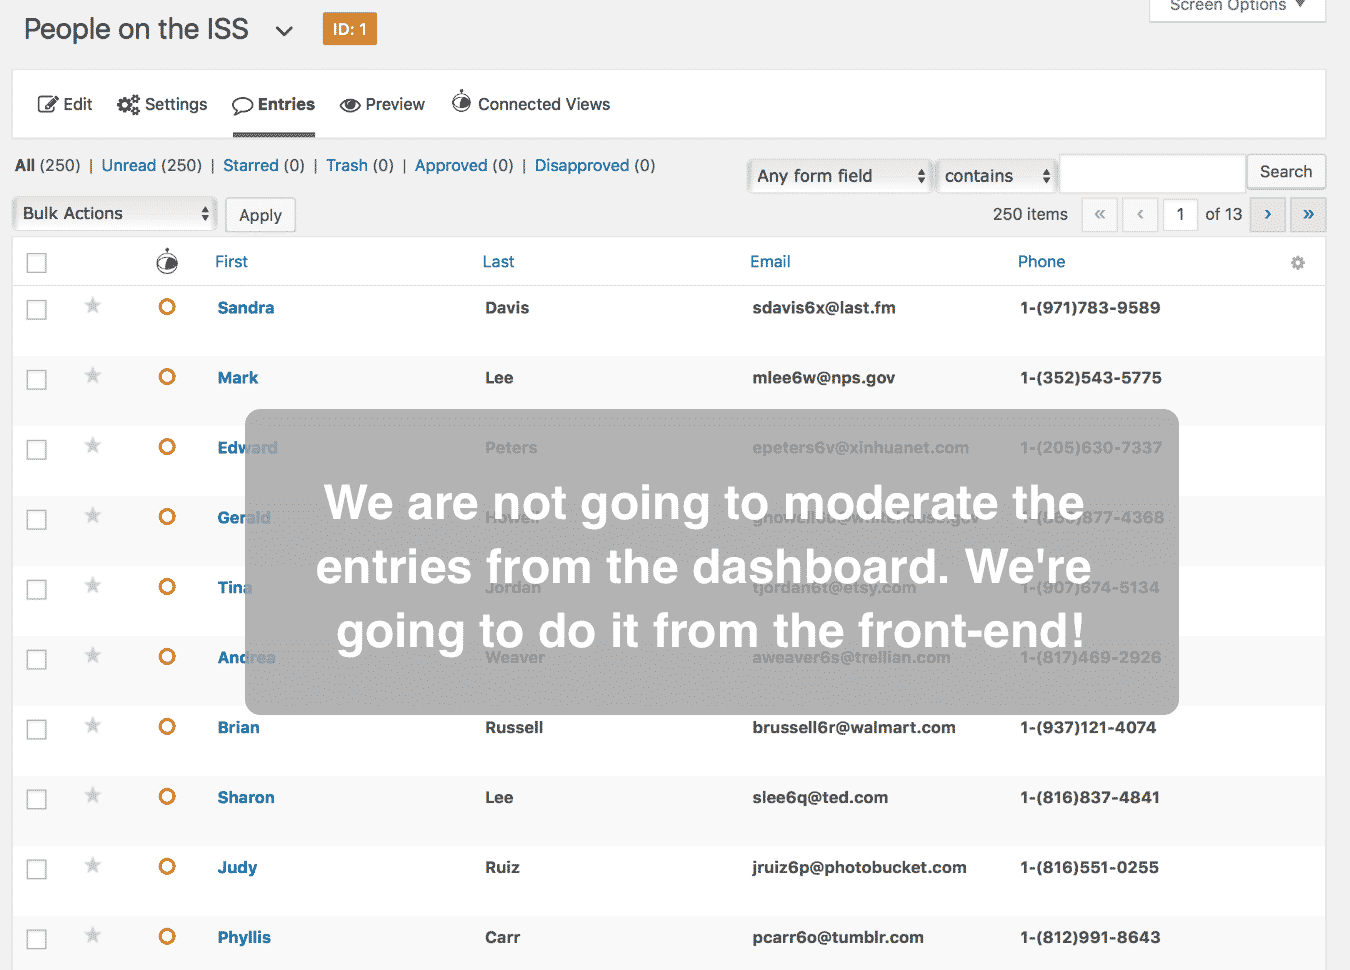
There are a lot of entries we need to moderate!
We want to approve and disapprove entries from the front end of the site, not the Dashboard.
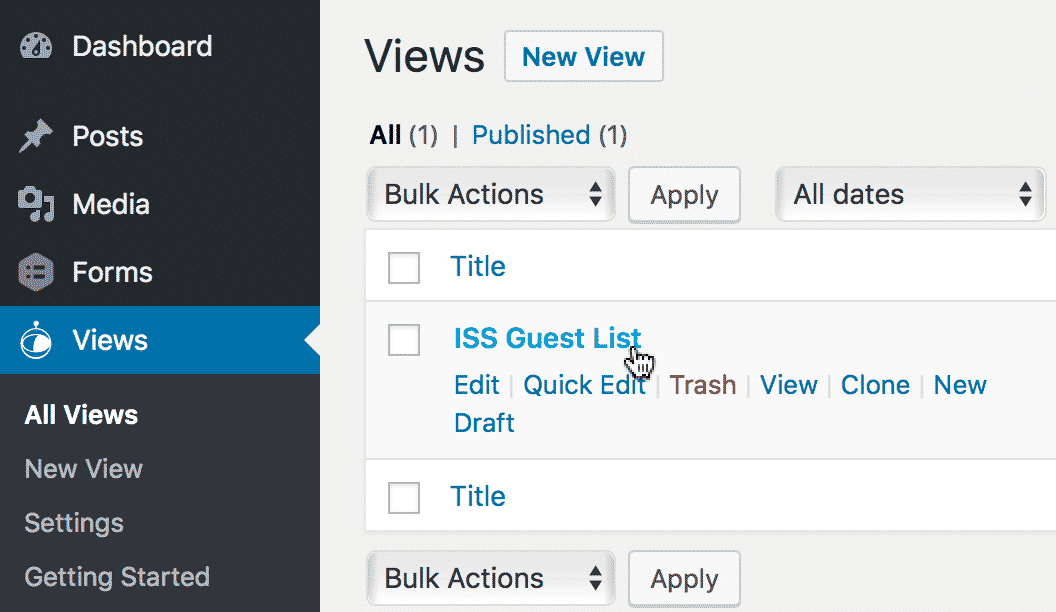
Click on the View you want to add front-end moderation to
Click the "Add Field" button in the View Configuration
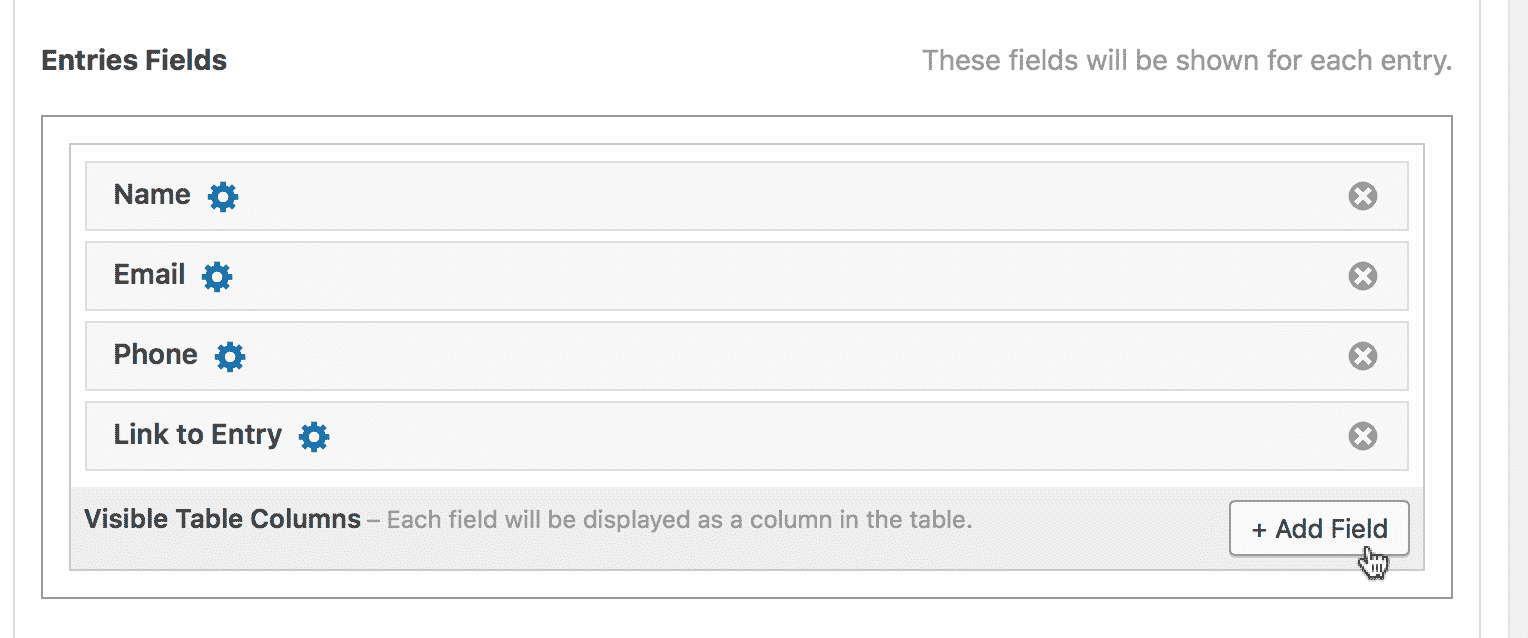
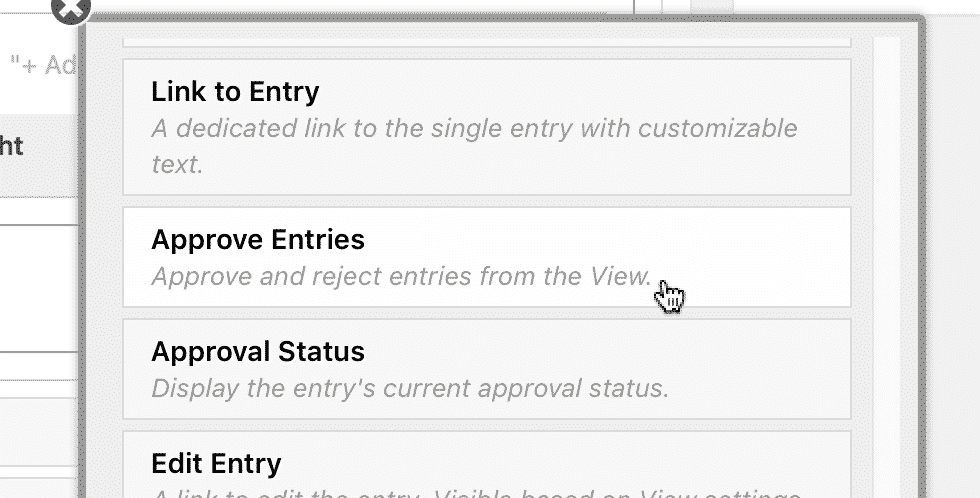
Then click on Approve Entries
The field will display as an entry approval button.
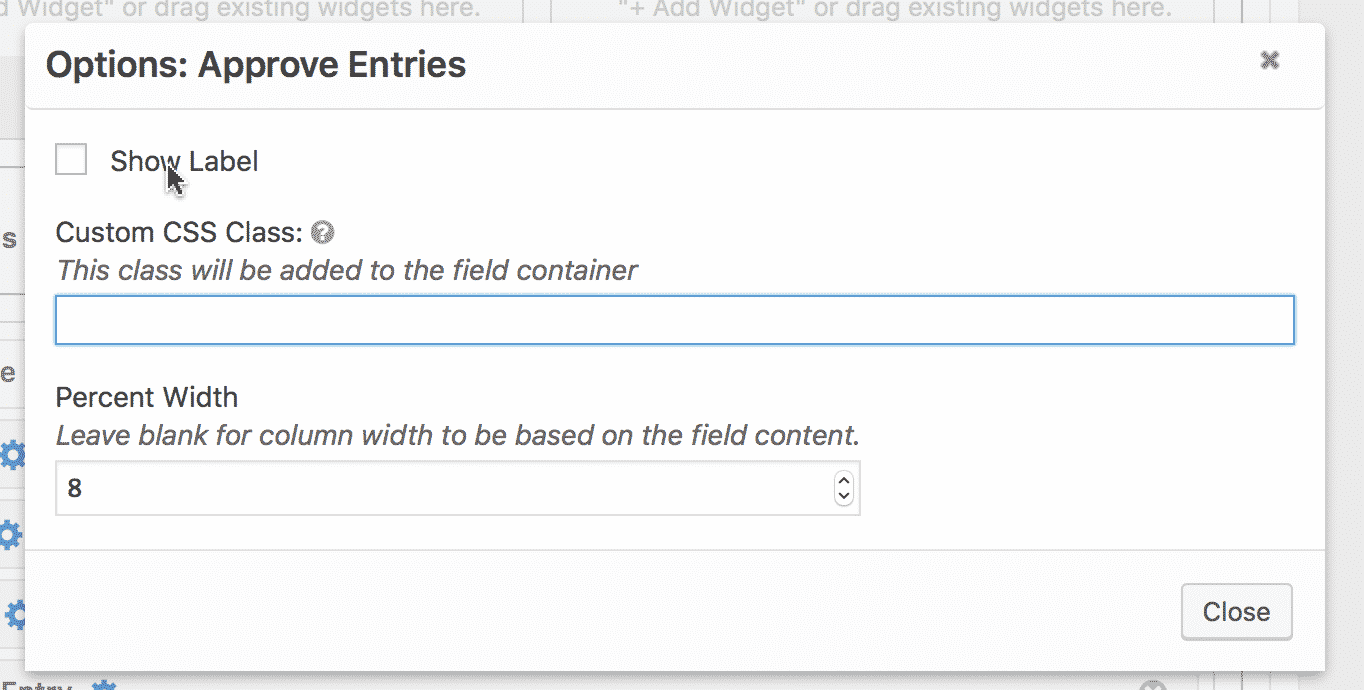
Click the gear icon next to the Approve Entries field to configure the settings (optional)
Then uncheck "Show Label" (optional)
You can also leave the label if you prefer.
We set the width of the field to be narrow This is to make the column small, as seen in this demo. The width setting will only appear when using a table-based layout.
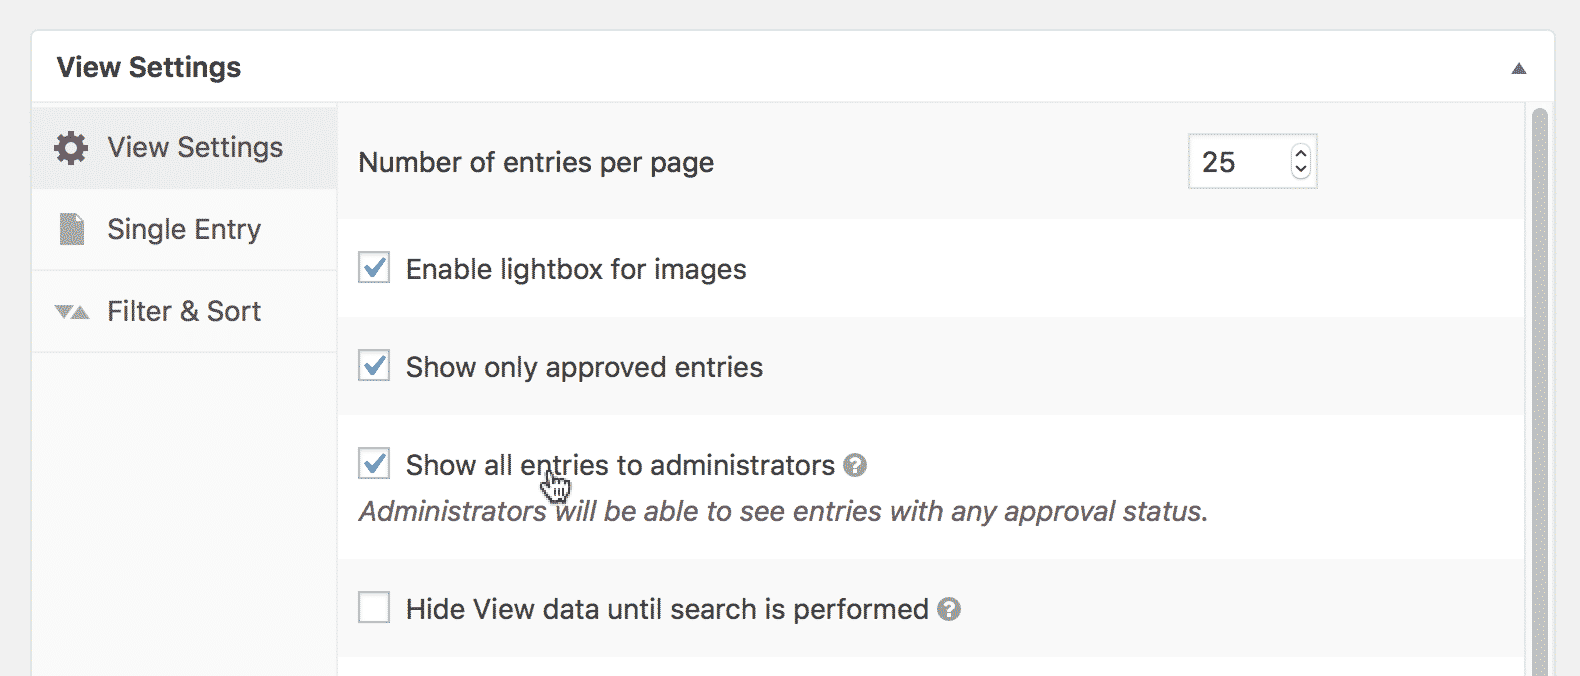
Click the "Show only approved entries" checkbox
This will prevent entries from being displayed before they are approved.
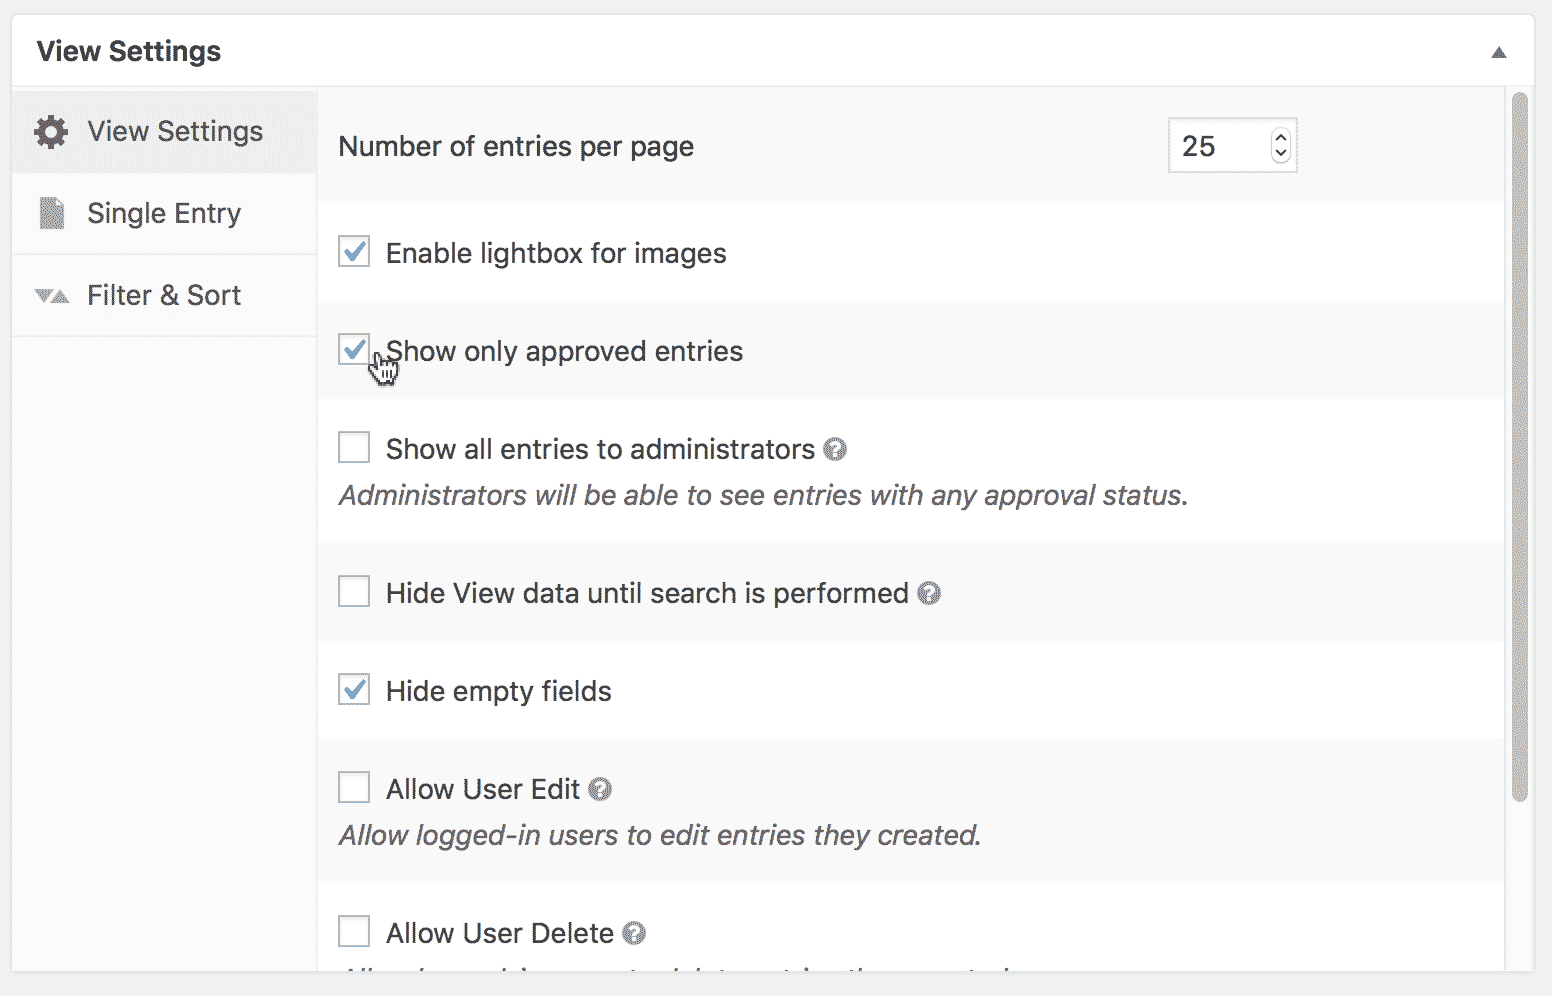
Then check "Show all entries to administrators"
This setting makes it, so logged-out visitors and non-administrators will only see approved entries, while administrators will see entries with all statuses. This makes it easier for administrators to moderate entries from a View.
Update the View
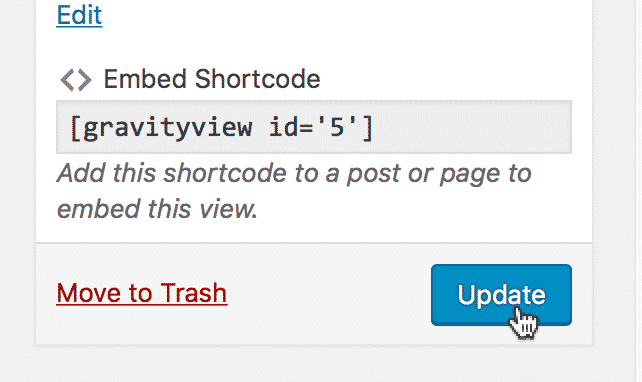
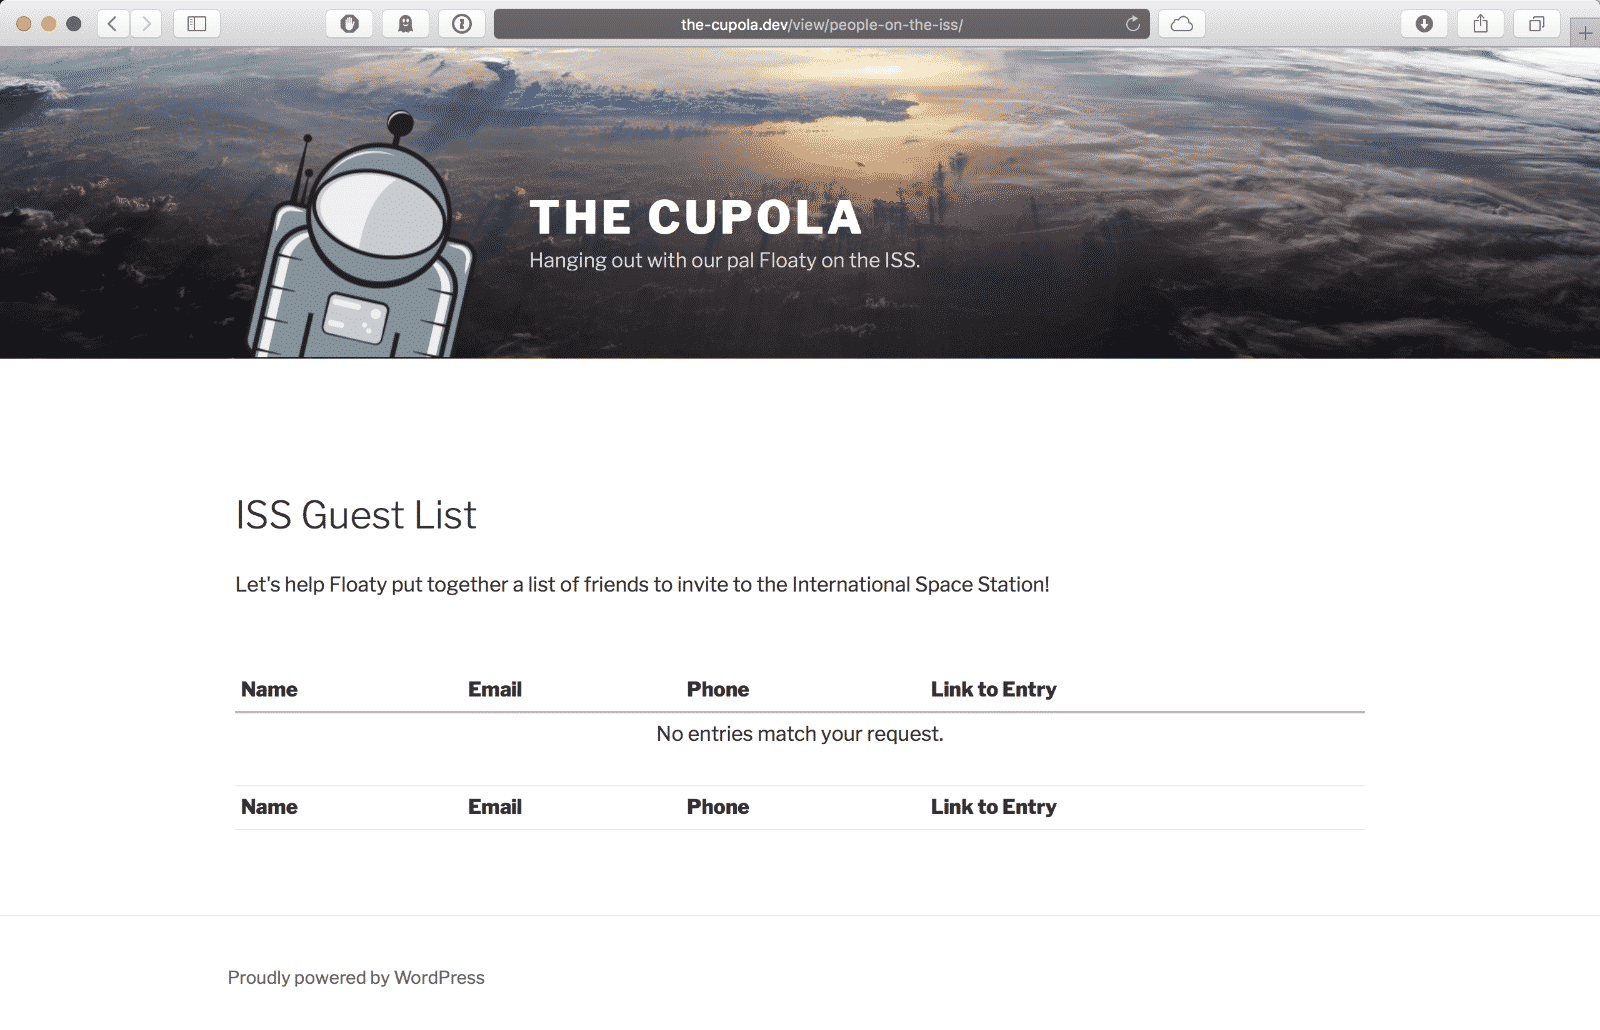
Then visit the updated View
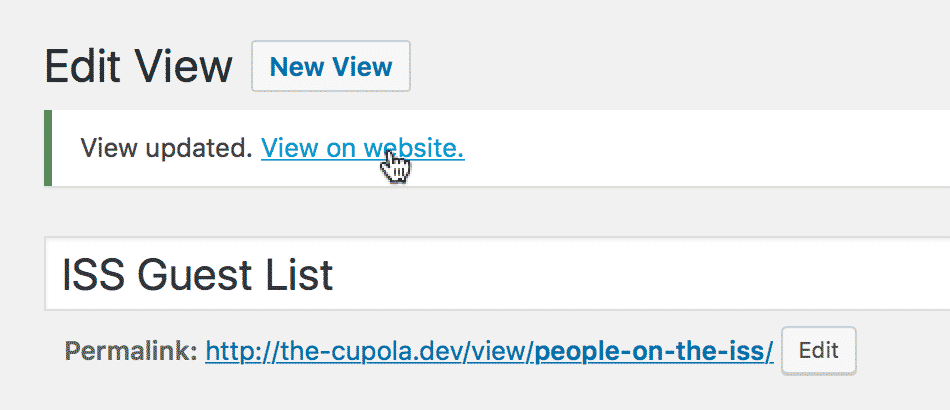
Note: for logged-out users, no entries will be visible because no entries have been approved yet.
If you log out of WordPress, you will see no entries displayed because none are approved.
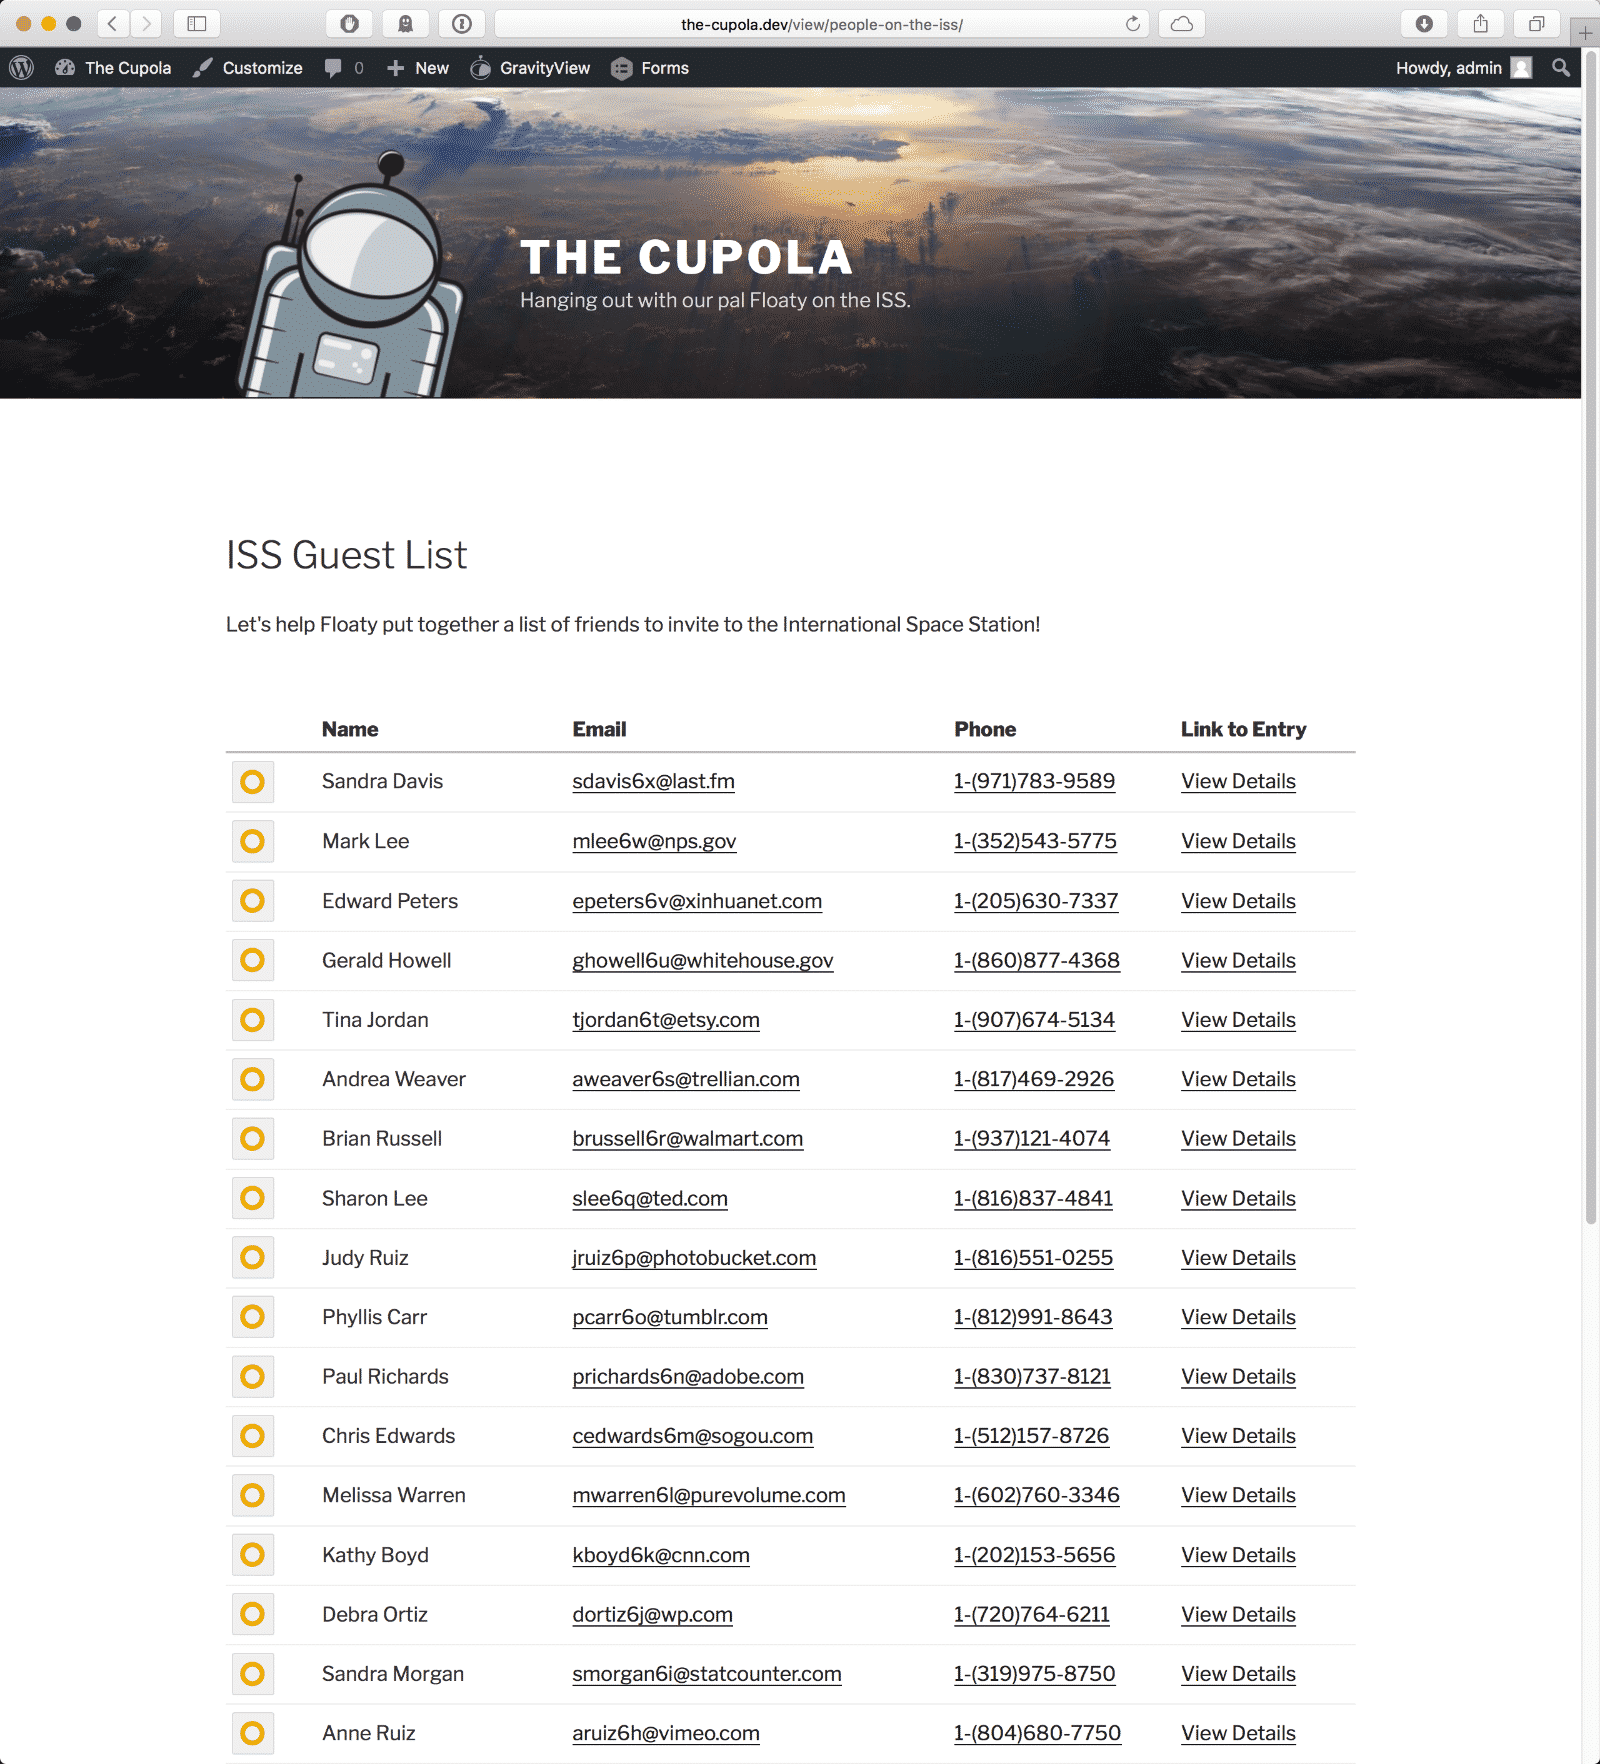
Because you're logged in, you will see the new Entry Approval column and all the entries
You can hover over the icon to show what each status symbol means:
- Yellow circle: Entry not yet reviewed
- Green check: Entry approved for directory viewing
- Red "x": Entry not approved for directory viewing
Note: If the Approve Entries field is not showing for some of your users, see Approve Entries Field Not Showing for Non-Admin Users.
Click on the approval icon to approve or disapprove an entry
Click once to approve and twice to disapprove an entry. Once you approve an entry, it will be visible to non-administrators or logged-out visitors who can see the View.
To reset entry approval, hold down the Option key (or Alt key) on your keyboard while clicking the approval icon.
Log out of WordPress
This will show you what logged-out users see.
Only approved entries are visible, and the Approve Entries column is hidden.
As you see, only the approved entries are visible when you're logged out.
You're now an expert front-end entry approver. A moderator extraordinaire!
Floaty thanks you for your help in narrowing down the guest list. If you have any questions, as always, please get in touch.