_1@2x.png)
Creating a review/voting system by embedding a form into a single entry
Check out this blog post that uses the same tips from this article: How to build a photo contest site on WordPress using Gravity Forms and GravityView.
Because GravityKit's Ratings & Reviews extension is based on the WordPress comments system, it is limited in some ways. For example, you can't export the reviews, or you can't generate a chart based on the votes. There are numerous other limitations besides these two ones.
In this tutorial, we'll provide a workaround to these limitations by using an embedded form inside a View's Single Entry page. We will create a new form to collect these ratings (or votes) and a new View to display them.
What we'll need:
- The main View, in this case, is a "Movie Catalog" View;
- A simple form to collect movie reviews. We'll call it "Review this Movie" (screenshot below);
- A View to display those reviews, which we will call "Movie Reviews". This View will use the "Review This Movie" form as its data source.

How are we going to do it:
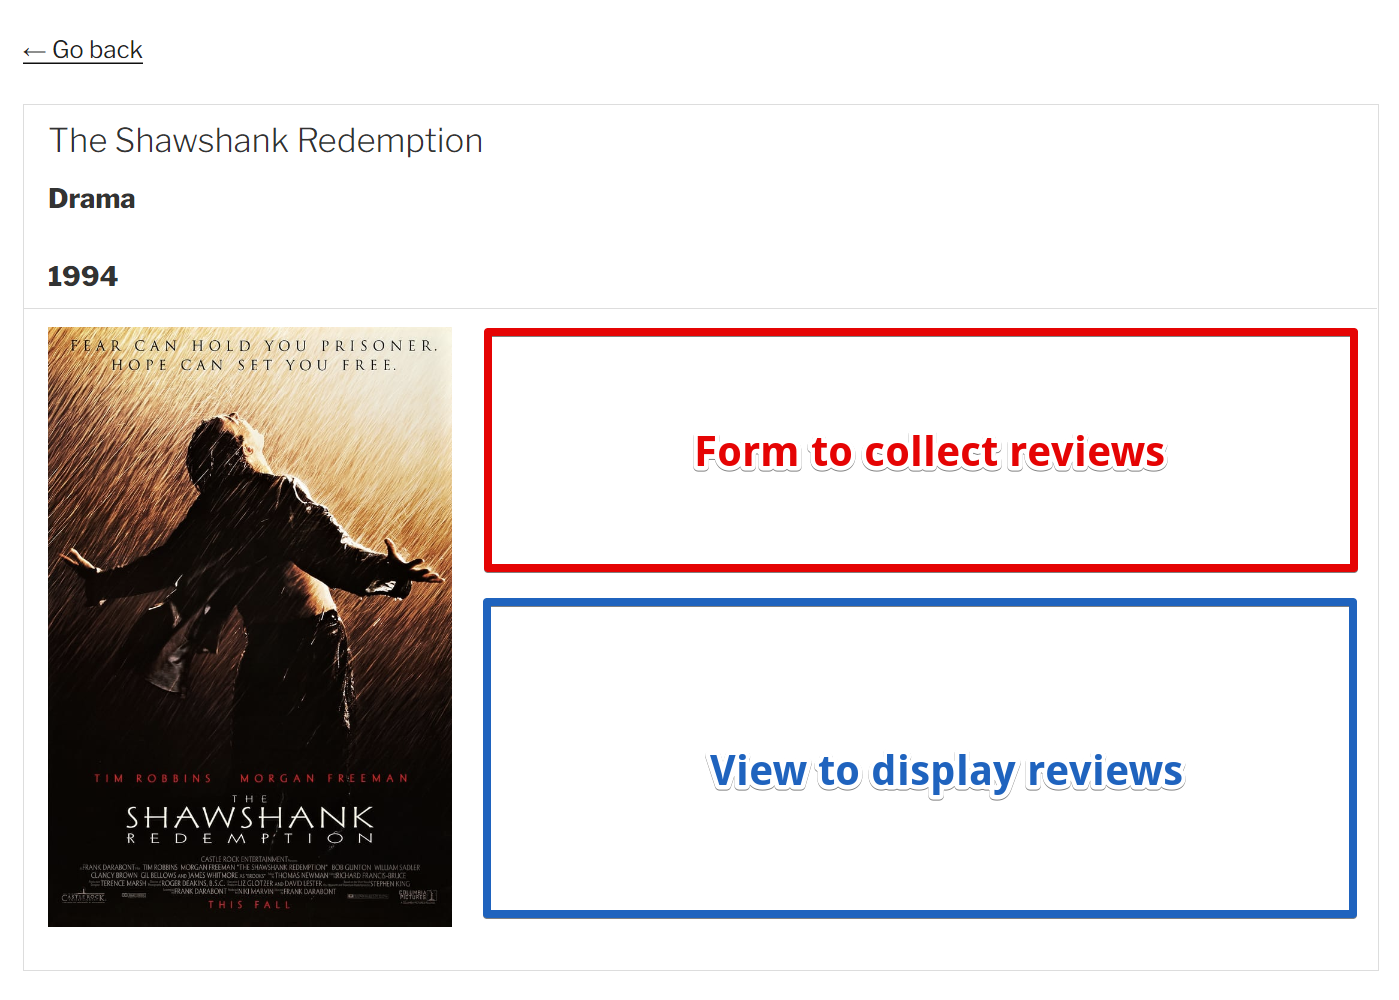
In this example, the "Movie Catalog" View uses the List View layout, which has the perfect place to embed the form and View for our tutorial:
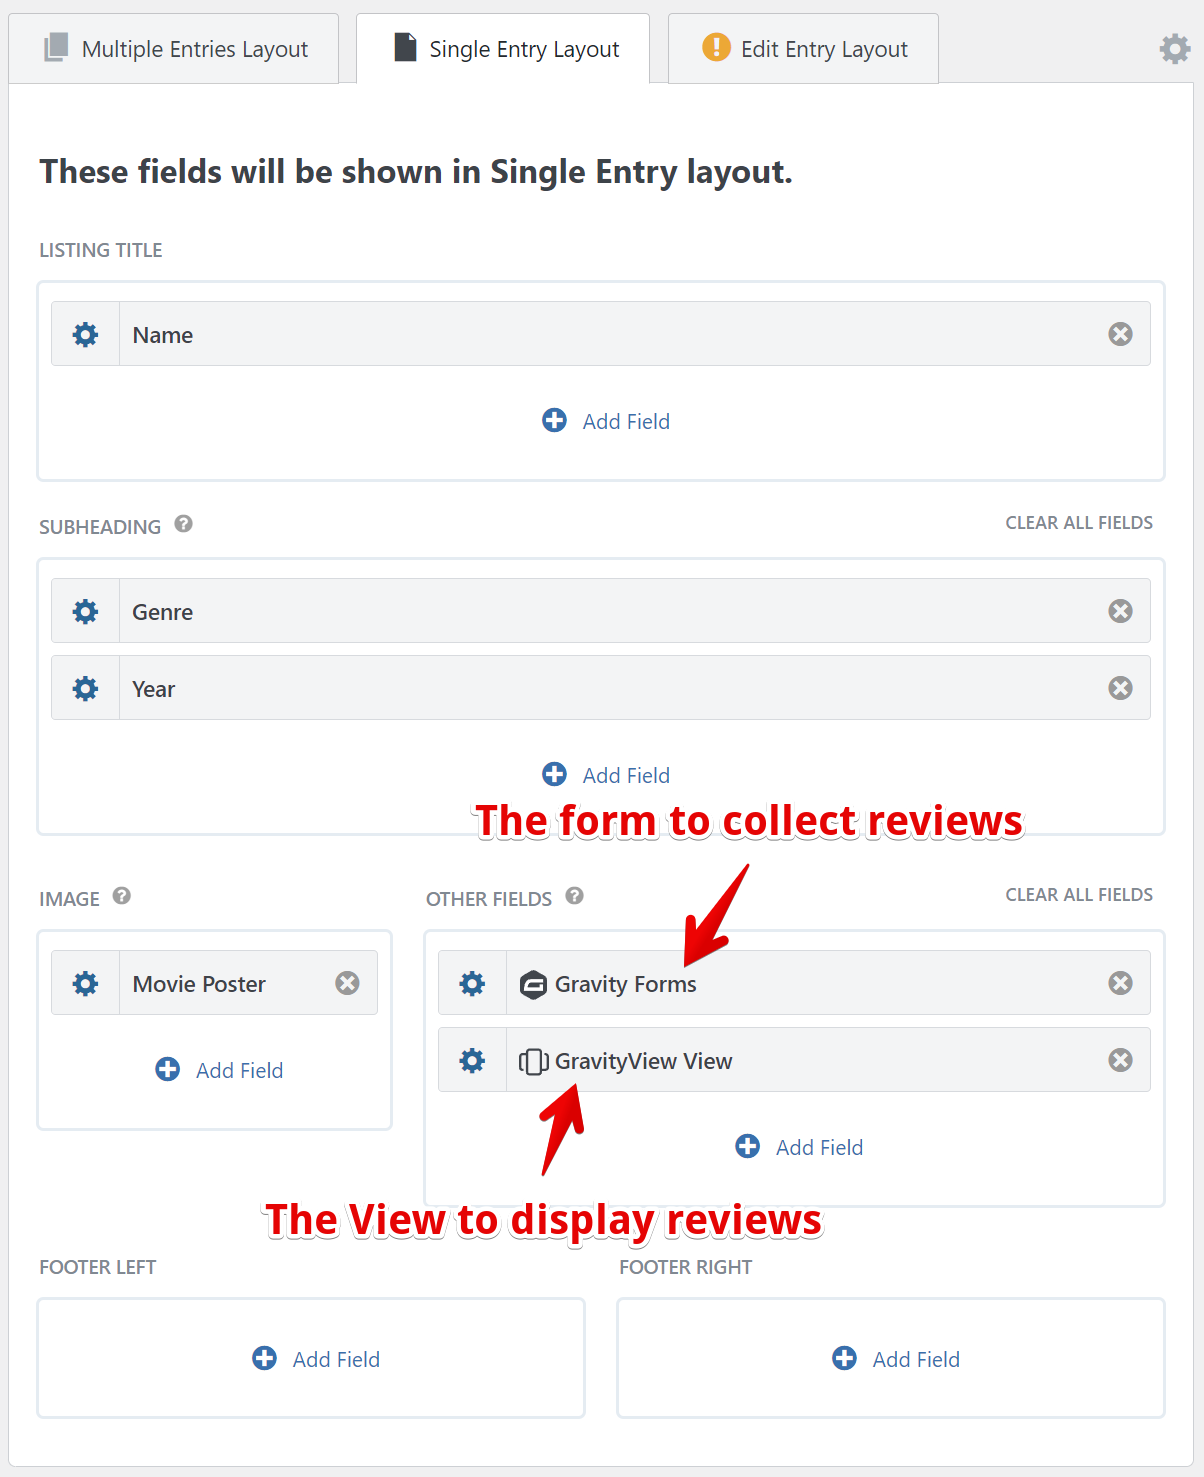
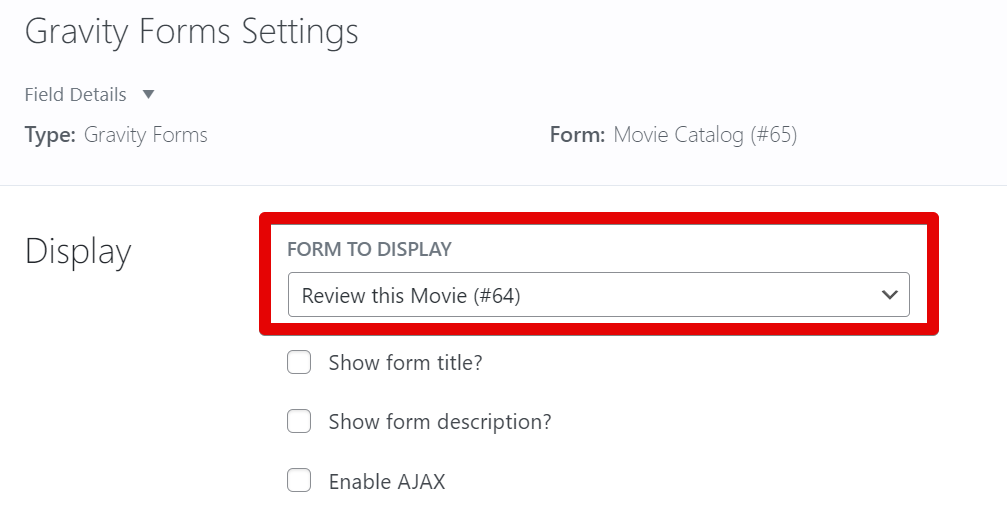
We'll start by adding a Gravity Forms field to the Single Entry page of the "Movie Catalog" View.
Read here on how to do that. Once the field is added, we will select the "Review this Movie" form in that field:
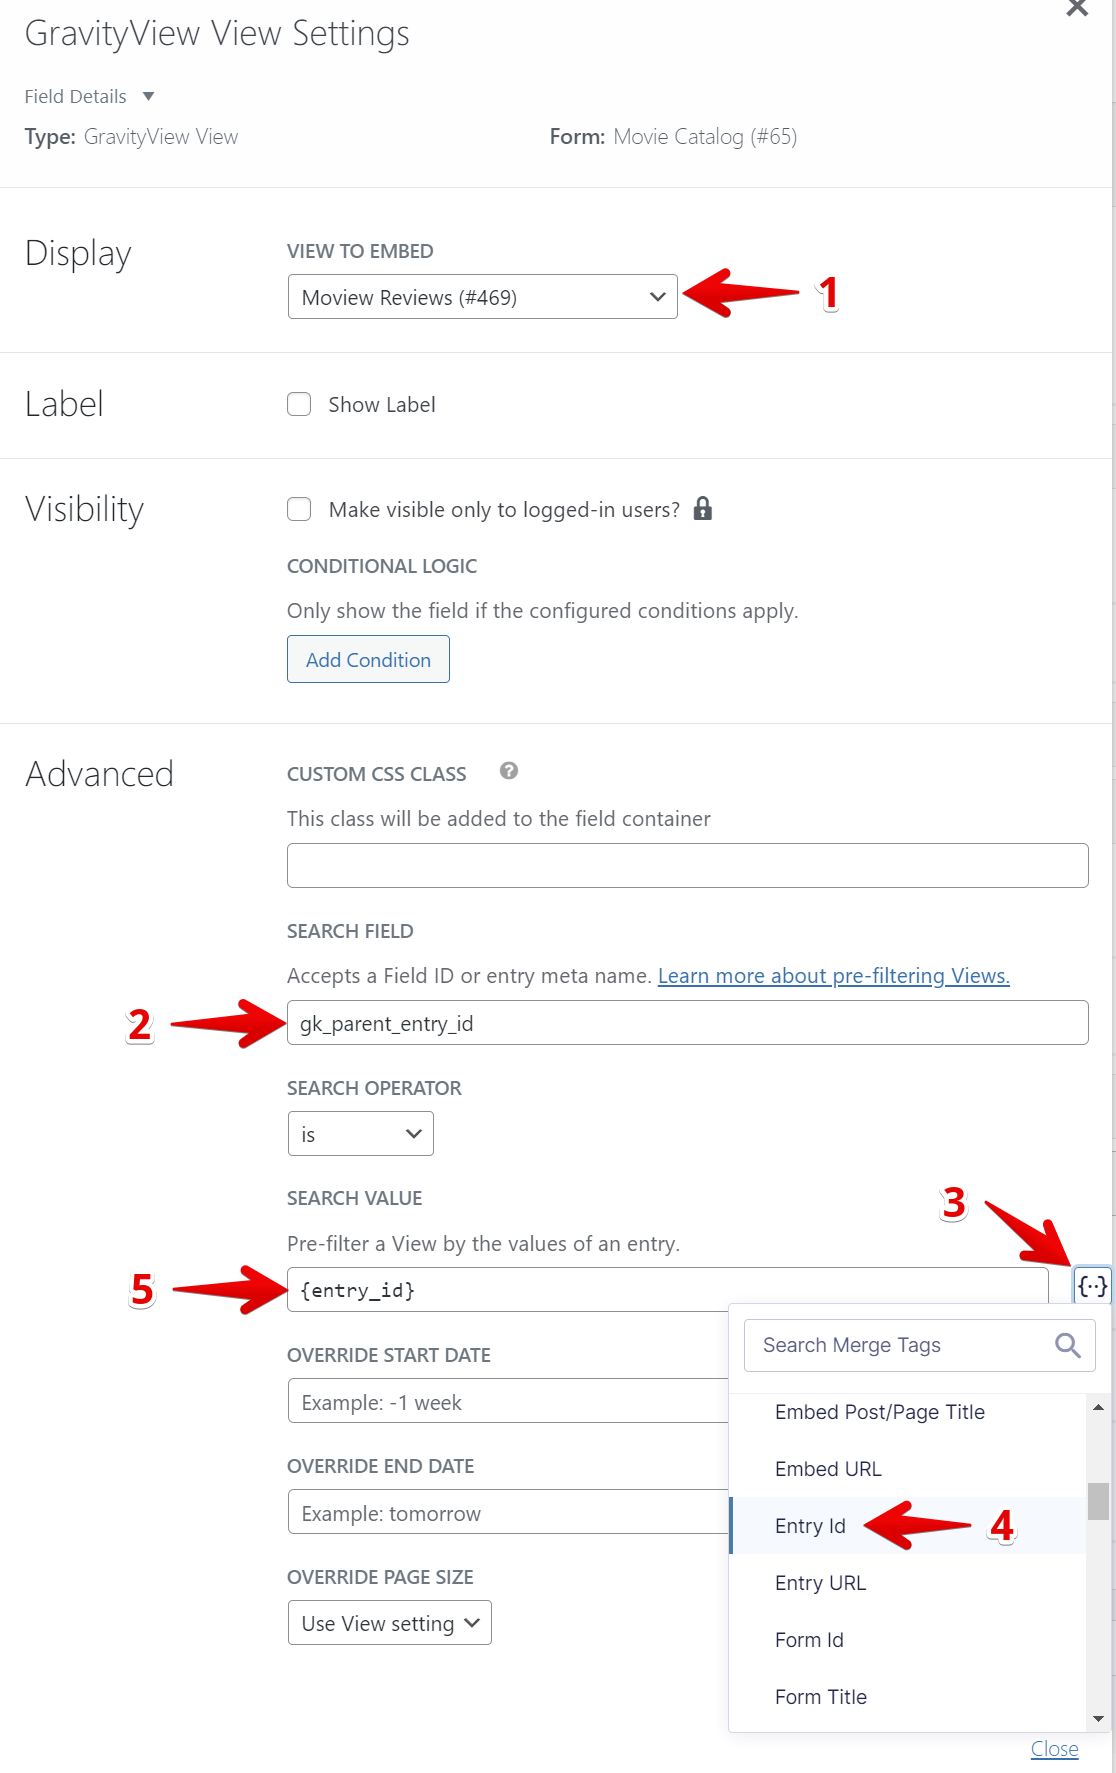
Next, we'll embed the "Movie Reviews" View below the form above by using the GravityView View field. Read here how to do that. When configuring this field, select the "Movie Reviews" View and type gk_parent_entry_id in the search field input. Then, pick the {entry_id} Merge Tag for the search value input. This will filter this embedded View to only display entries (reviews) from the form embedded in the previous step.
Whenever an entry is submitted in the form embedded (our reviews form), the ID of the current entry (the ID of the movie) will be stored in that review automatically as an entry meta. This will establish a connection between the review and the movie. More about that here.
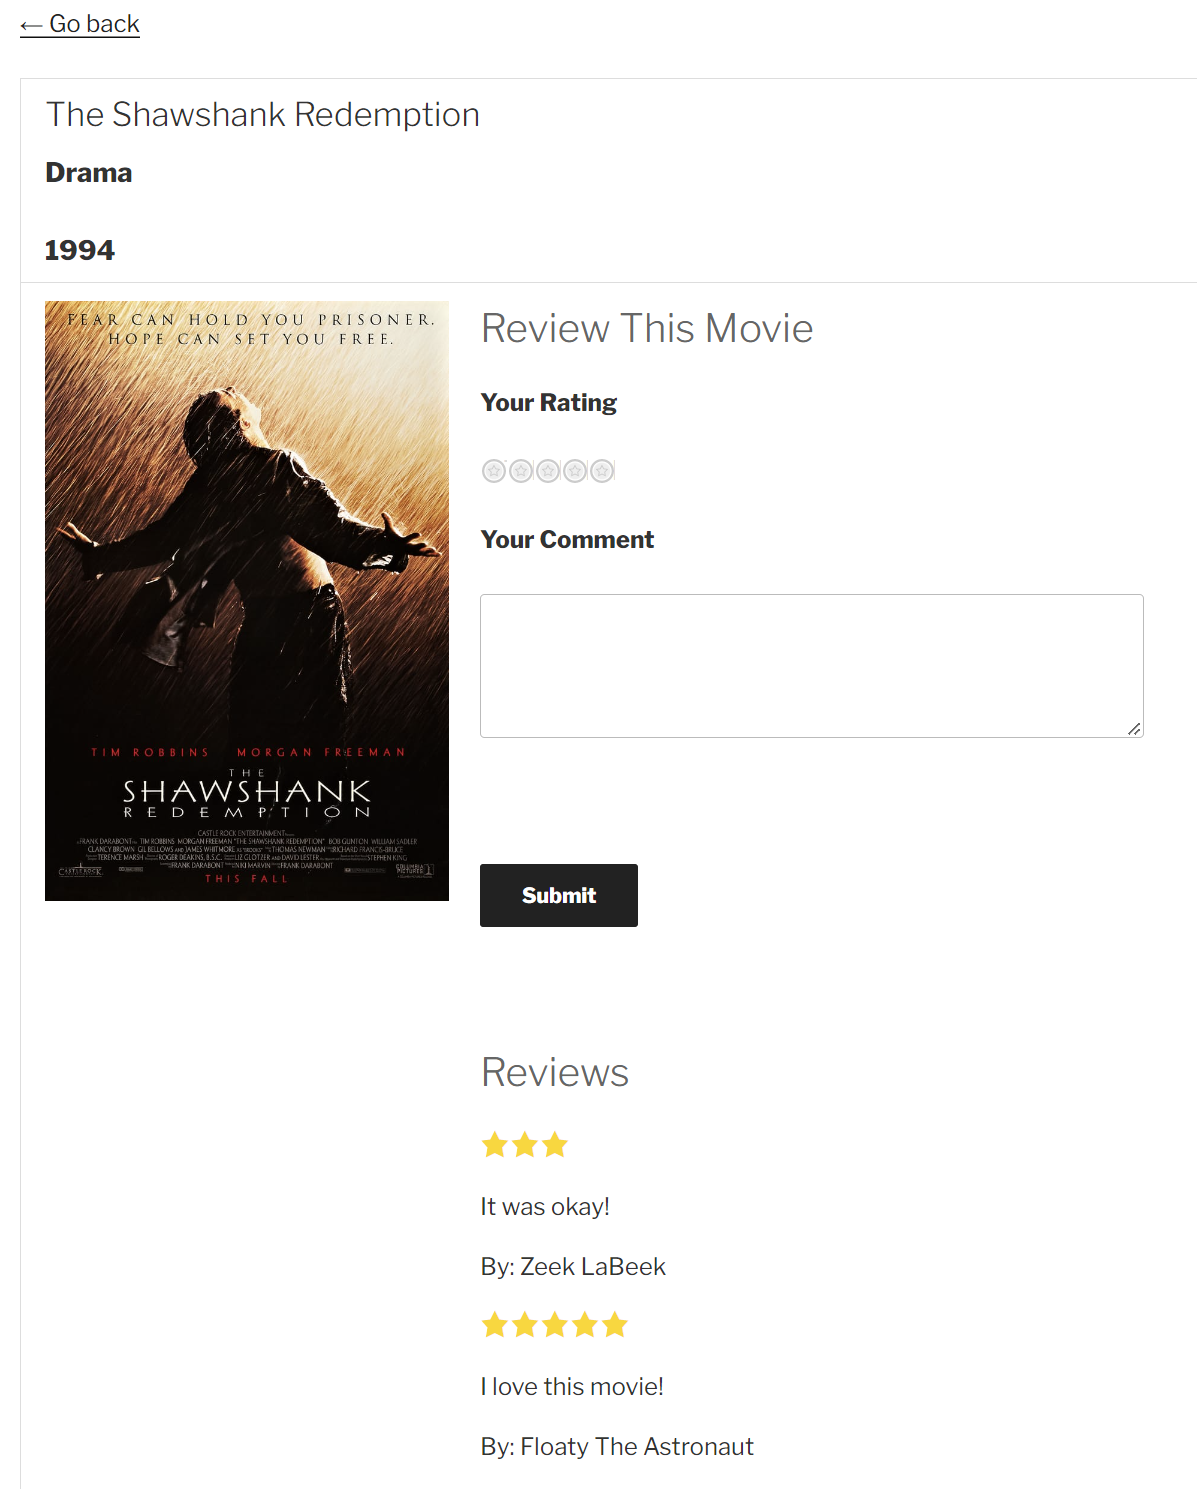
And here's what all of that looks like in the View on your website:
Bonus!
For the star rating on the form, we used the Rating type from the Survey field (only available in the Elite license of Gravity Forms), but to achieve that similar look on the View, we had to use the [gvlogic] shortcode and dashicons.
Here's the code we used:
[gvlogic if="{Your Rating:3:value}" is="Terrible"]
<span class="dashicons dashicons-star-filled"></span>
[/gvlogic][gvlogic if="{Your Rating:3:value}" is="Not so great"]
<span class="dashicons dashicons-star-filled"></span><span class="dashicons dashicons-star-filled"></span>
[/gvlogic][gvlogic if="{Your Rating:3:value}" is="Neutral"]
<span class="dashicons dashicons-star-filled"></span><span class="dashicons dashicons-star-filled"></span><span class="dashicons dashicons-star-filled"></span>
[/gvlogic][gvlogic if="{Your Rating:3:value}" is="Pretty good"]
<span class="dashicons dashicons-star-filled"></span><span class="dashicons dashicons-star-filled"></span><span class="dashicons dashicons-star-filled"></span><span class="dashicons dashicons-star-filled"></span><span class="dashicons dashicons-star-filled"></span>
[/gvlogic][gvlogic if="{Your Rating:3:value}" is="Excellent"]
<span class="dashicons dashicons-star-filled"></span><span class="dashicons dashicons-star-filled"></span><span class="dashicons dashicons-star-filled"></span><span class="dashicons dashicons-star-filled"></span><span class="dashicons dashicons-star-filled"></span>
[/gvlogic]
When using the logic above, please replace {Your Rating:3:value} with the proper Merge Tag of your rating field.
The following CSS style was necessary to paint the stars gold:
.dashicons-star-filled{
    color: gold;
}
If you have further questions, please contact our support. We'll be glad to help with your project!