_1@2x.png)
Getting Started with GravityCalendar
GravityCalendar displays your Gravity Forms entries in a calendar format. If you are collecting dates through a form (event registrations, project deadlines, staff schedules, class signups), GravityCalendar lets you visualize that data on an interactive calendar your visitors can browse.
Think of it like a GravityView for calendars: your form collects the data, and GravityCalendar presents it visually.
Prefer to Watch?
This video walks through the entire process:
How GravityCalendar Works
GravityCalendar connects to your form as a "feed" similar to how notifications or other add-on integrations work. You configure which form fields map to calendar event properties (start date, end date, title, description), and every entry with valid dates automatically appears as an event on the calendar.
Because the calendar reads directly from your form entries rather than storing events separately, changes happen instantly: new entries appear on the calendar, and deleted entries disappear.
What You Will Need
- Gravity Forms installed and activated
- GravityCalendar installed and activated
- A form with at least one date field (see Step 1 below)
Step 1: Create a Form with Date Fields
Your form needs at least one field that GravityCalendar can map to event dates.
You have two options:
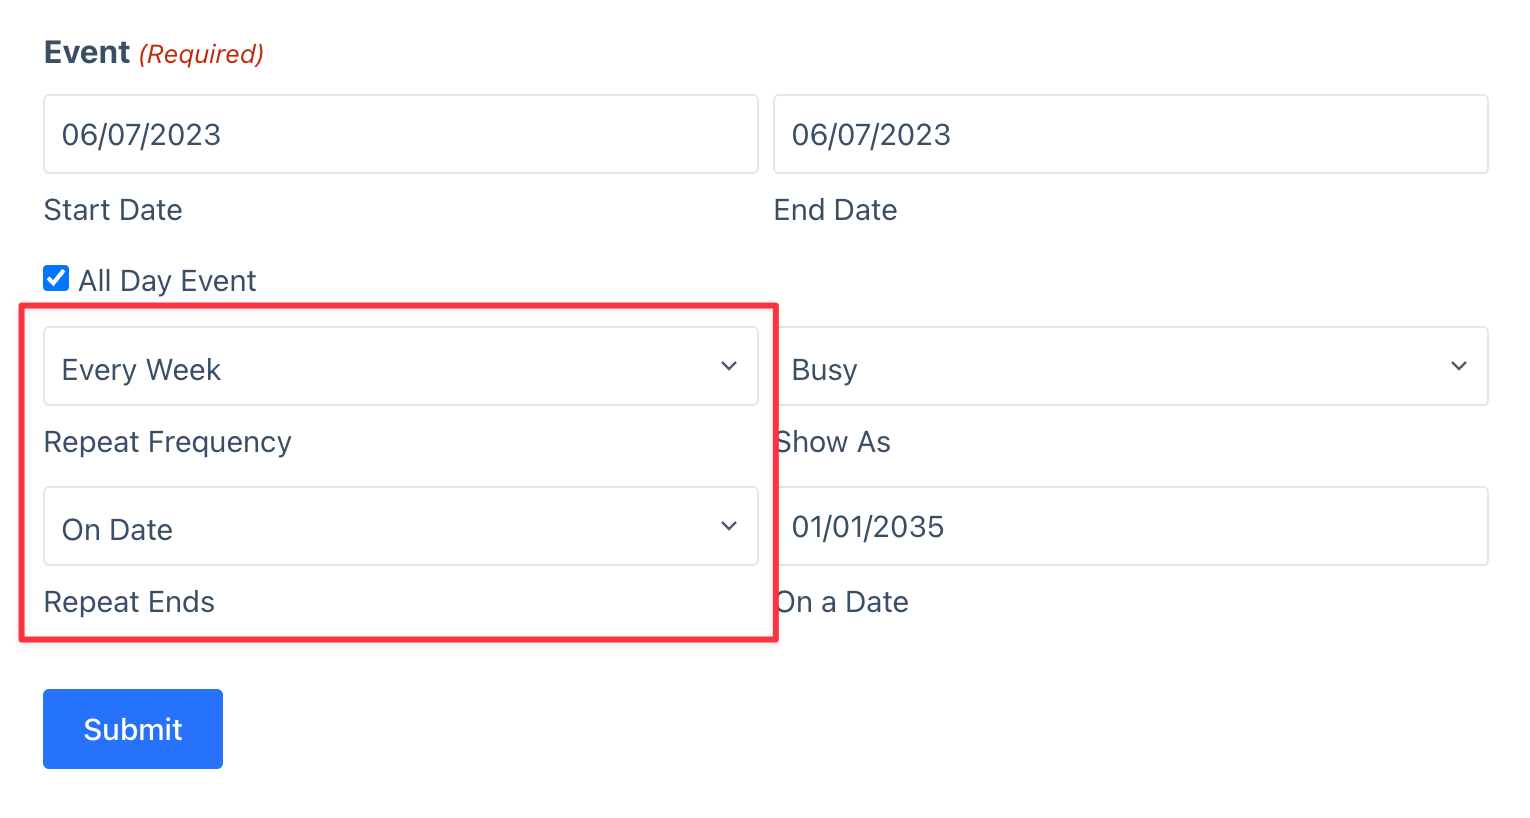
Option A: Use the Event Field (Recommended)
The Event field bundles start date, end date, times, timezone, and repeat options into a single field, making it the fastest way to get started.
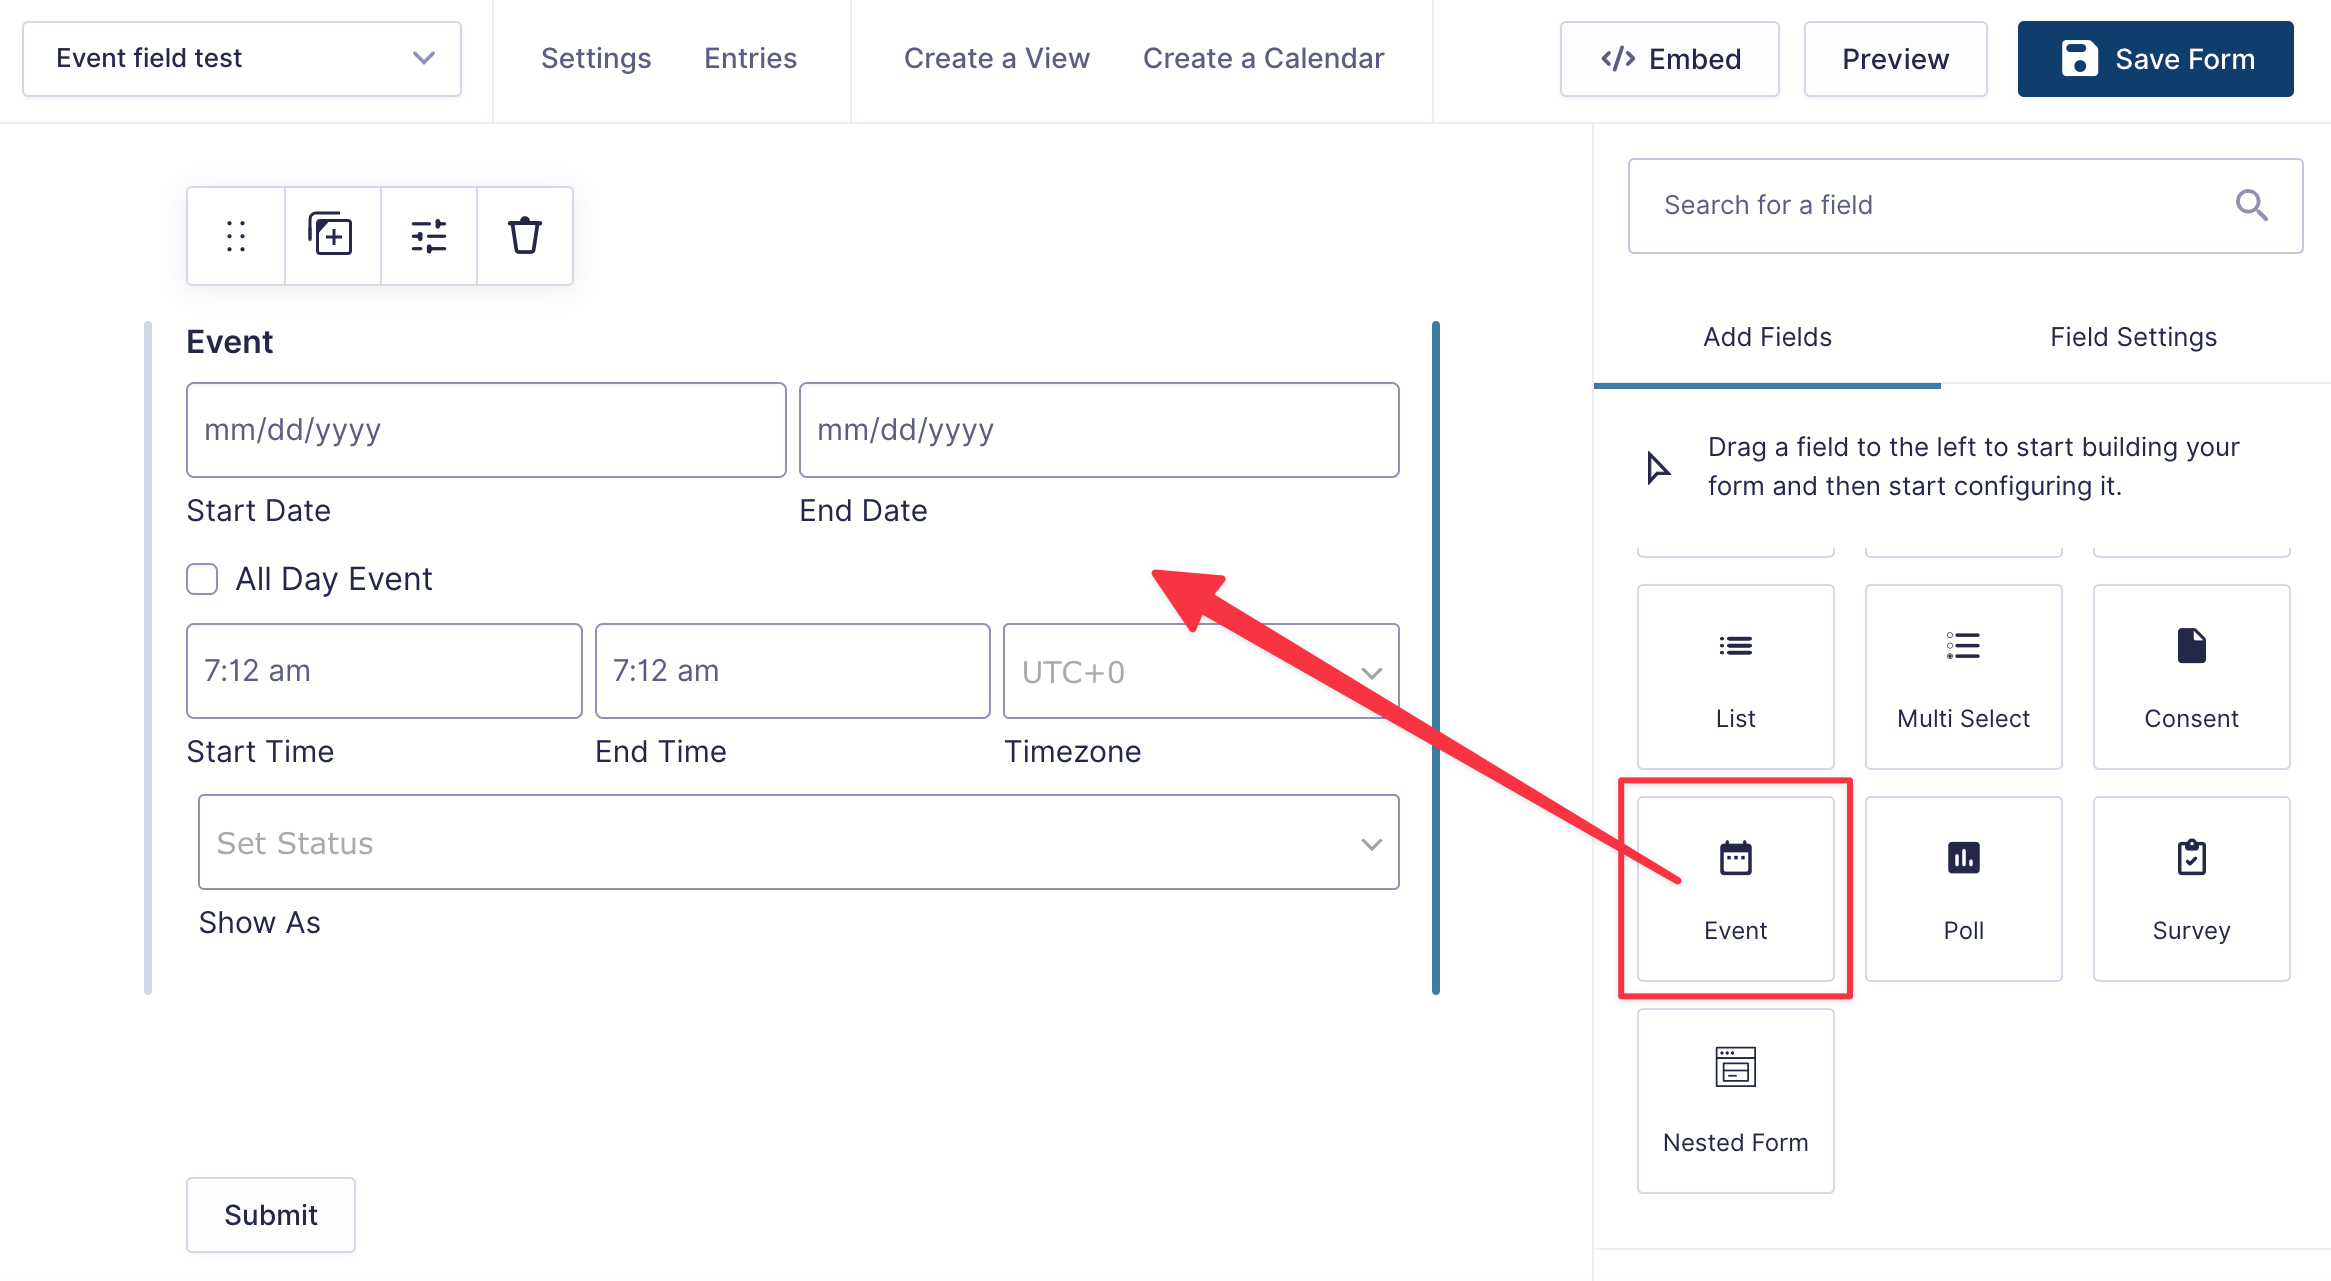
To add it, edit your form and look for "Event" under Advanced Fields. For configuration details, see Getting started with the Gravity Forms Event field.
Option B: Use Separate Date and Time Fields
If you have an existing form or need more flexibility, use individual fields:
- Start Date (Date field) - Required for all events
- End Date (Date field) - Optional; for multi-day events
- Start Time (Time field) - Optional; without it, events display as all-day
- End Time (Time field) - Optional
You'll also need a field for the event title (a Single Line Text field works well).
Step 2: Create a Calendar Feed
With your form ready, create a calendar feed by going to Forms in your WordPress admin, hovering over your form, and clicking Settings → GravityCalendar. Then click Add New.
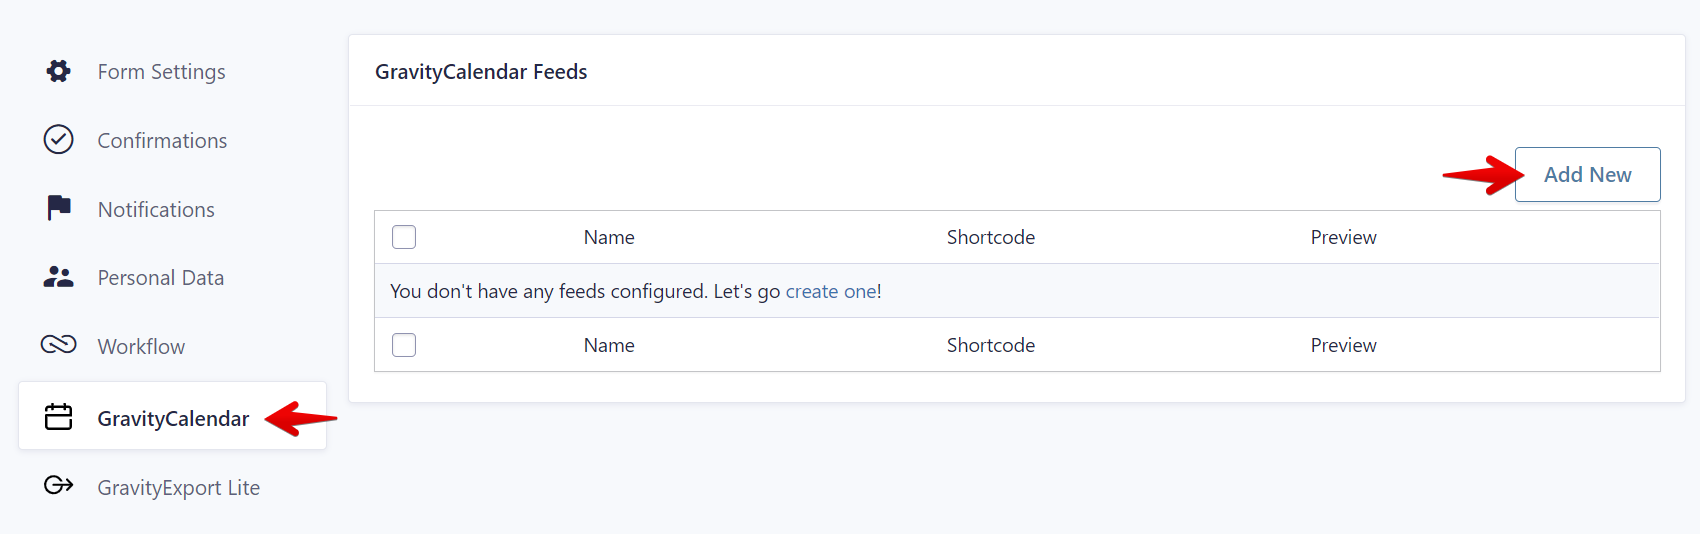
The Feed Settings screen will open:

Required Fields
Three fields are required to create a calendar feed:
- Feed Name - An internal name to identify this feed (not shown to visitors)
- Start Date - Select the Date or Event field that contains when each event begins
- Event Title - The text displayed on the calendar for each event. You can type static text or use merge tags like
{Name (First):1.3}to pull values from form fields.
Tip: If the Start Date dropdown only shows "Select a Field" with no options, your form does not have Date fields yet. Go back to Step 1 and add an Event field or Date fields first.
Optional Fields
- End Date - For multi-day events. If left blank, the Start Date is used (creating single-day events).
- Start Time - When the event begins. If left blank, events display as all-day.
- End Time - When the event ends.
-
Event Description - Additional text shown when visitors click or hover over an event. Supports merge tags.
Event Location - Where the event takes place. Supports merge tags.
Event URL - Where visitors go when they click an event. Choose from:
- URL from Form Field - Uses a Website field value
- Custom URL - A URL you specify (supports merge tags)
- Link to Single Entry - Opens a GravityView single entry page
- Event Color - The background and border color for events on this calendar (9 color options available)
Customizing the Calendar Appearance
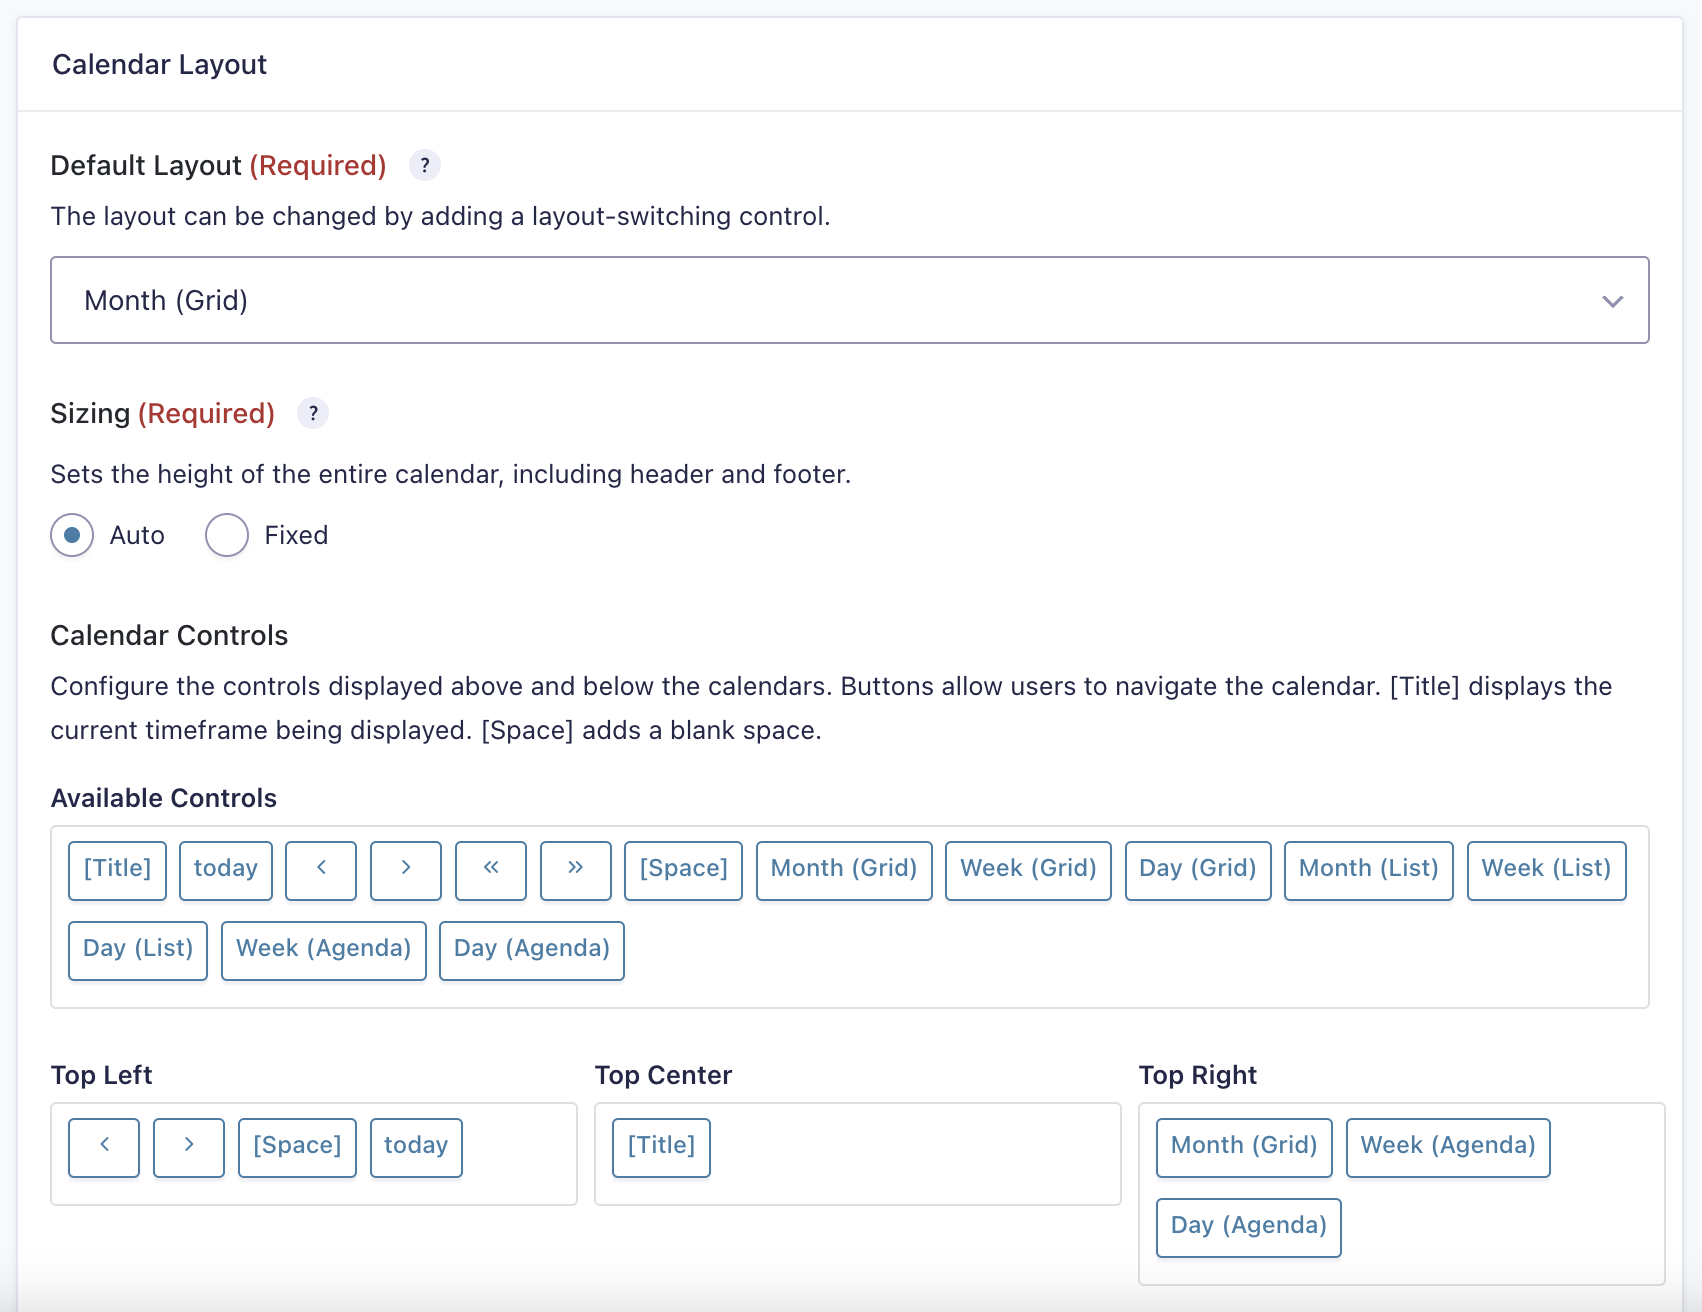
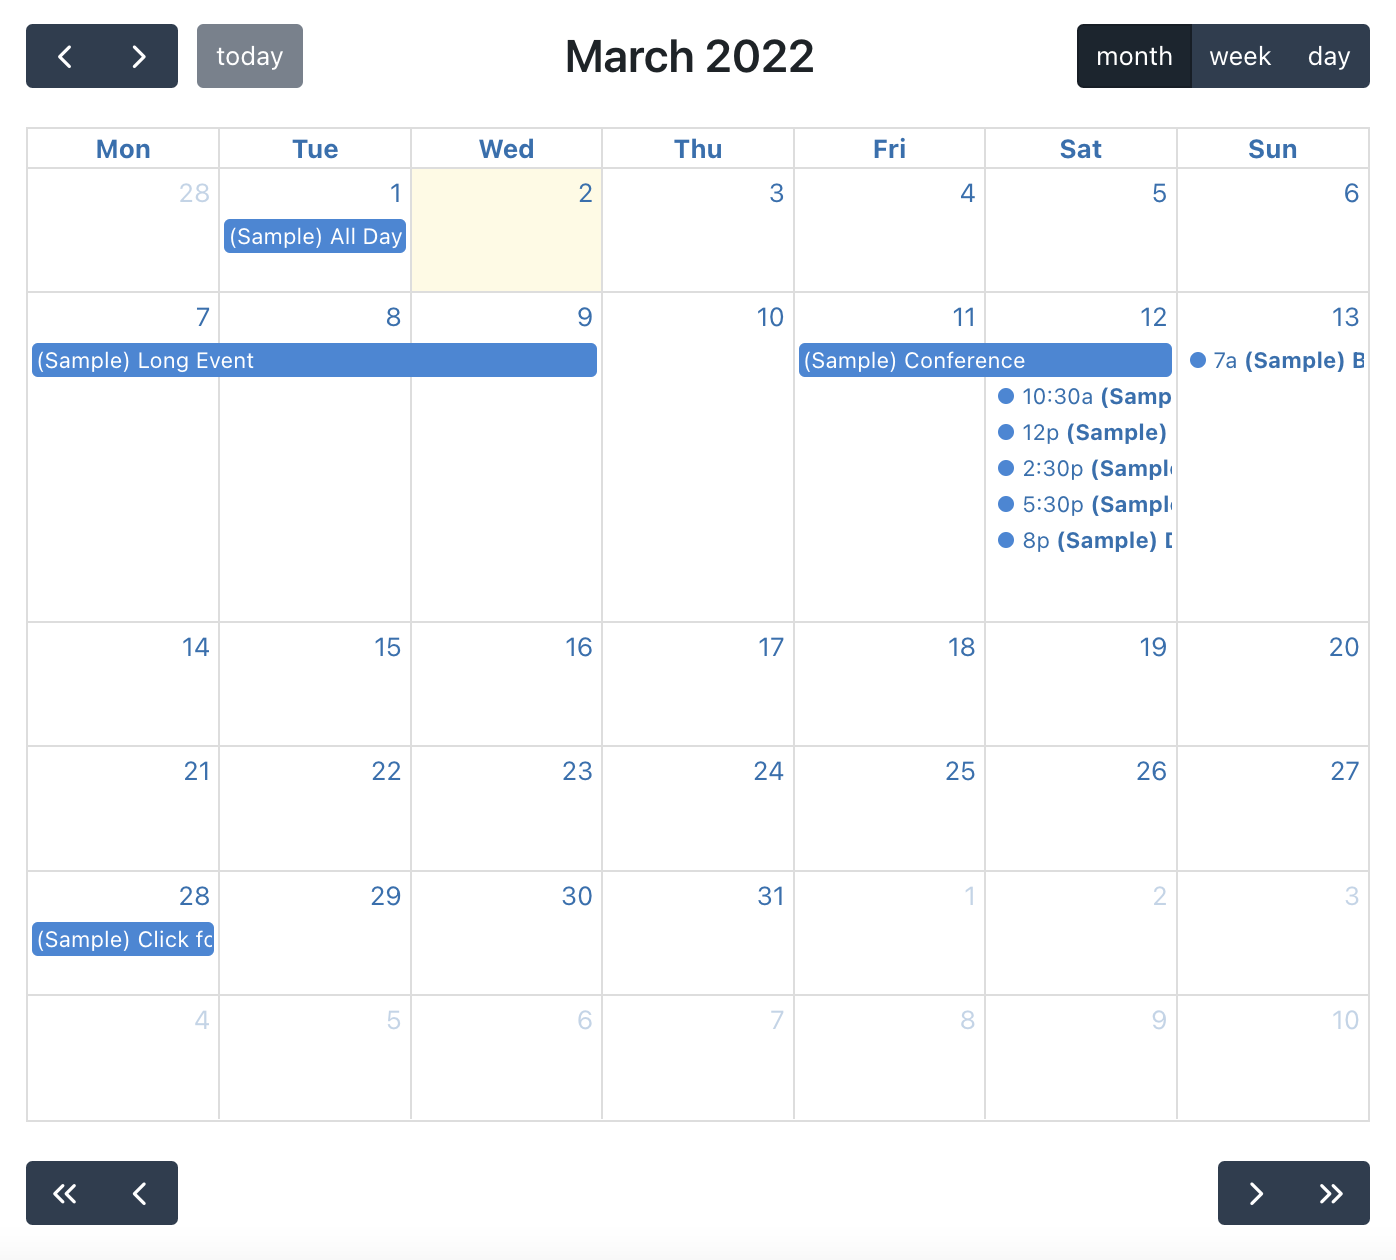
Default Layout sets the default view visitors see when the calendar loads:
- Grid - Monthly view showing days in a traditional calendar grid (default)
- Agenda - Weekly view with a time axis showing when events occur during each day
-
List - A chronological list of upcoming events
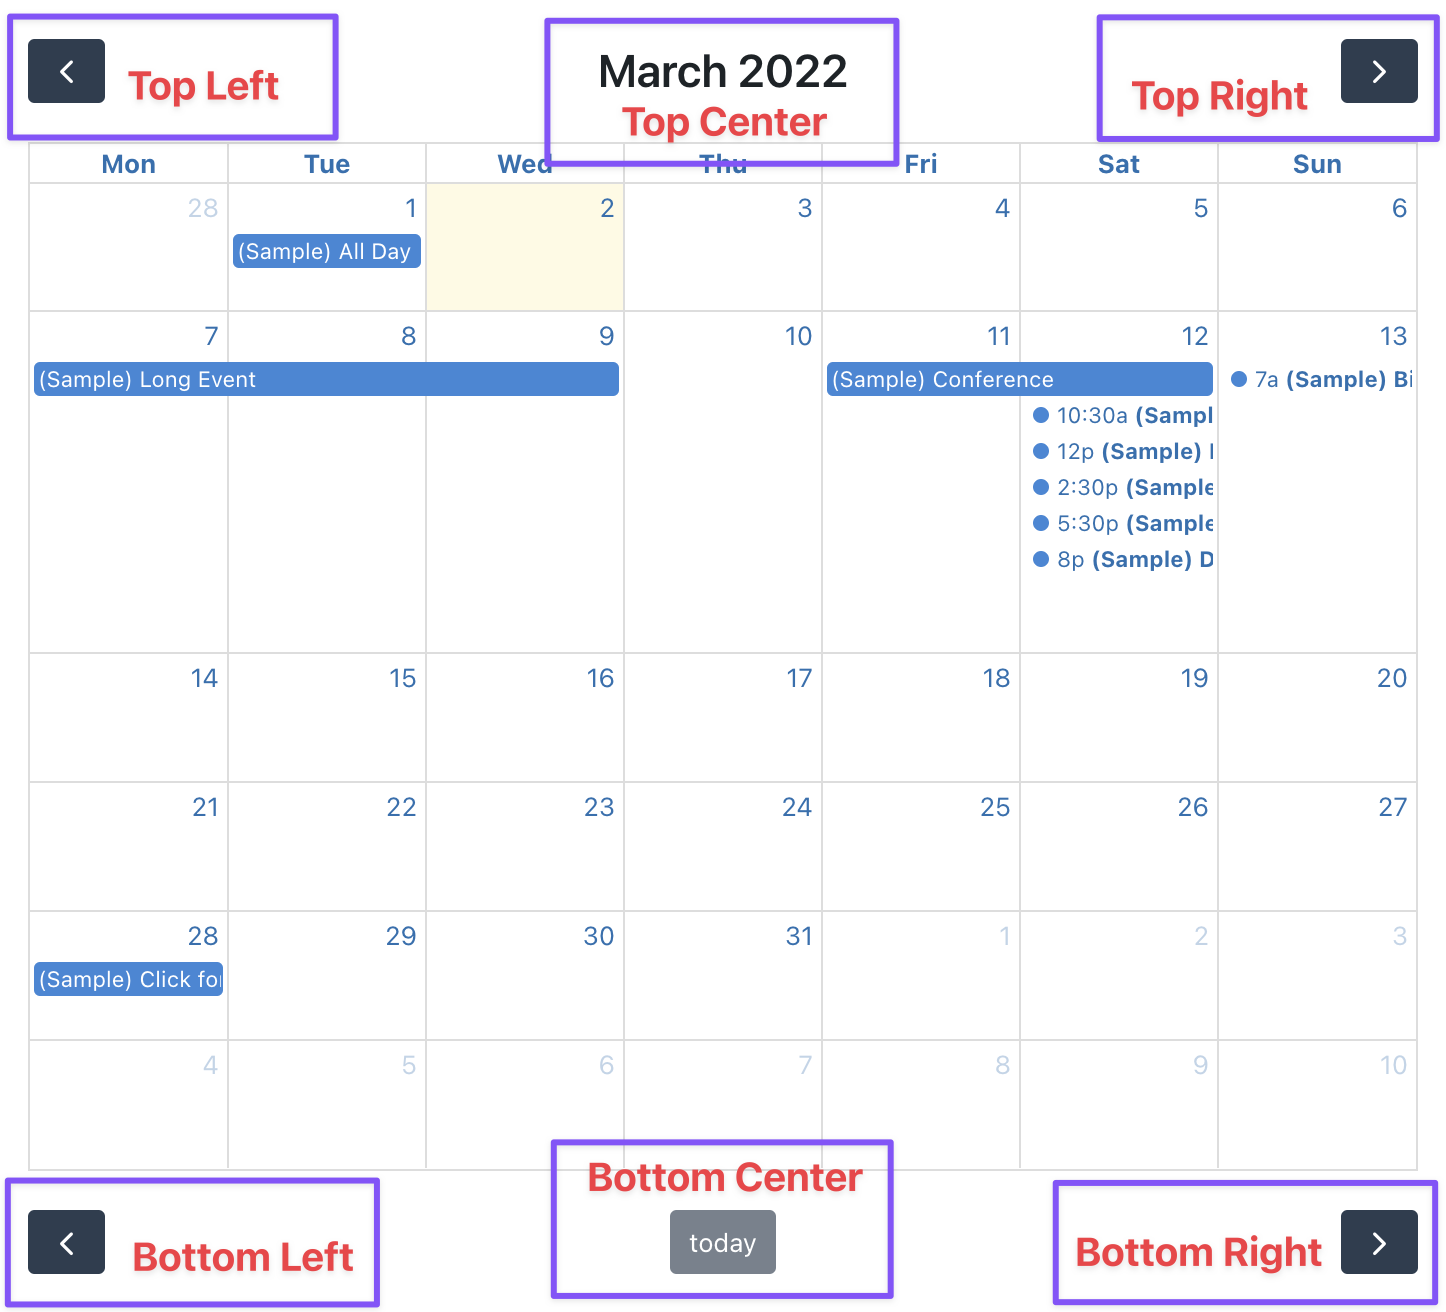
Calendar Controls are the navigation elements visitors use to browse the calendar (buttons for previous/next month, a "today" button, the current month/year label, etc.). You can drag and drop these controls into six different positions around the calendar: top-left, top-center, top-right, bottom-left, bottom-center, and bottom-right.
Allow Event Editing lets logged-in users reschedule events by dragging them to a different date or time on the calendar. When a user drags an event, the underlying form entry is updated with the new date values. You can restrict this feature to specific user roles.
Sizing controls the calendar height. Choose "Automatic" to let the calendar adjust based on content, or set a fixed height in pixels.
Conditional Logic lets you show or hide events based on form field values. This works like Gravity Forms conditional logic: you set rules (e.g., "show event if Status field equals Confirmed") and only matching entries appear on the calendar.
As you configure these options, changes appear immediately in the preview window below:
Additional Options
- Allow HTML Content - Renders HTML tags in event titles and descriptions instead of displaying them as plain text. Enable this if your merge tags contain HTML formatting.
- Dynamically Load Events - Loads events via AJAX as visitors navigate the calendar instead of loading all events upfront. Recommended for calendars with many events.
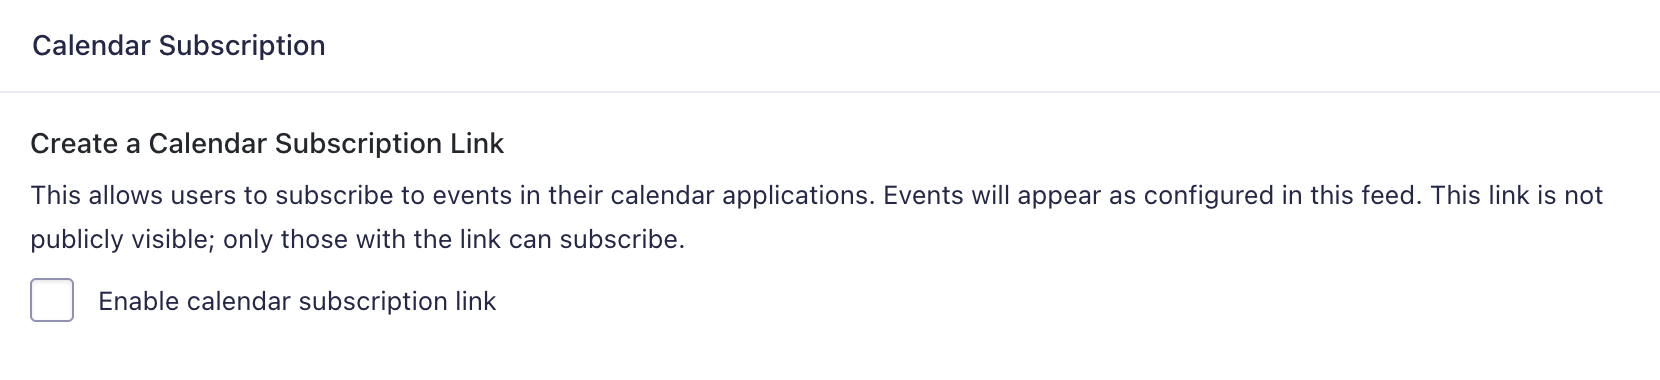
- Enable Subscription URL - Generates a URL that visitors can use to subscribe to your calendar in Google Calendar, Apple Calendar, or other calendar apps.
Click Update Settings to save. You will see your calendar listed in the feeds table with its shortcode:

Step 3: Add Entries to Your Form
Your calendar displays form entries, so you'll need some entries before events appear. You can add them two ways:
Frontend submission: Embed your form on a page and have users submit entries.
Manual entry: Go to Forms → Entries, select your form, and click Add New.
Step 4: Display Your Calendar
Embed your calendar using any of these methods:
- Gutenberg block - Add the "GravityCalendar" block to any page
- Shortcode - Use
[gravitycalendar id="X"](find the ID in your feed settings) - Widget - Add to any sidebar or widget area in your theme
- GravityView widget - Embed inside a View
For step-by-step instructions, see Displaying a calendar.
Next Steps
- Customize event colors
- Link events to a detail page
- Enable calendar subscriptions (Google Calendar, Apple Calendar)
- Developer hooks for advanced customization