_1@2x.png)
Activating your license
After Installing GravityView, you'll need to activate your license. Here's how to do it in three simple steps.
Prefer to Watch the Video?
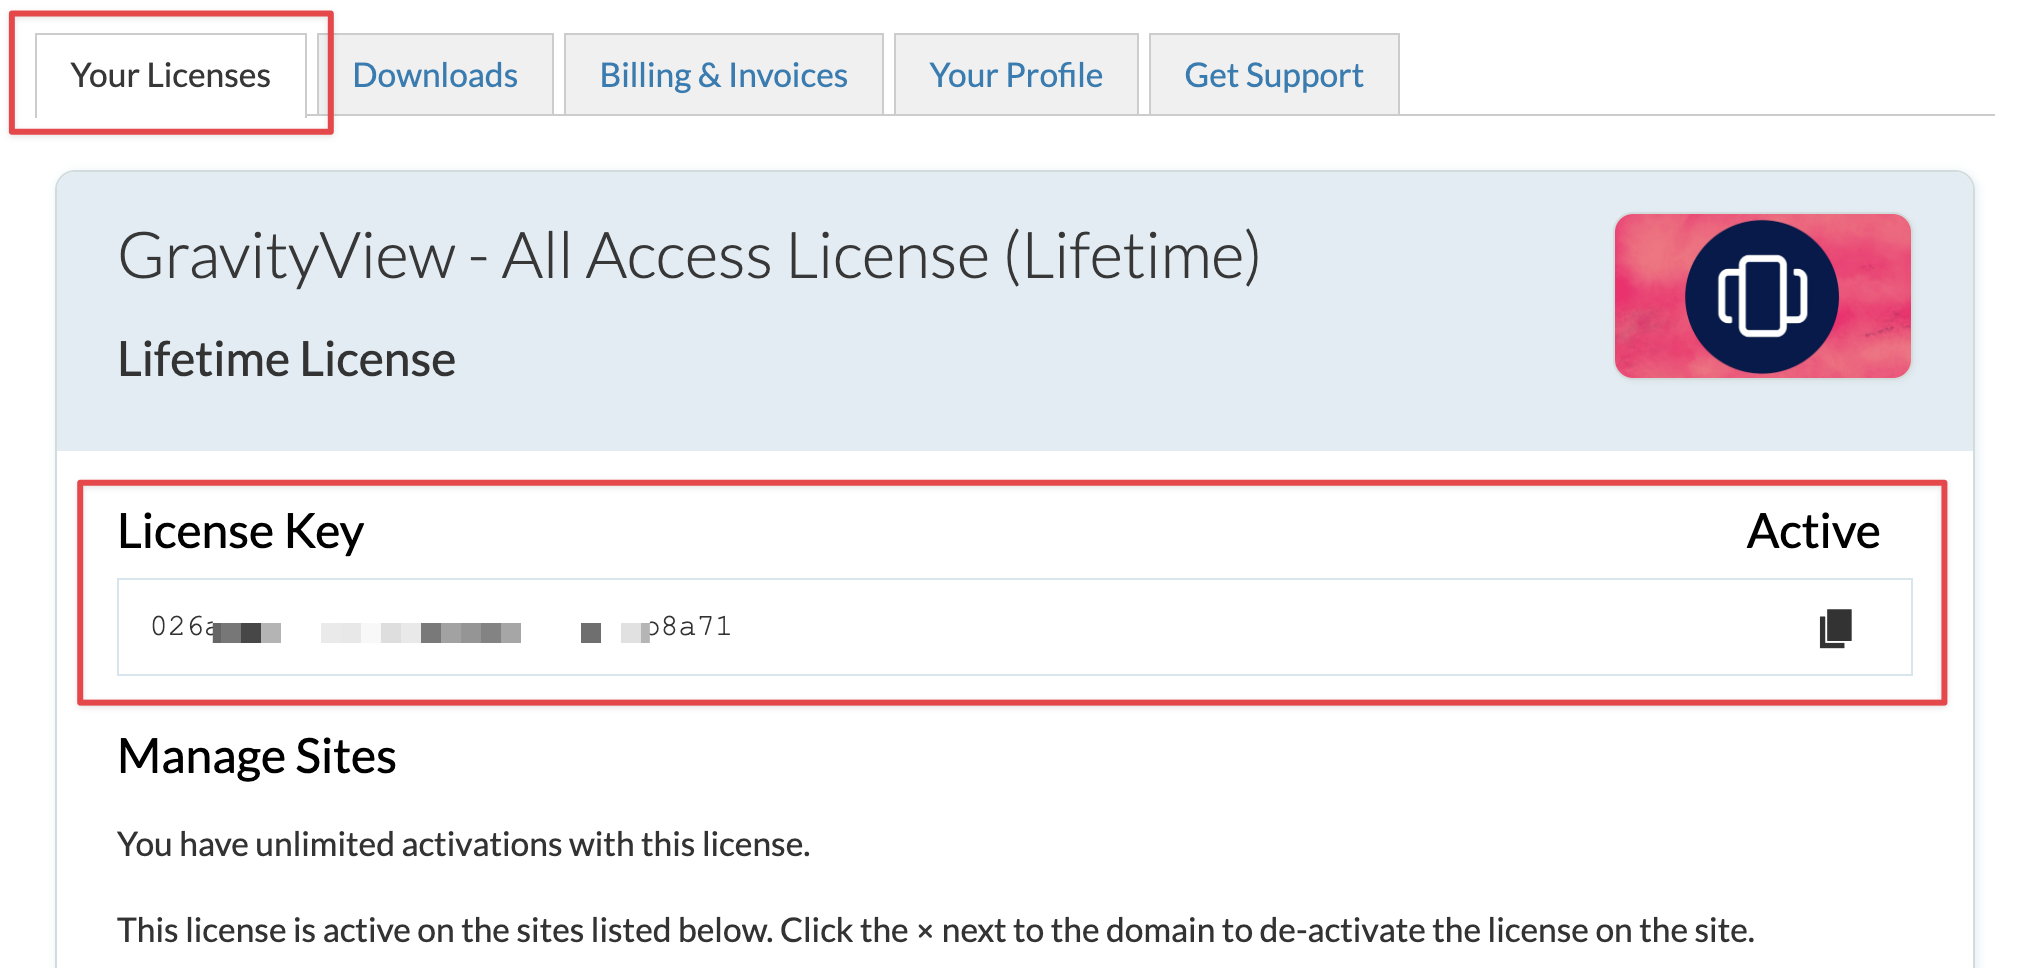
1. Log in to your account and copy your license key
Go to the GravityKit account page and log in with your account details. Next, from the "Your Licenses" tab of your account page, copy your license key by clicking on the button on the right to copy it to your clipboard.
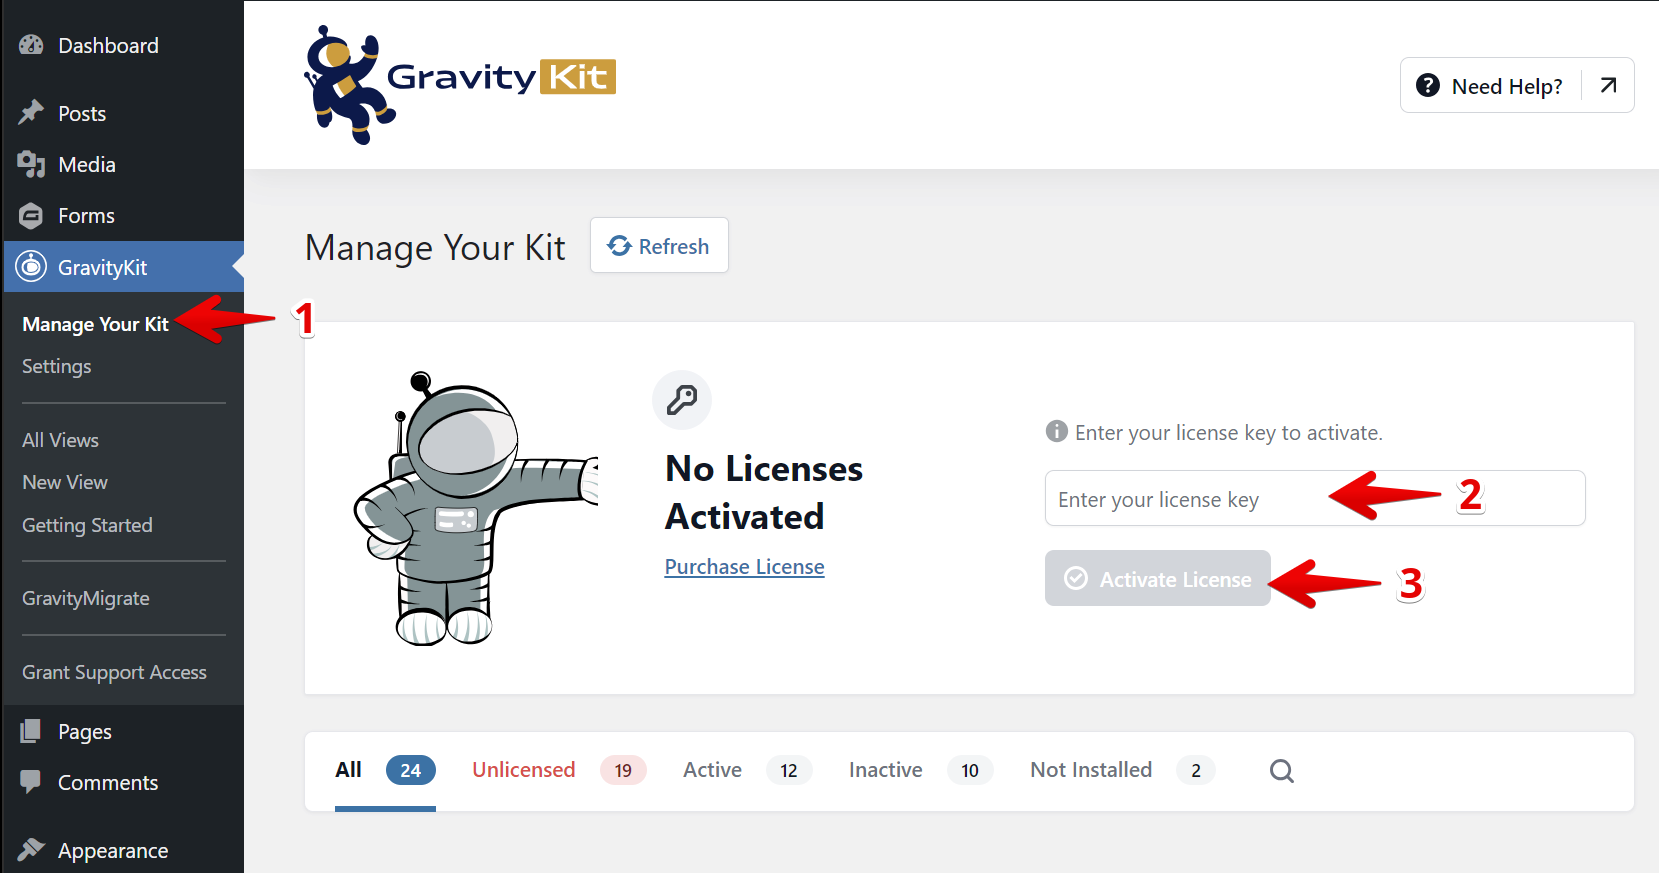
2. Log in to your WordPress website and navigate to the GravityKit "Manage Your Kit" page
You can do this by hovering over "GravityKit" in the WordPress menu and clicking "Manage Your Kit".
Once inside the "Manage Your Kit" page, paste your license key in the text input and click on the Activate License button.
If you don't see where to input your license key, that means your website is part of a multisite network. On a multisite network, it's only possible to activate or manage licenses from the Network Admin dashboard. Click here to see how to do that.
After clicking "Activate License", you should see a message saying that your license key is valid and active. If you have any problems, check to see if your license key has expired. If it hasn't expired but you're still seeing errors, contact our support.