_1@2x.png)
Installing GravityView
This article will walk you through how to install the GravityView plugin.
Prefer to watch the video?
1. Download the Latest Version of GravityView
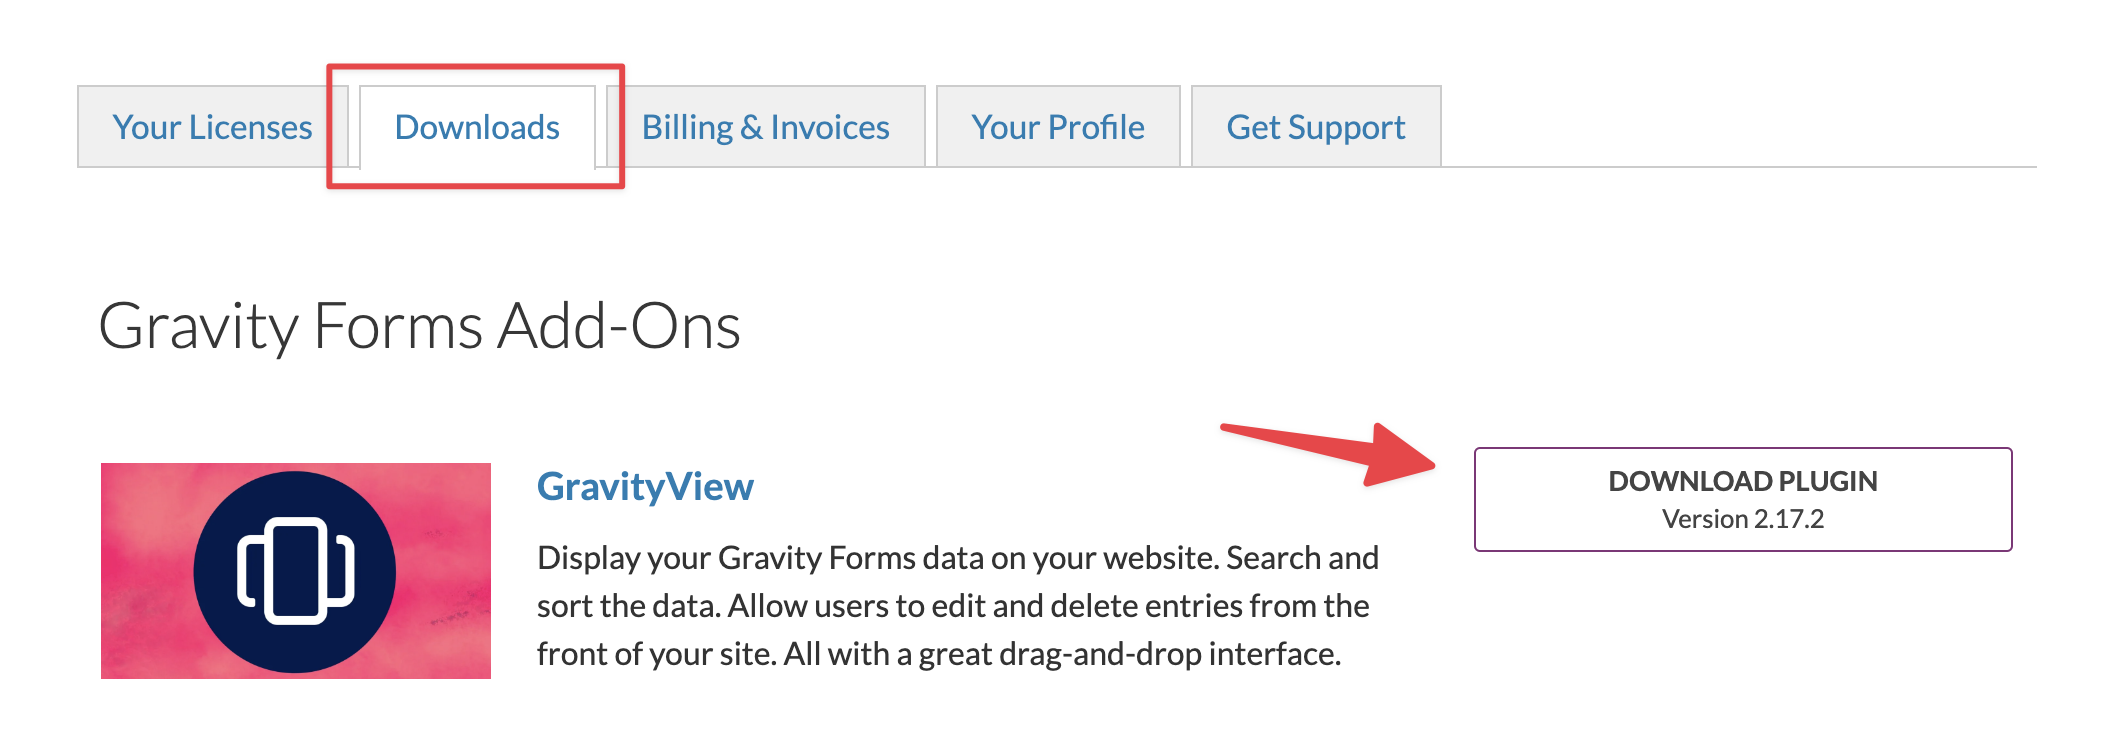
Log in to your GravityKit Account, and click on the "Downloads" tab. Next to GravityView, click the "Download Plugin" button. The GravityView plugin will now download to your computer as a ZIP file.
2. Install GravityView on your WordPress website
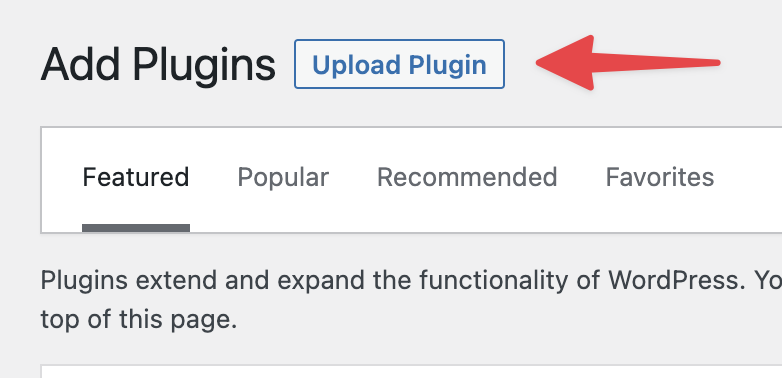
Now, click "Choose File" and select the GravityView plugin ZIP file that you downloaded in the previous step.
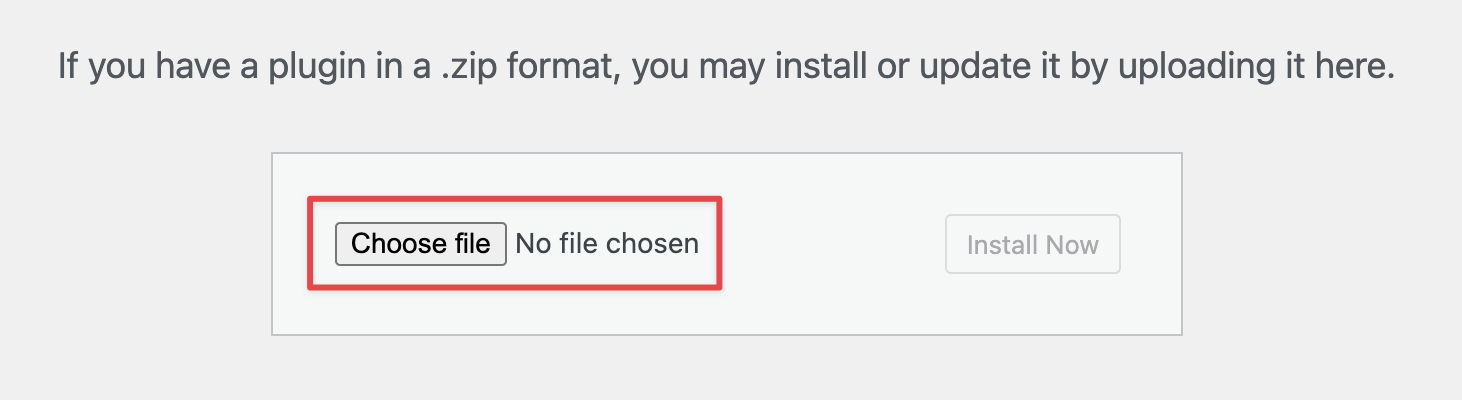
Finally, click "Install Now". After the plugin has finished installing, activate it by clicking "Activate Plugin".
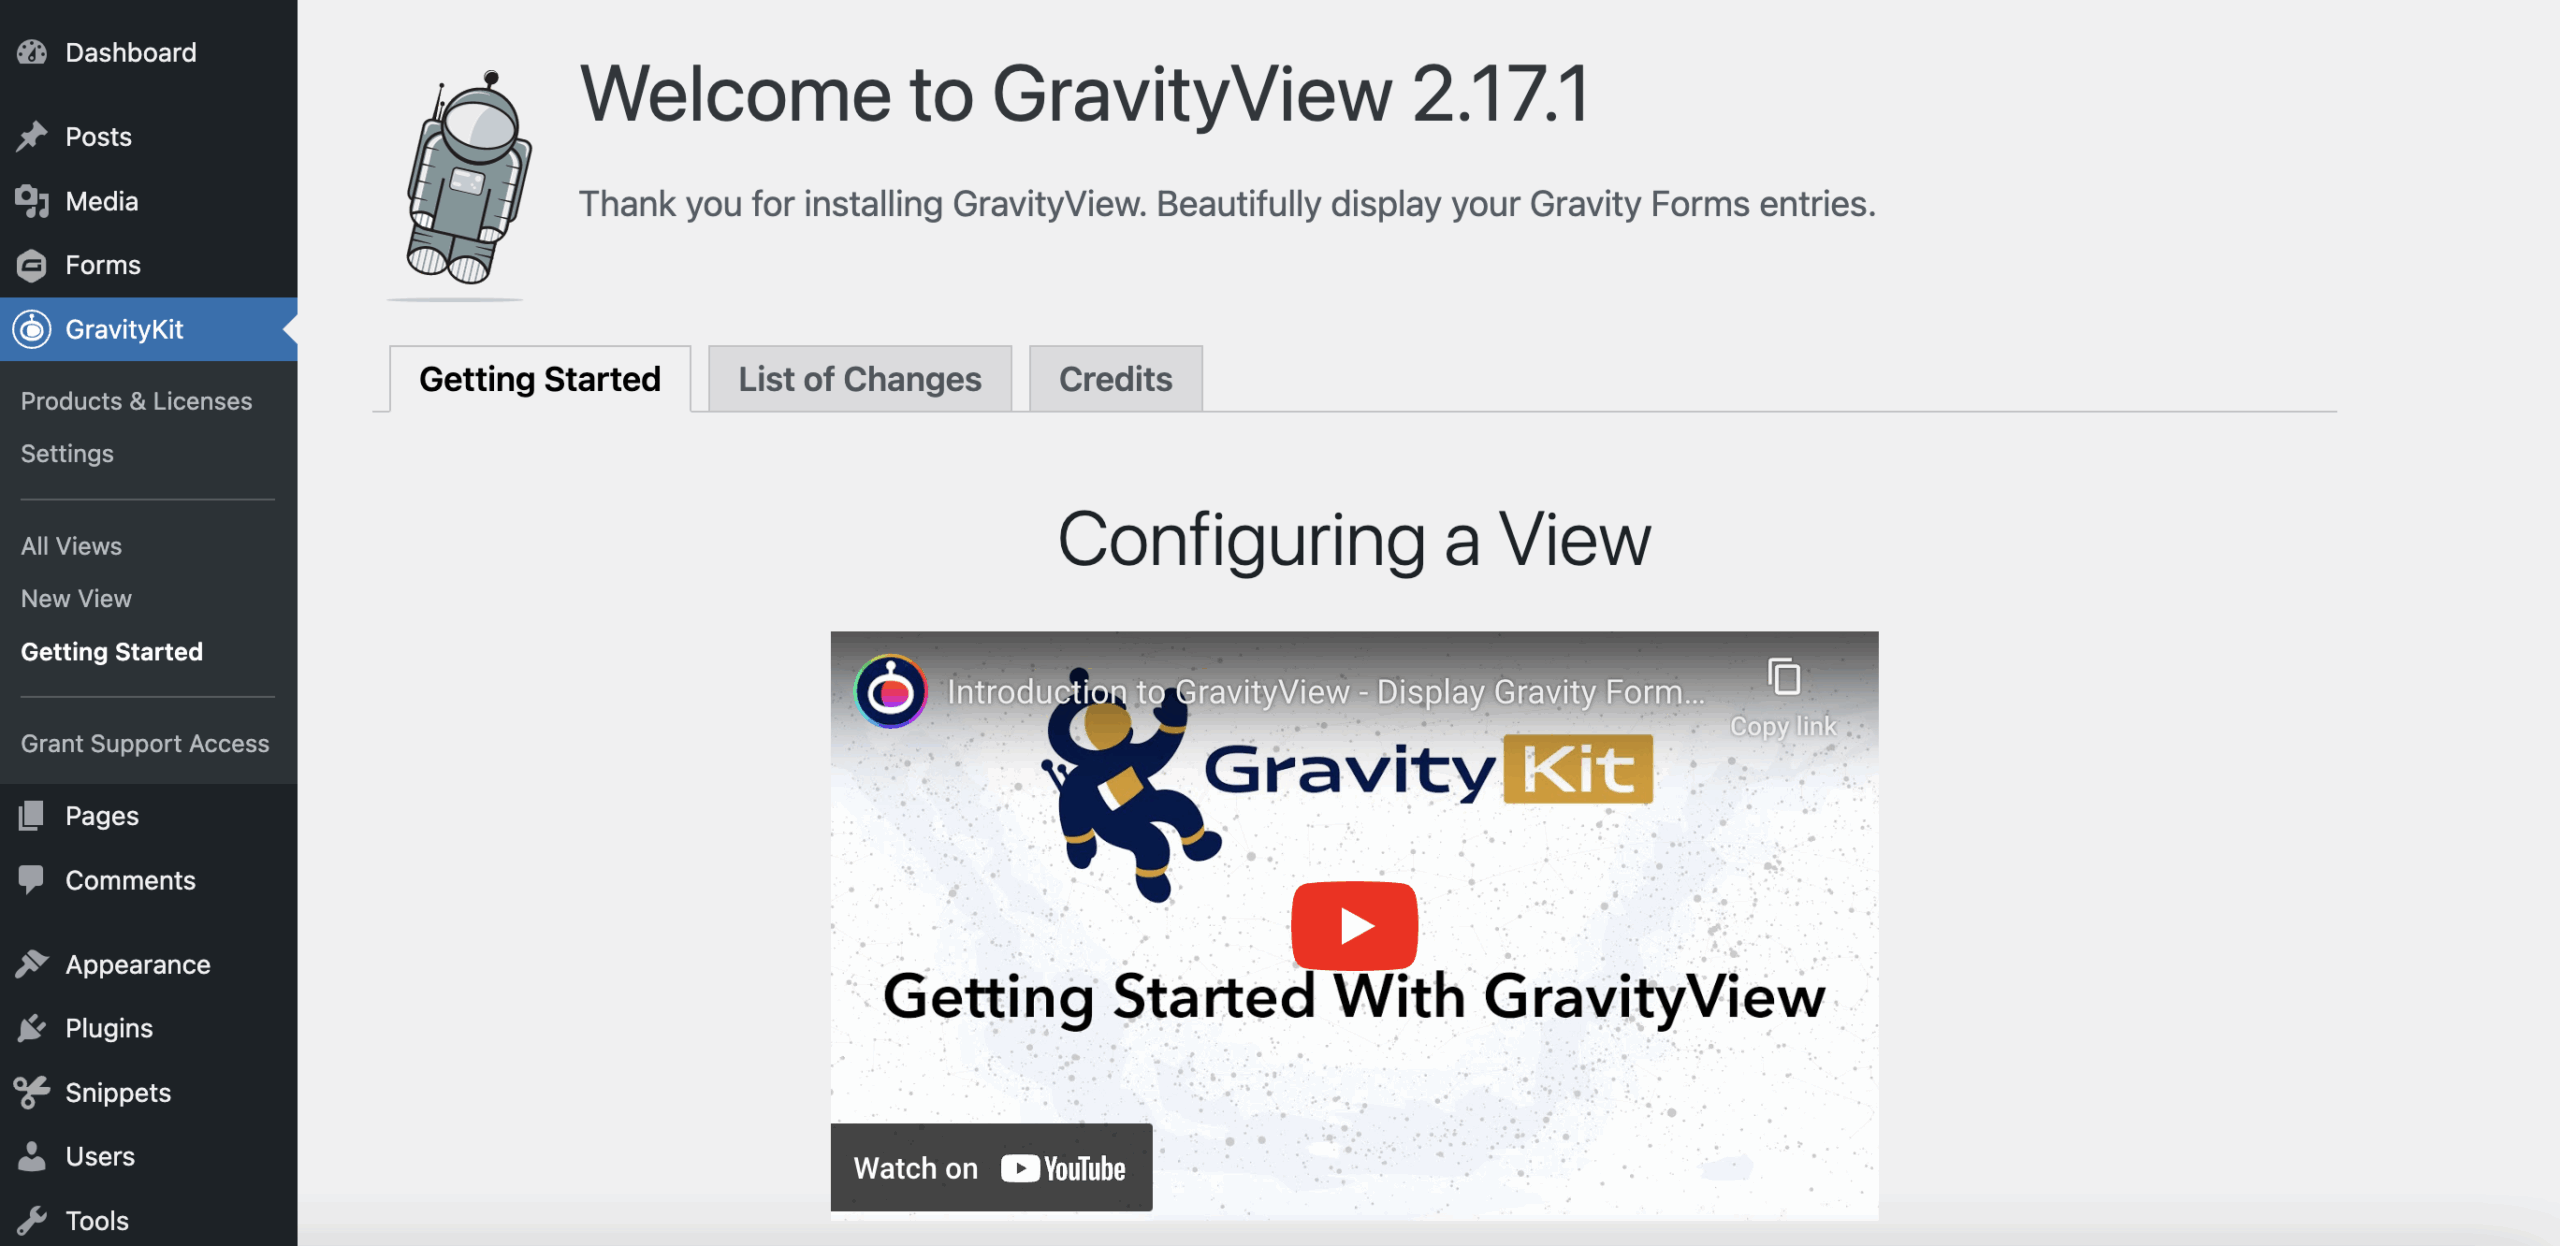
You will now see the GravityView "Getting Started" screen with information on configuring your first View.
Before you start creating new Views, you should first activate your license.
3. Activate your GravityView license
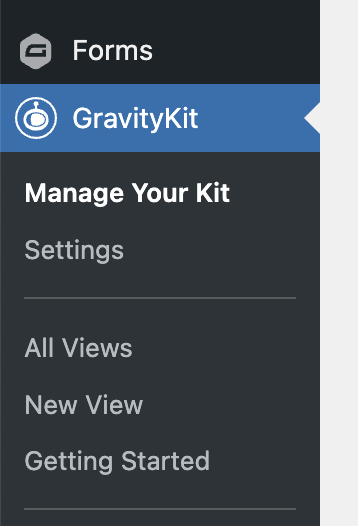
After activating the GravityView plugin, hover over "GravityKit" and click "Manage Your Kit".
Go back to your Account page on gravitykit.com, copy your license key, and paste it into the "License Key" box.
After entering your key, click the button that says "Activate License".
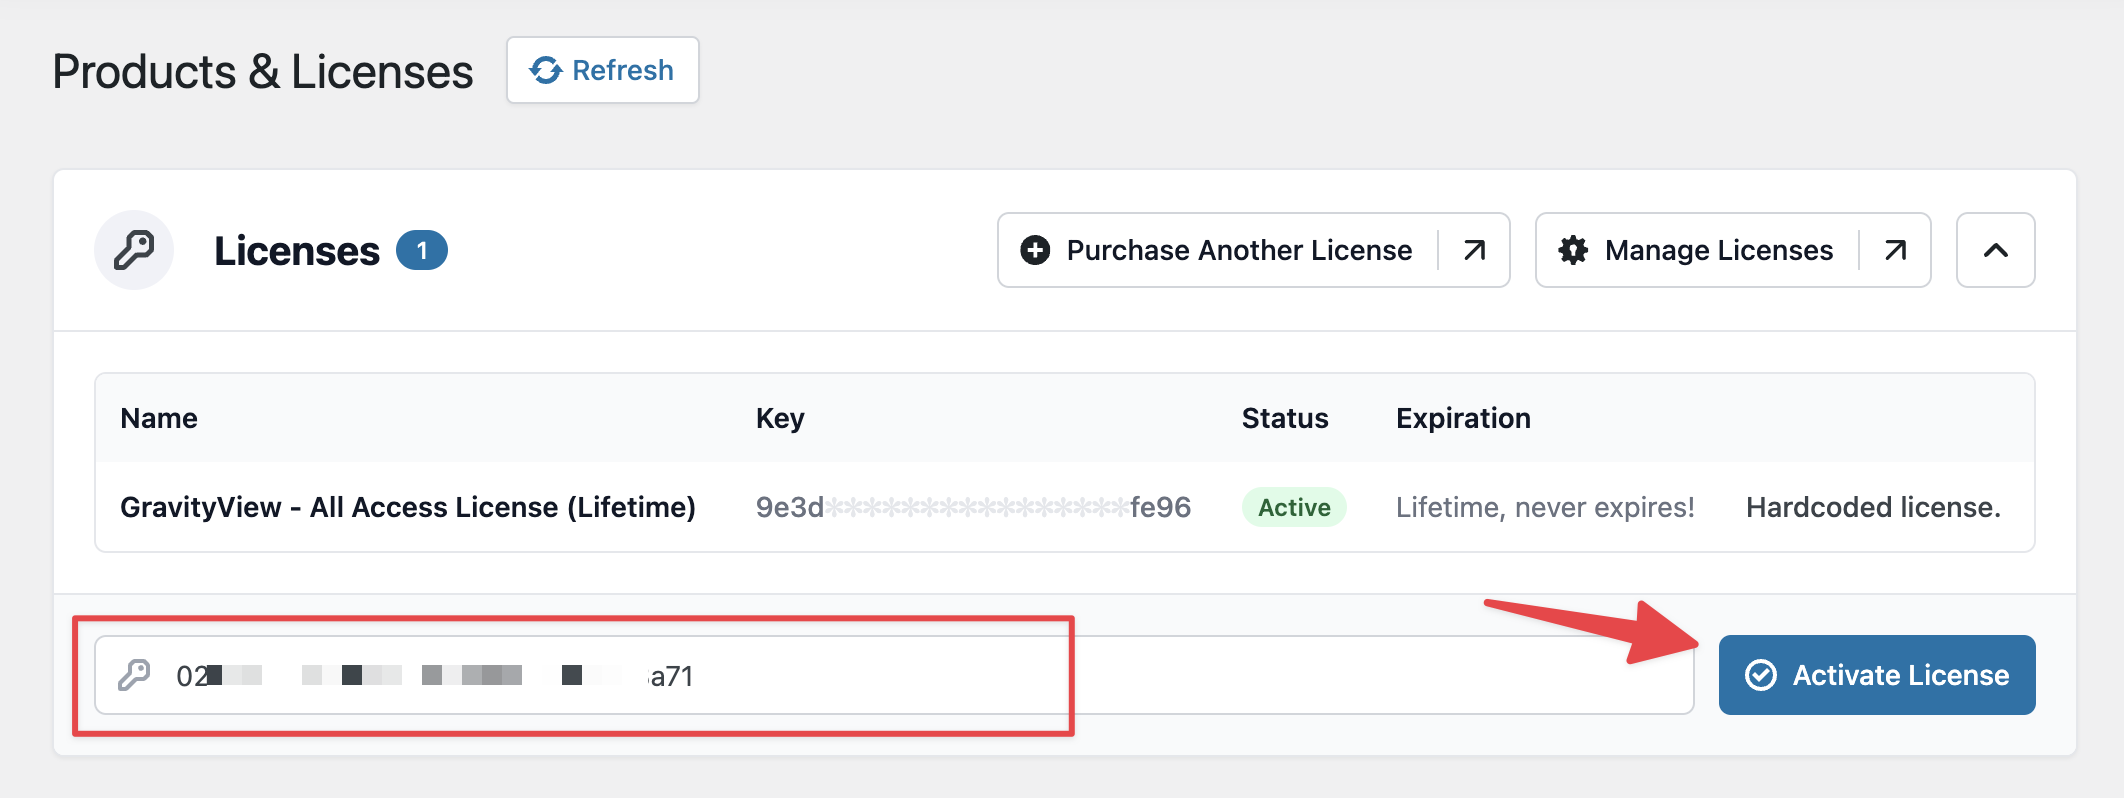
After activating your license, you should see a notice saying that the license key is valid and active. If not, contact our support team.
Now that your license is active, you can enjoy automatic updates!
If you ever have questions about the plugin, you can click on the blue circle with a question mark in the middle at the bottom of each GravityView page (we call that the "Support Port").
From there, you can also search our how-to articles and send support requests - all without leaving your website.