Adding custom CSS to your Views
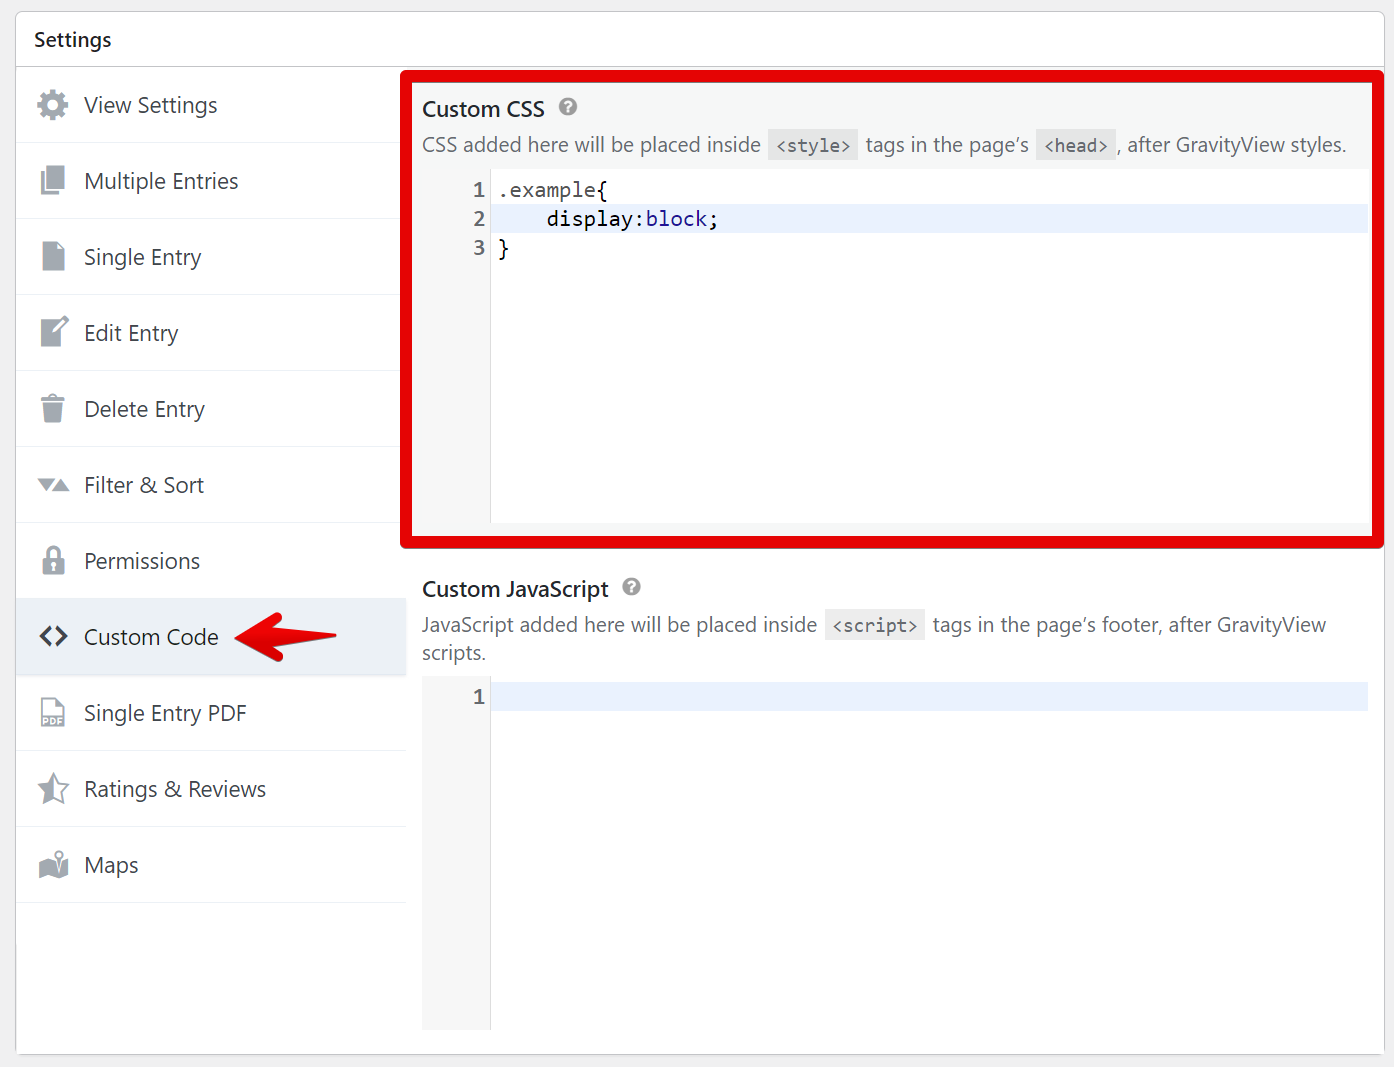
GravityView has an easy way to add custom CSS to Views directly from the View editor. Using the Settings metabox and the Custom Code tab, you can add CSS that loads only when the View is displayed, without modifying your theme files or using a separate plugin.
You don't need to enqueue CSS in your theme. A View's Custom CSS is only loaded when the specific View is rendered.

How to add custom CSS to a View
1. Edit the View in WordPress
Edit the View you want to add styles to.
2. Open the View Settings panel
Scroll to the Settings box in the View editor.
3. Select the "Custom Code" tab
Click Custom Code to reveal the "Custom CSS" textarea.
4. Add your CSS
Enter your custom CSS in the Custom CSS field.
5. Save your View
Scroll back up and click Update (or Publish) to save your added CSS.
Using placeholders in custom CSS
GravityView has placeholders (since 2.50) that are automatically replaced with View-specific values when the CSS is output. This makes it easy to write styles that target only a specific View.
Available placeholders:
| Placeholder | Description | Example output |
|---|---|---|
VIEW_SELECTOR |
A CSS selector that targets only this View | .gv-container.gv-container-123 |
VIEW_ID |
The View's ID number | 123 |
GF_FORM_ID |
The connected Gravity Forms form ID | 5 |
The VIEW_SELECTOR (recommended)
The VIEW_SELECTOR placeholder outputs a high-specificity CSS class selector. This is the recommended way to scope your custom styles:
VIEW_SELECTOR {
    background: #f5f5f5;
}

VIEW_SELECTOR .gv-table-view th {
    background: #333;
    color: white;
}

VIEW_SELECTOR .gv-list-view-title {
    font-weight: bold;
}
When the View is rendered, these placeholders are replaced with the actual selector:
.gv-container.gv-container-123 {
    background: #f5f5f5;
}

.gv-container.gv-container-123 .gv-table-view th {
    background: #333;
    color: white;
}

.gv-container.gv-container-123 .gv-list-view-title {
    font-weight: bold;
}
The VIEW_SELECTOR placeholder:
- Works for all instances - targets every instance of the View on the page
- Has high specificity - the double-class selector (
.gv-container.gv-container-123) has higher specificity than a single class, reducing the need for!important
Targeting a specific View instance
VIEW_SELECTOR targets all instances. If you need different styles for each instance, use the VIEW_ID placeholder, suffixed by an incrementing number for each embedded View with the same ID:
#gv-view-VIEW_ID-1 { /* First instance */ }
#gv-view-VIEW_ID-2 { /* Second instance */ }
When the View is rendered, all VIEW_ID placeholders are replaced with the actual ID:
#gv-view-123-1 { /* First instance */ }
#gv-view-123-2 { /* Second instance */ }
Why use placeholders to scope your CSS?
The styles you add will affect the entire page by default. This code will affect every <strong> tag on the page, not just in the View:
strong {
    color: red;
}
Instead, use VIEW_SELECTOR to scope your styles to the View:
VIEW_SELECTOR strong {
    color: red;
}
This will target only the <strong> tags in the View itself.
Using the GF_FORM_ID placeholder
Use GF_FORM_ID when you need to target form-specific elements:
/* Target Gravity Forms field elements */
VIEW_SELECTOR .gfield_list_VIEW_ID {
    width: 100%;
}
This may be helpful to style Views differently based on the connected form. See Gravity Forms CSS guide for form styling information.
Edge cases
Views without a connected form
If a View is not configured and doesn't have a connected Gravity Forms form, the GF_FORM_ID placeholder will not be replaced and will remain as literal text.
Placeholders are case-sensitive
Placeholders must be uppercase. These will not work:
view_selector { }  /* Won't be replaced */
View_Id { }        /* Won't be replaced */
Placeholders in comments
Placeholders are replaced everywhere in your CSS, including comments:
/* Styles for View VIEW_ID connected to Form GF_FORM_ID */
Becomes:
/* Styles for View 123 connected to Form 5 */
Using !important
Because VIEW_SELECTOR outputs a double-class selector (.gv-container.gv-container-123 ), it has higher specificity than most theme styles. You typically don't need !important , but if theme styles still override yours, you can use it:
VIEW_SELECTOR .entry-title {
    font-size: 24px !important;
}
_1@2x.png)