_1@2x.png)
Getting started with GravityMigrate
In this article, we will introduce GravityMigrate and show you how to get started with this powerful add-on.
GravityMigrate is an add-on for Gravity Forms, designed to be an all-in-one tool for exporting and importing Gravity Forms data. GravityMigrate supports all Gravity Forms data types, including forms, entries, files, feeds, Views, workflows, nested forms, and more.
Prefer to watch the video?
Migrating data (overview)
Before we show you, step by step, how to migrate data, here's a brief overview of the migration process:
- Select the data on your existing site that you want to migrate to the new site
- Download this data from GravityMigrate as a ZIP file
- Import this same ZIP file into GravityMigrate on your new site
- Select the specific data you want to import (or choose all data)
It's as simple as that. Now let's look at each step in more detail.
Exporting your Gravity Forms data
Start by hovering over "GravityKit" and clicking "GravityMigrate". From the GravityMigrate configuration screen you'll be able to both import and export data. If you're migrating your data to a new site, you'll need to start by exporting it from the old site.
To do this, start by selecting the forms you want to export.

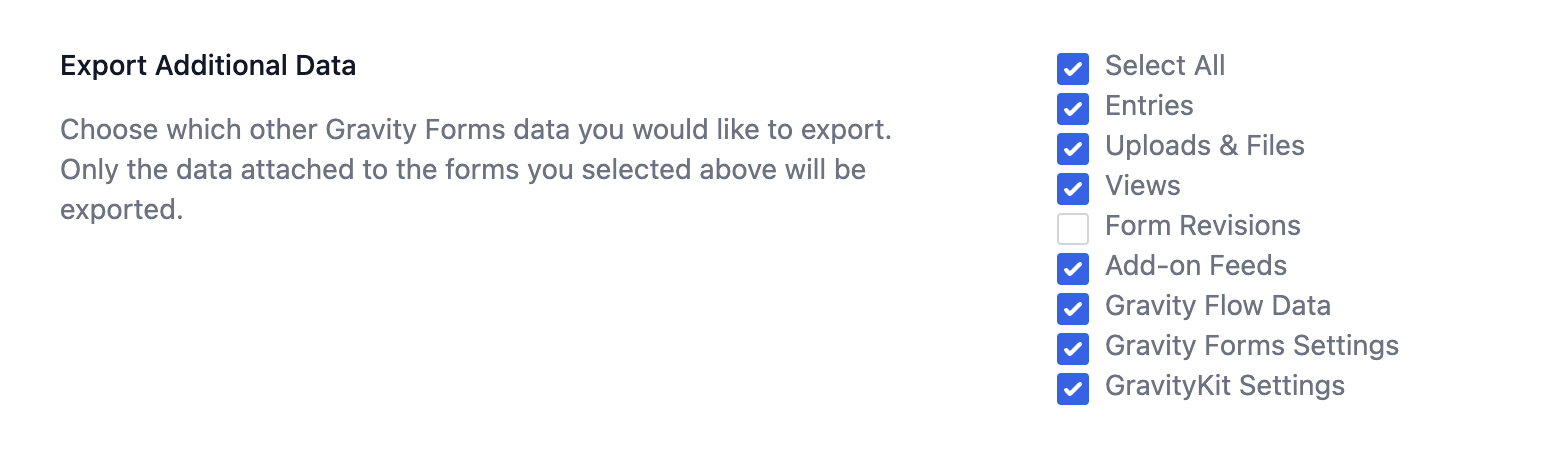
Next, select the additional data that you want to export along with your forms. This could include entries, uploaded files, Views, Gravity Flow workflows, add-on settings, and other related data.
Finally, you have the option to limit entries to a certain date range, and set a password for the generated export file.
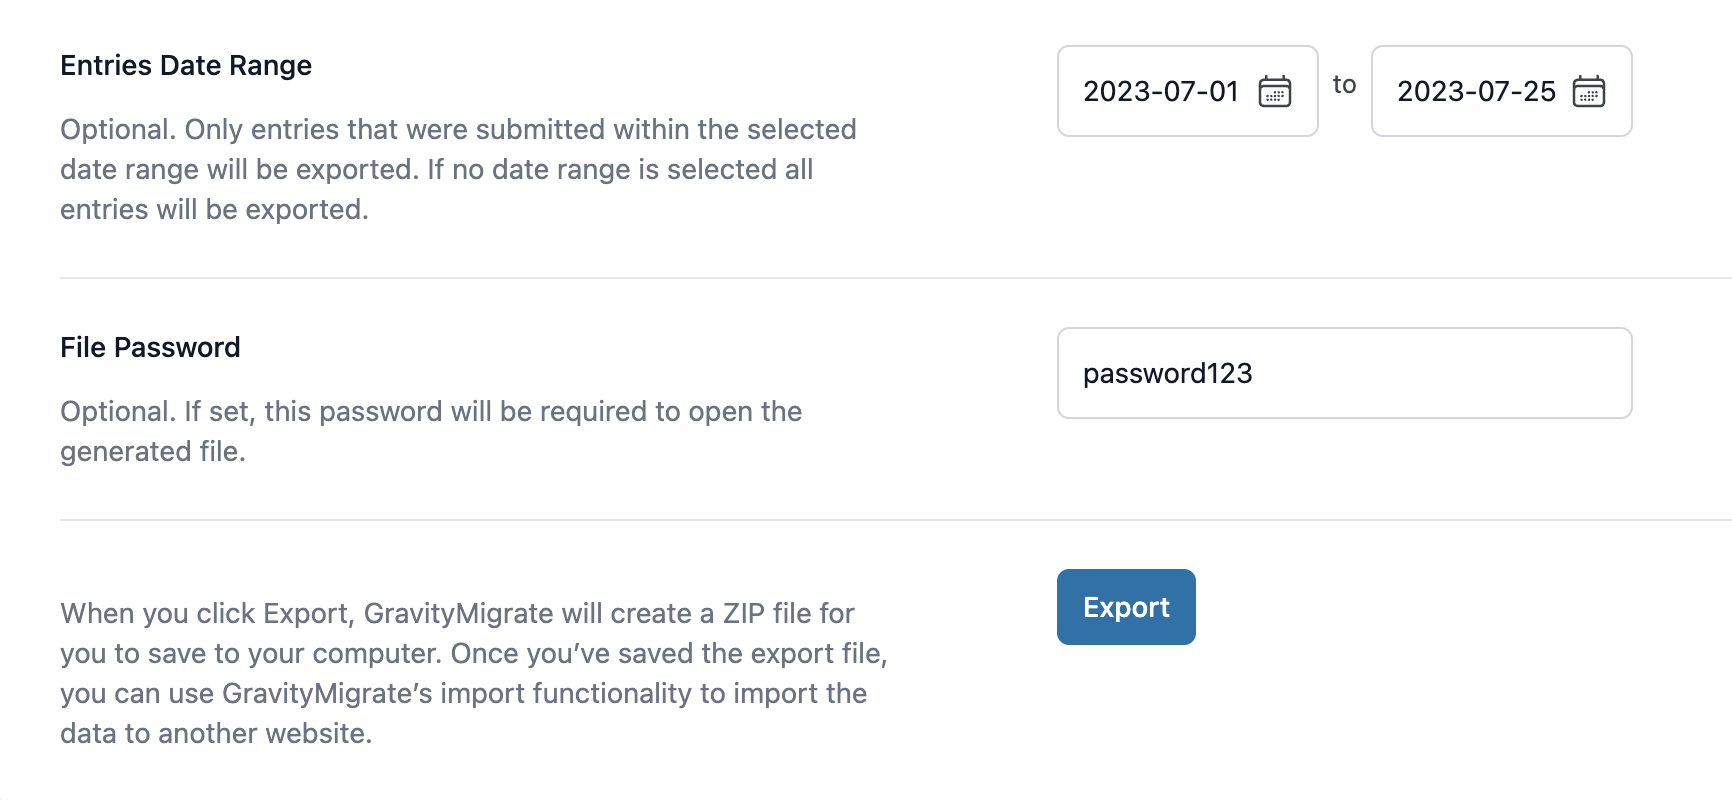
When you're done, click the "Export" button. GravityMigrate will then generate a ZIP file for you to save to your computer.
Importing your Gravity Forms data
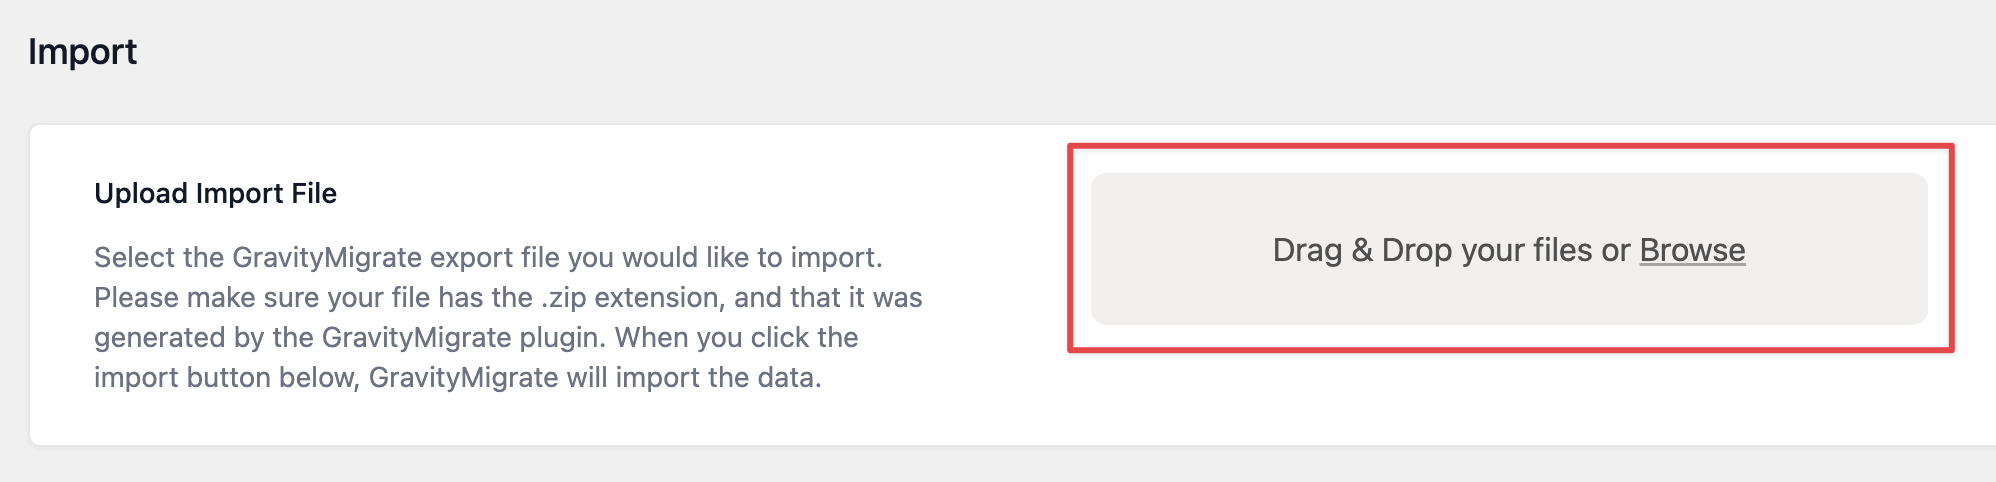
Go to the GravityMigrate settings page on your new website and upload the ZIP file containing your Gravity Forms data.
When the file has finished uploading, GravityMigrate will give you the option to exclude certain forms or other data from the import.
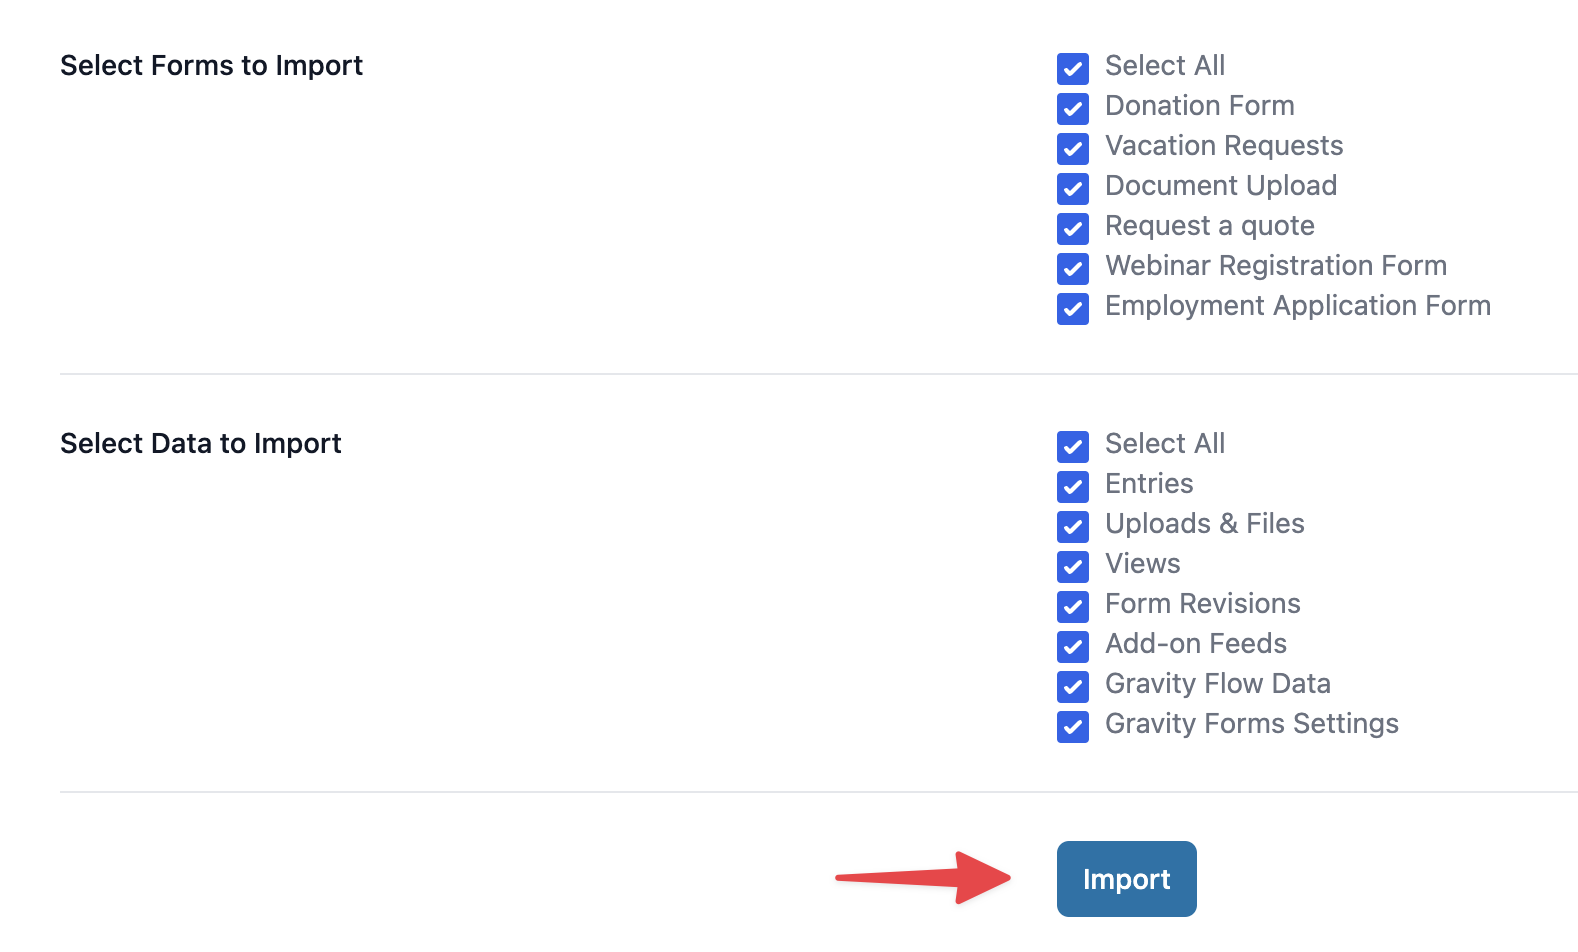
When you're ready, click the "Import" button. GravityMigrate will then import your data. That's it!
To ensure a smooth migration, follow our best practices.