Adding a download button for entries in GravityView using GravityExport
In this article, you will find out how to use GravityExport to add a download button to your Views, allowing you to download individual entries.
1. Create a new export feed
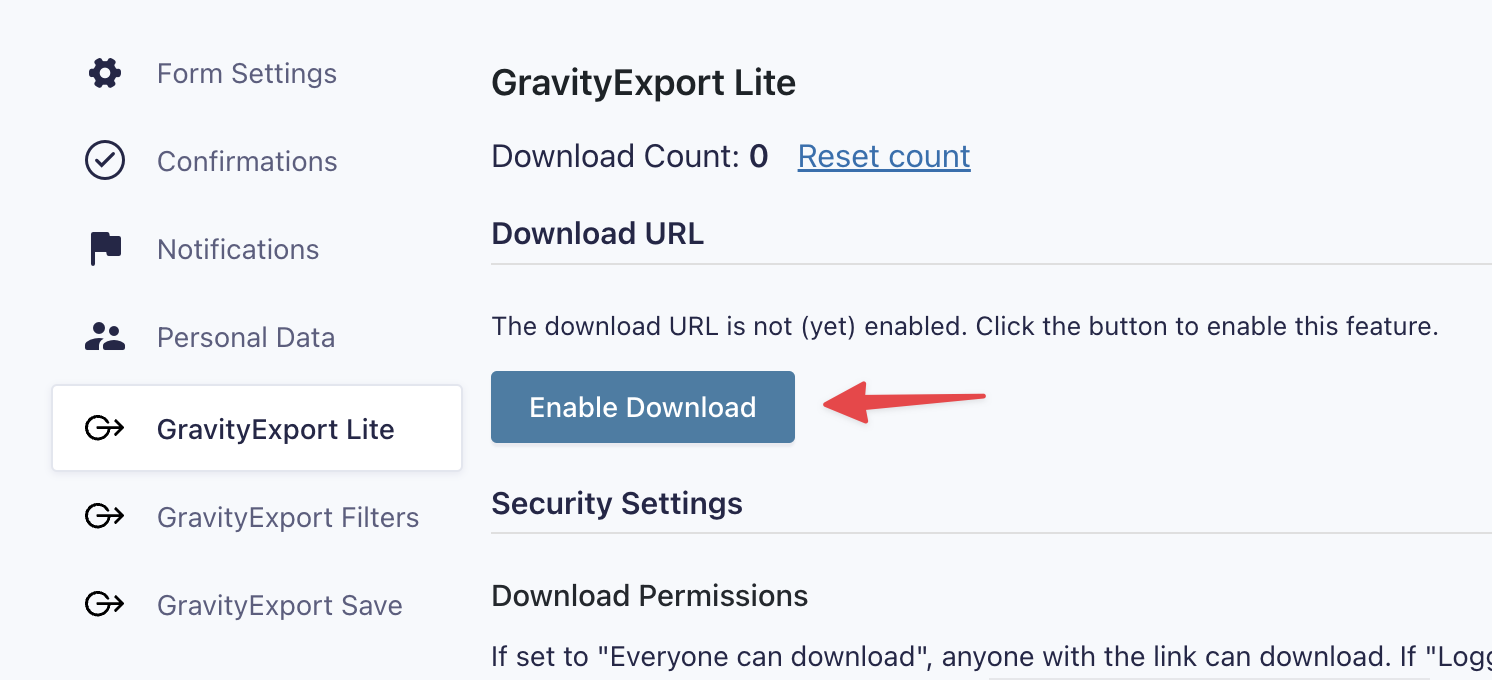
Head over to the form settings page, click on "GravityExport Lite" or "GravityExport Filters", and create a new feed. After that, click "Enable Download" to generate a download link.
 Now configure the remaining options and select a file type for your export (either CSV, Excel or PDF). When you're done, save the feed, scroll back up to the top and copy the download link.
 The next step is to create the download button and add it to your View.
2. Add the download link to your View
Now edit your View in GravityView and add a new Custom Content field where you want the download button to show up.
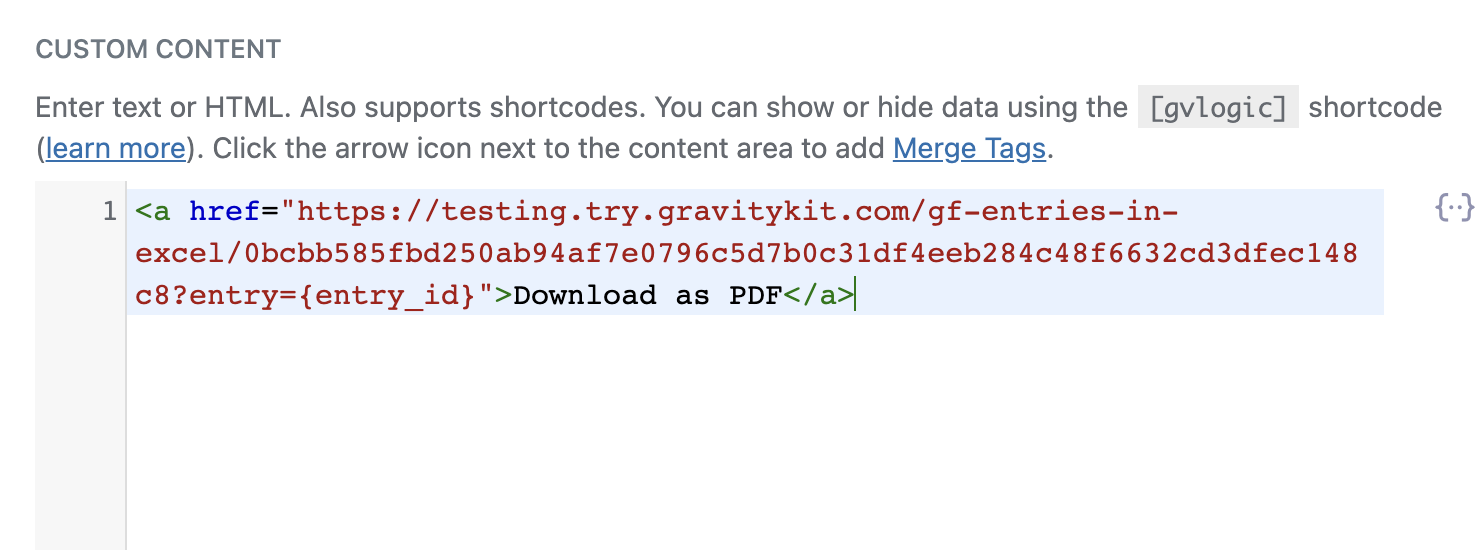
Creating the download link is simple. All you need to do is add an HTML anchor link and set the href property equal to your GravityExport download URL. However, the download URL will download all entries by default. If you want to download single entries, make sure to add ?entry={entry_id} to the end of the URL. {entry_id} is a Gravity Forms merge tag that outputs the ID of an individual entry.
Here's an example:
<a href="https://testing.try.gravitykit.com/gf-entries-in-excel/0bcbb585fbd250ab94af7e0796c5d7b0c31df4eeb284c48f6632cd3dfec148c8?entry={entry_id}"> Download Entry </a>

3. Add custom styles
If you want to create an attractive button, you'll need to add a CSS class and custom styles to your anchor link. Here's an example:
<a class="button-pdf" href="https://testing.try.gravitykit.com/gf-entries-in-excel/0bcbb585fbd250ab94af7e0796c5d7b0c31df4eeb284c48f6632cd3dfec148c8?entry={entry_id}">Download as PDF</a>

<style>
.button-pdf {
padding: 20px 10px;
color: #fff;
background-color: #808080;
border-radius: 9px;
box-shadow: 0px 2px 3px rgba(19, 126, 180, .30);
padding: 15px 32px;
 display: inline-block;
 font-size: 18px;
text-align: center;
text-decoration:none;
}

.button-pdf:hover {
color:#ffffff;
background-color: #595959;

}
</style>
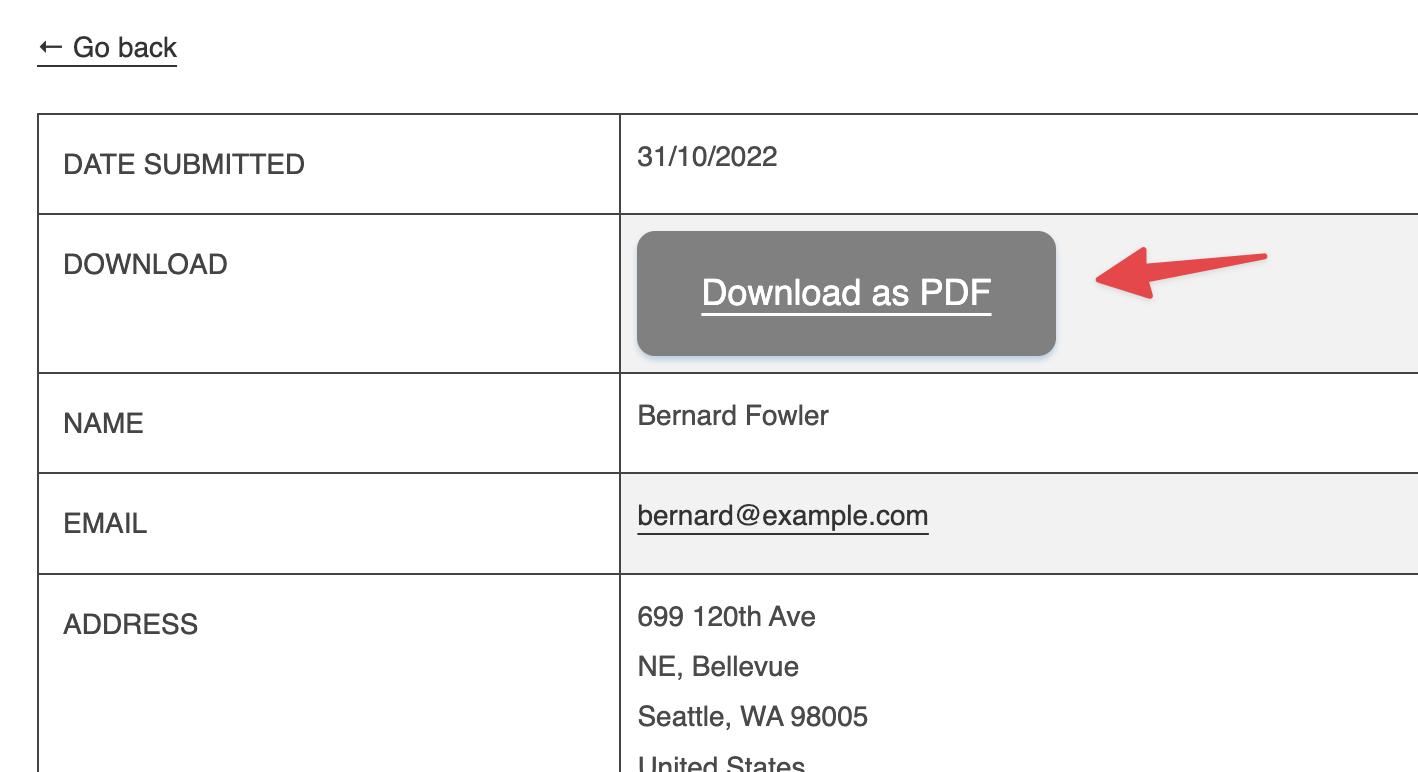
And here's what it will look like on the front end:
 If you want to copy this example, you can paste the above code into your Custom Content field (just make sure to replace the download URL with your own).
Clicking on the download button will automatically download the entry to your computer based on the options you configured in GravityExport.

That's it!
_1@2x.png)