Linking an Event to a Single Entry Page
Note: Linking a calendar event to the Single Entry page requires you to have GravityView installed with a View linked to your events form.
Often, you may want to display more event details than what fits in the small tooltip or popover of the calendar. By creating a View connected to the same form of your events, you can use the Single Entry page of your View to display the event details.
You can link events to the Single Entry page in two ways:
- By linking the event title directly to the single entry page of a View;
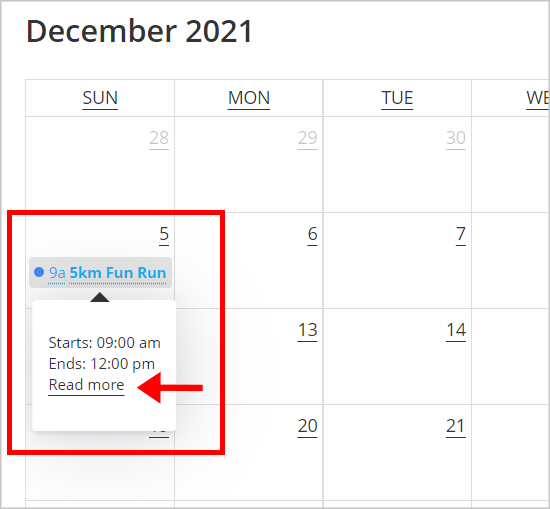
- Or by creating a "Read more" link inside the tooltip.
In this article, we'll explain how to achieve both methods.
Linking the event title to the Single Entry page
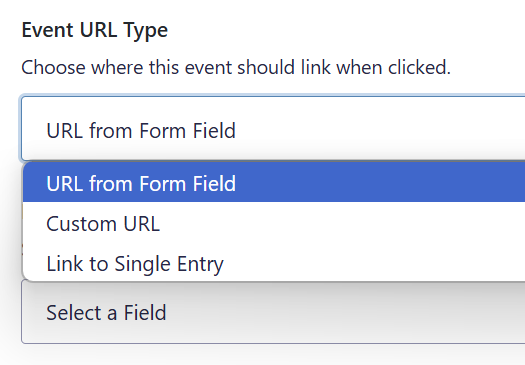
By default, the event title is clickable, regardless of whether it has a URL to point to or not. When configuring a GravityCalendar feed, you can choose what you'll use as a link:
- URL from Form Field: If your form contains a website field, then you can use this field as the event link;
- Custom URL: Accepts any URL. You can also use Field Merge Tags from your form to create custom URLs or pass parameters. Example:
https://website.com/events/?event_id={entry_id}&event_title={Event Title:2} - Link to Single Entry: This option allows you to select a View connected to the same form, so when clicking on an event, the user will be redirected to the Single Entry page of that View. If your View is embedded, then you will need to add the ID of the page or custom post type into the "Embedded Page ID (Optional)" input. This way, the link will point to the page
/page-name/entry/instead of linking to the View custom post type/view/entry/.
Creating a "Read More" link inside the event tooltip
1. Open Your GravityCalendar Feed Settings
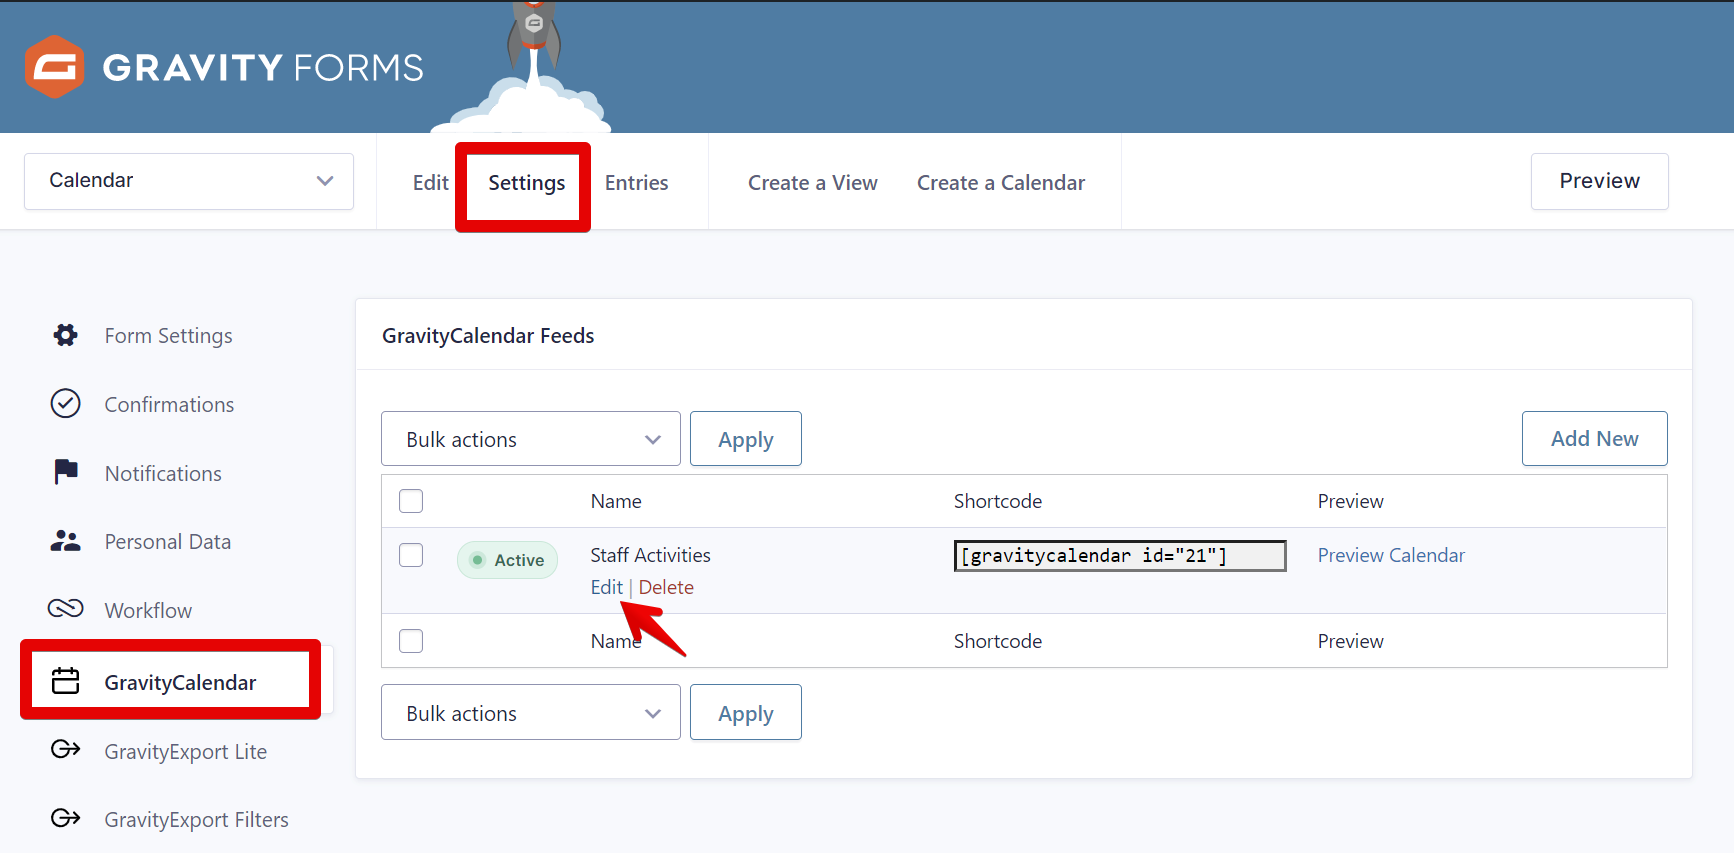
To open the Calendar Feed Settings page, edit your form in Gravity Forms, click on Settings at the top, and select the GravityCalendar tab on the left. Find your feed and click on Edit.
Now scroll down to the Event Description box under Calendar Fields.
2. Add the [gv_entry_link] Shortcode to the Event Description
Now create a simple "Read more" link using the [gv_entry_link] shortcode:
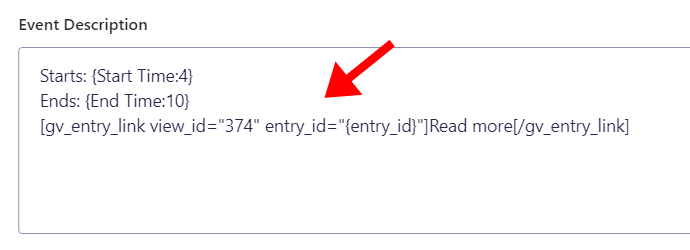
Here is the shortcode:
[gv_entry_link view_id="374" entry_id="{entry_id}"]Read more[/gv_entry_link]
Be sure to update the view_id and feel free to modify the words "Read more" to something else.
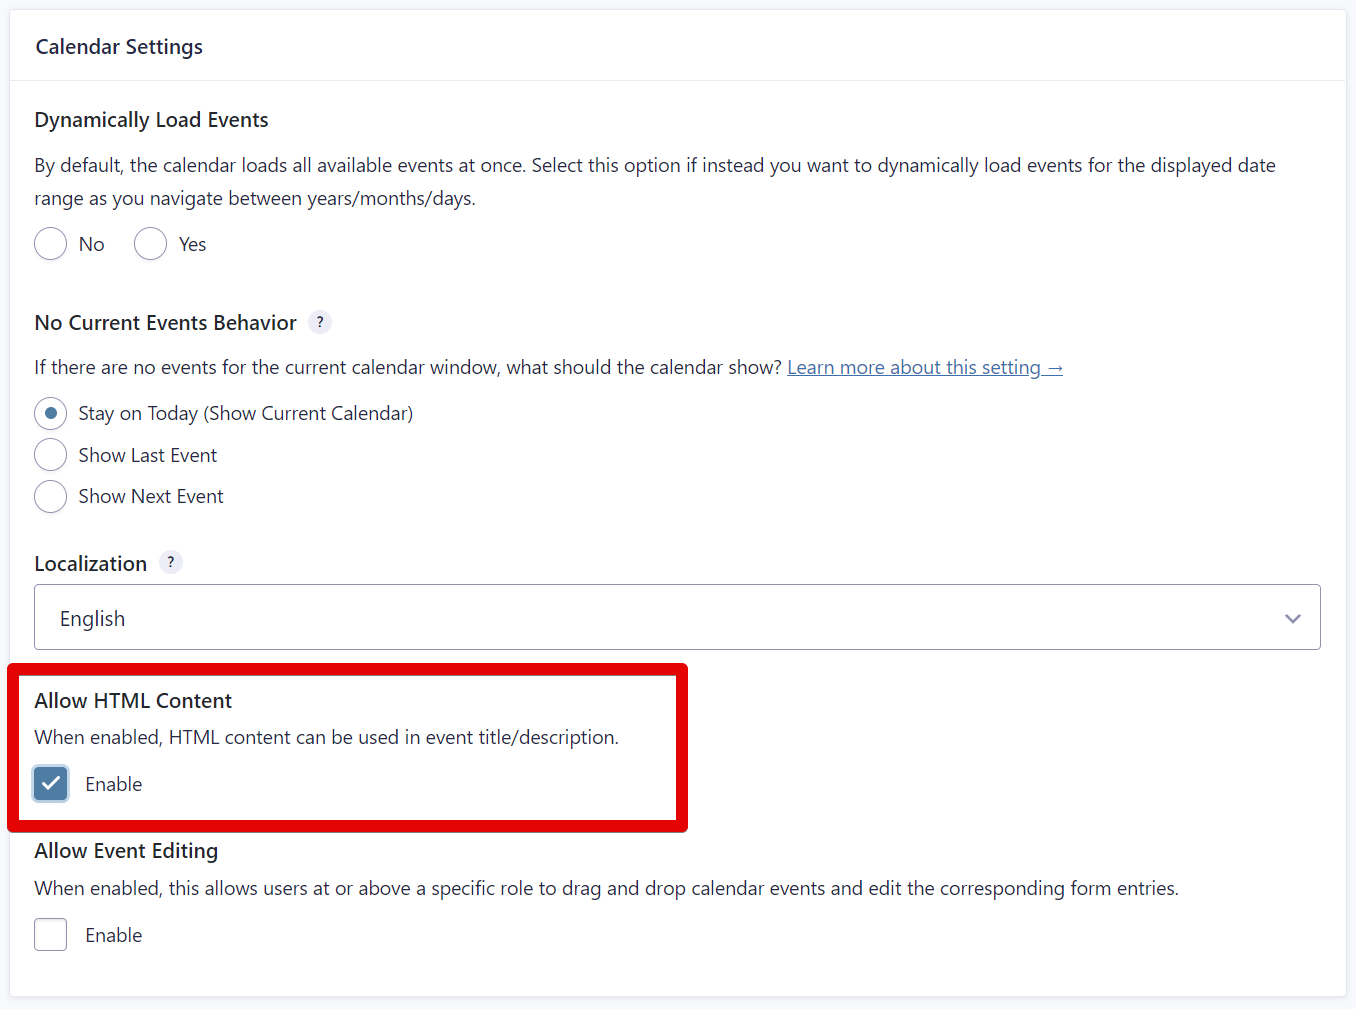
3. Enable the Allow HTML Content option
This option must be enabled; otherwise, you won't have a clickable link created by the [gv_entry_link] shortcode.
When users click "Read more," they will be taken to the Single Entry page, where they can view more details about the event.
_1@2x.png)