_1@2x.png)
Getting started with GravityExport Lite
This article will explain how to get started with the GravityExport Lite plugin.
Prefer to watch the video?
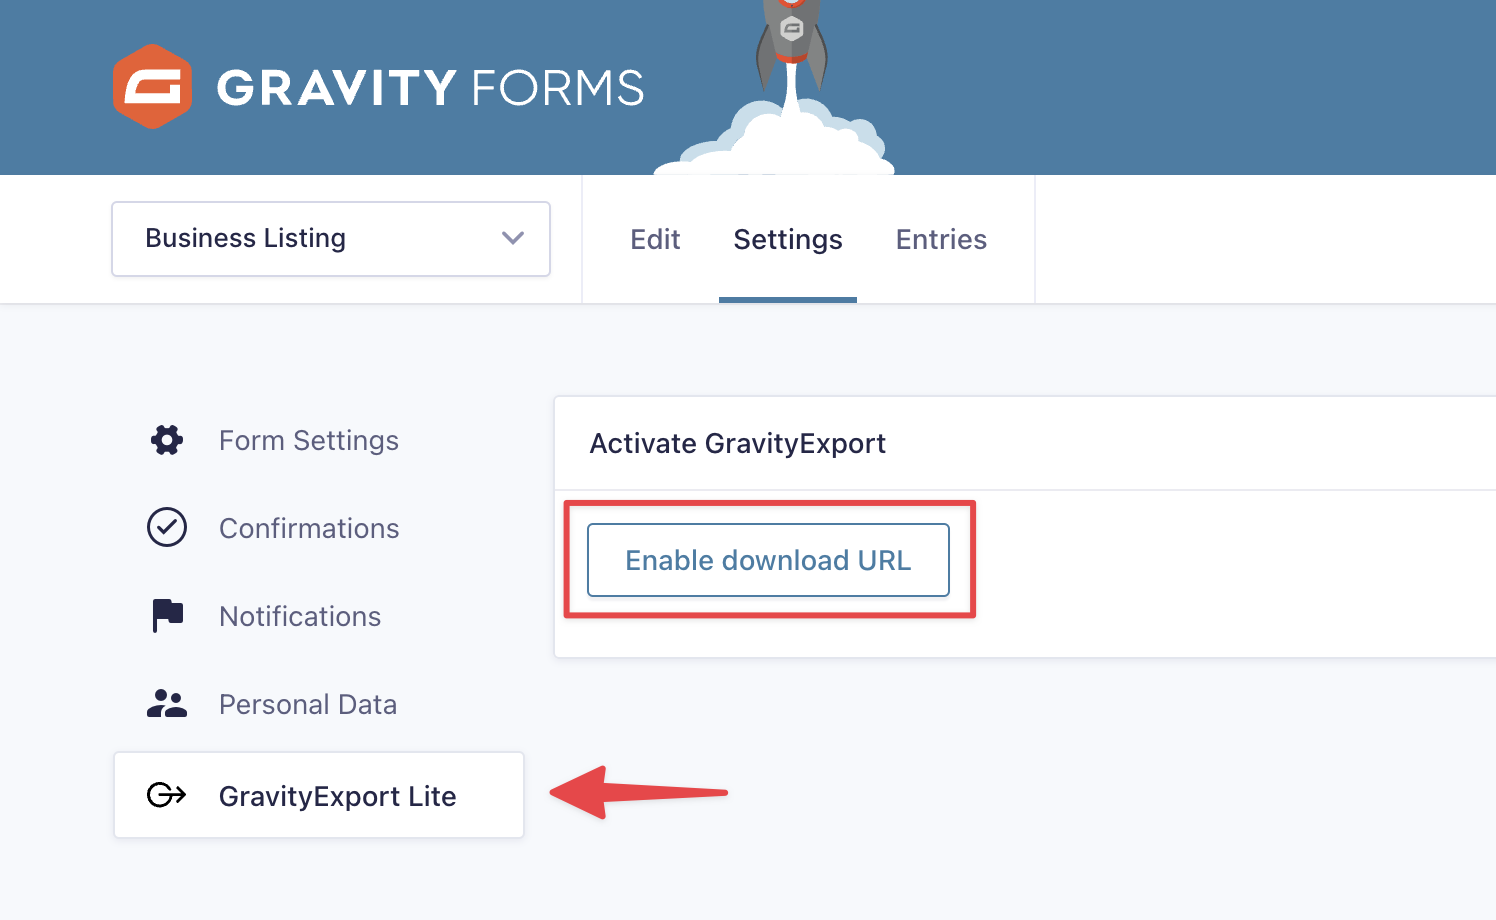
After installing GravityExport Lite, the first thing you'll need to do is enable the download URL. You can do this by going to the form settings page in Gravity Forms, clicking on the "GravityExport Lite" tab on the left and clicking the "Enable download URL" button.
After enabling the download URL, you can start configuring your report. First and foremost, you'll need to configure the download settings.
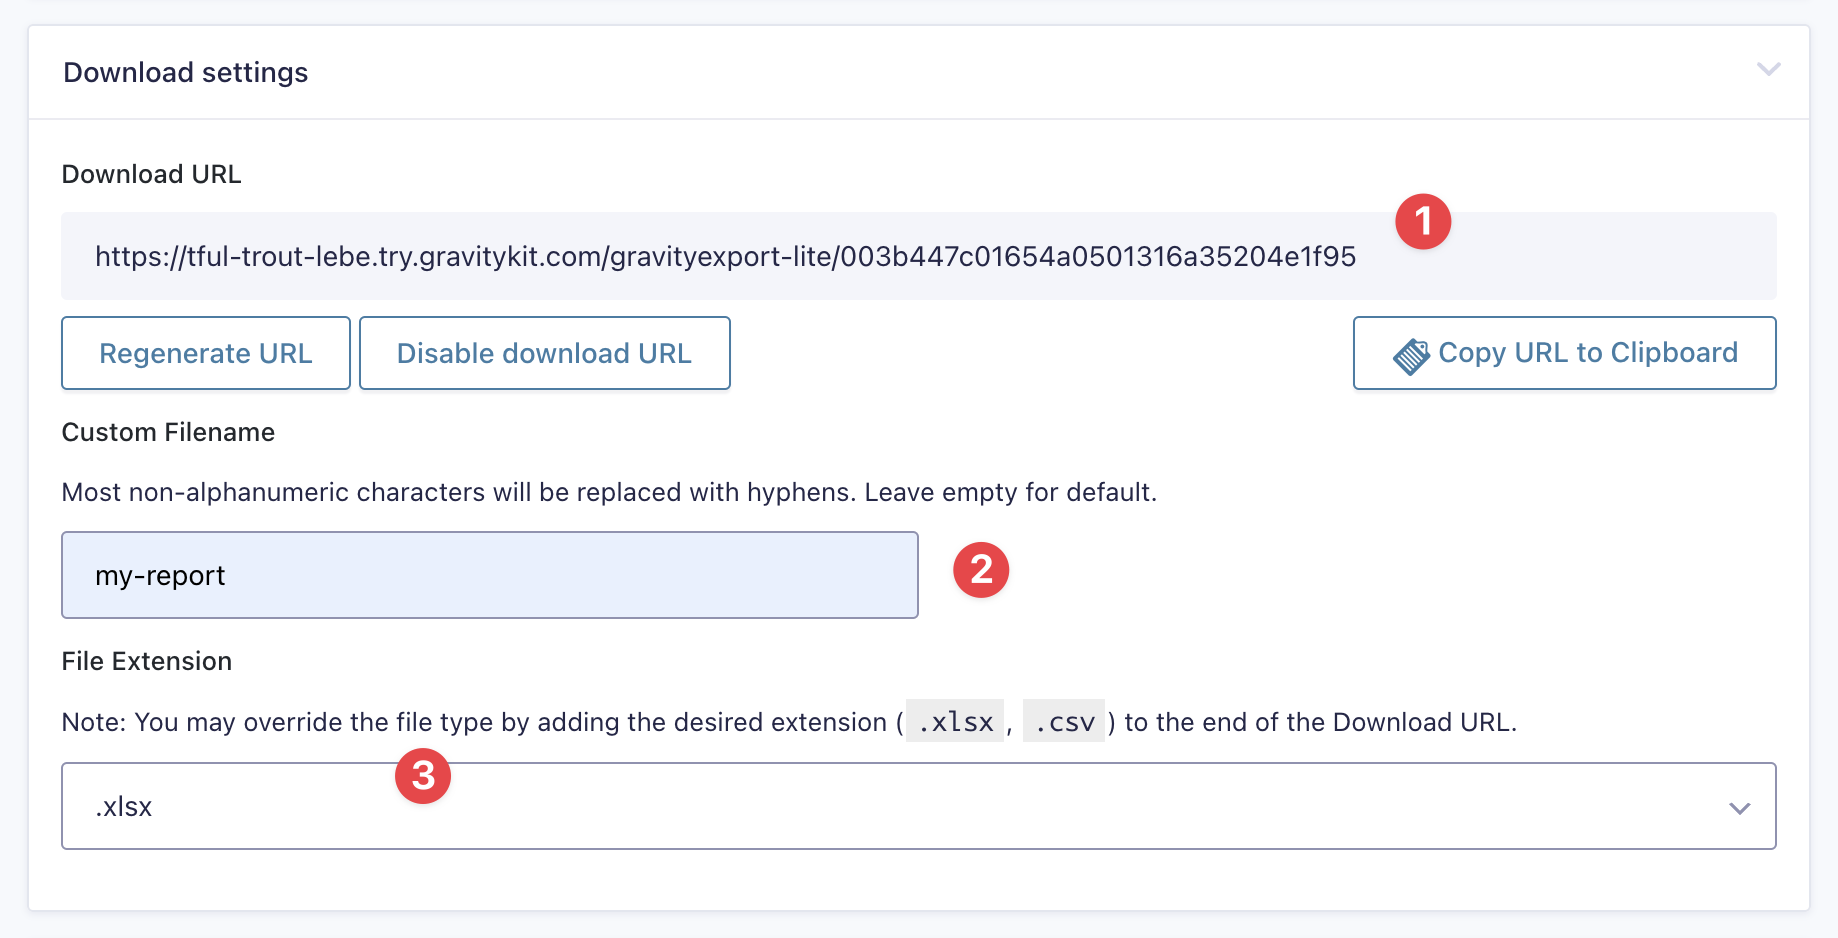
- Download URL: This is the secure URL that anybody can use to access your report. Simply paste the URL into your browser's address bar and the report will download automatically.
- Custom Filename: Input a filename for your report.
- File Extension: Choose the file format of the report (either CSV or Excel).
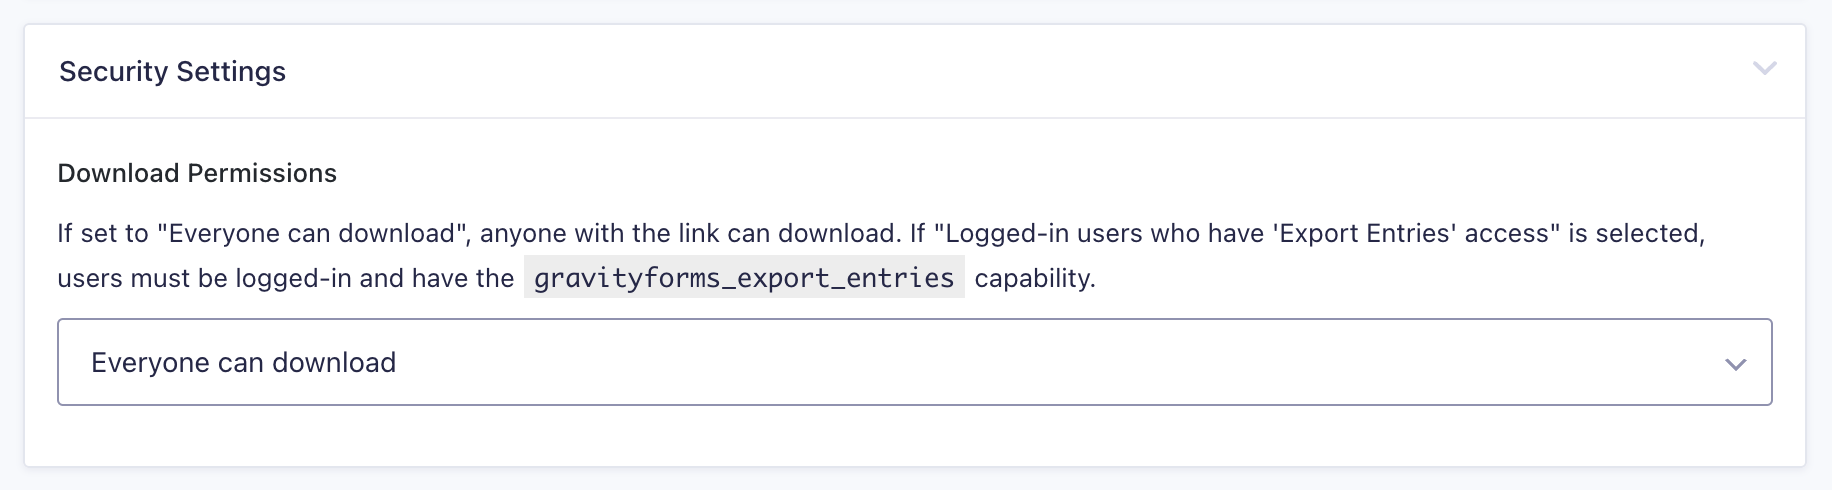
Next, you have the option to modify the download permissions. You can either set your report so that it's available for anyone who has the link to download, or you can restrict download access to logged-in users only.
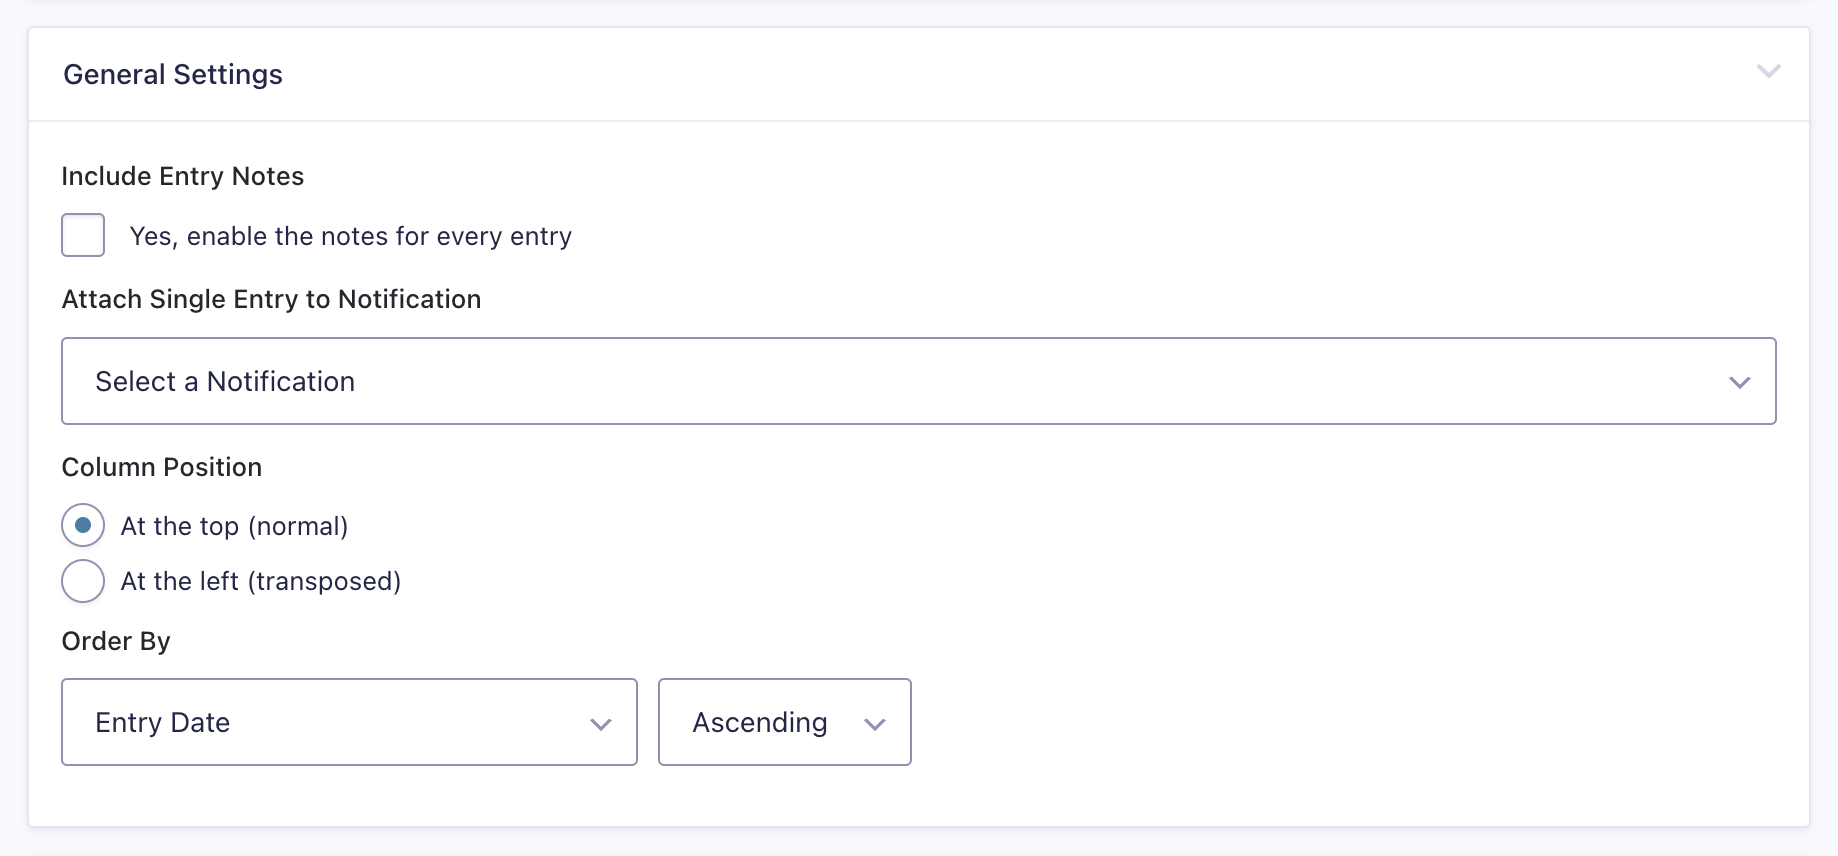
 After this, scroll down to the "General Settings". Here you have the option to include entry notes in your report, attach single form submissions to an existing Gravity Forms email notification, modify column positions, and change the field ordering.
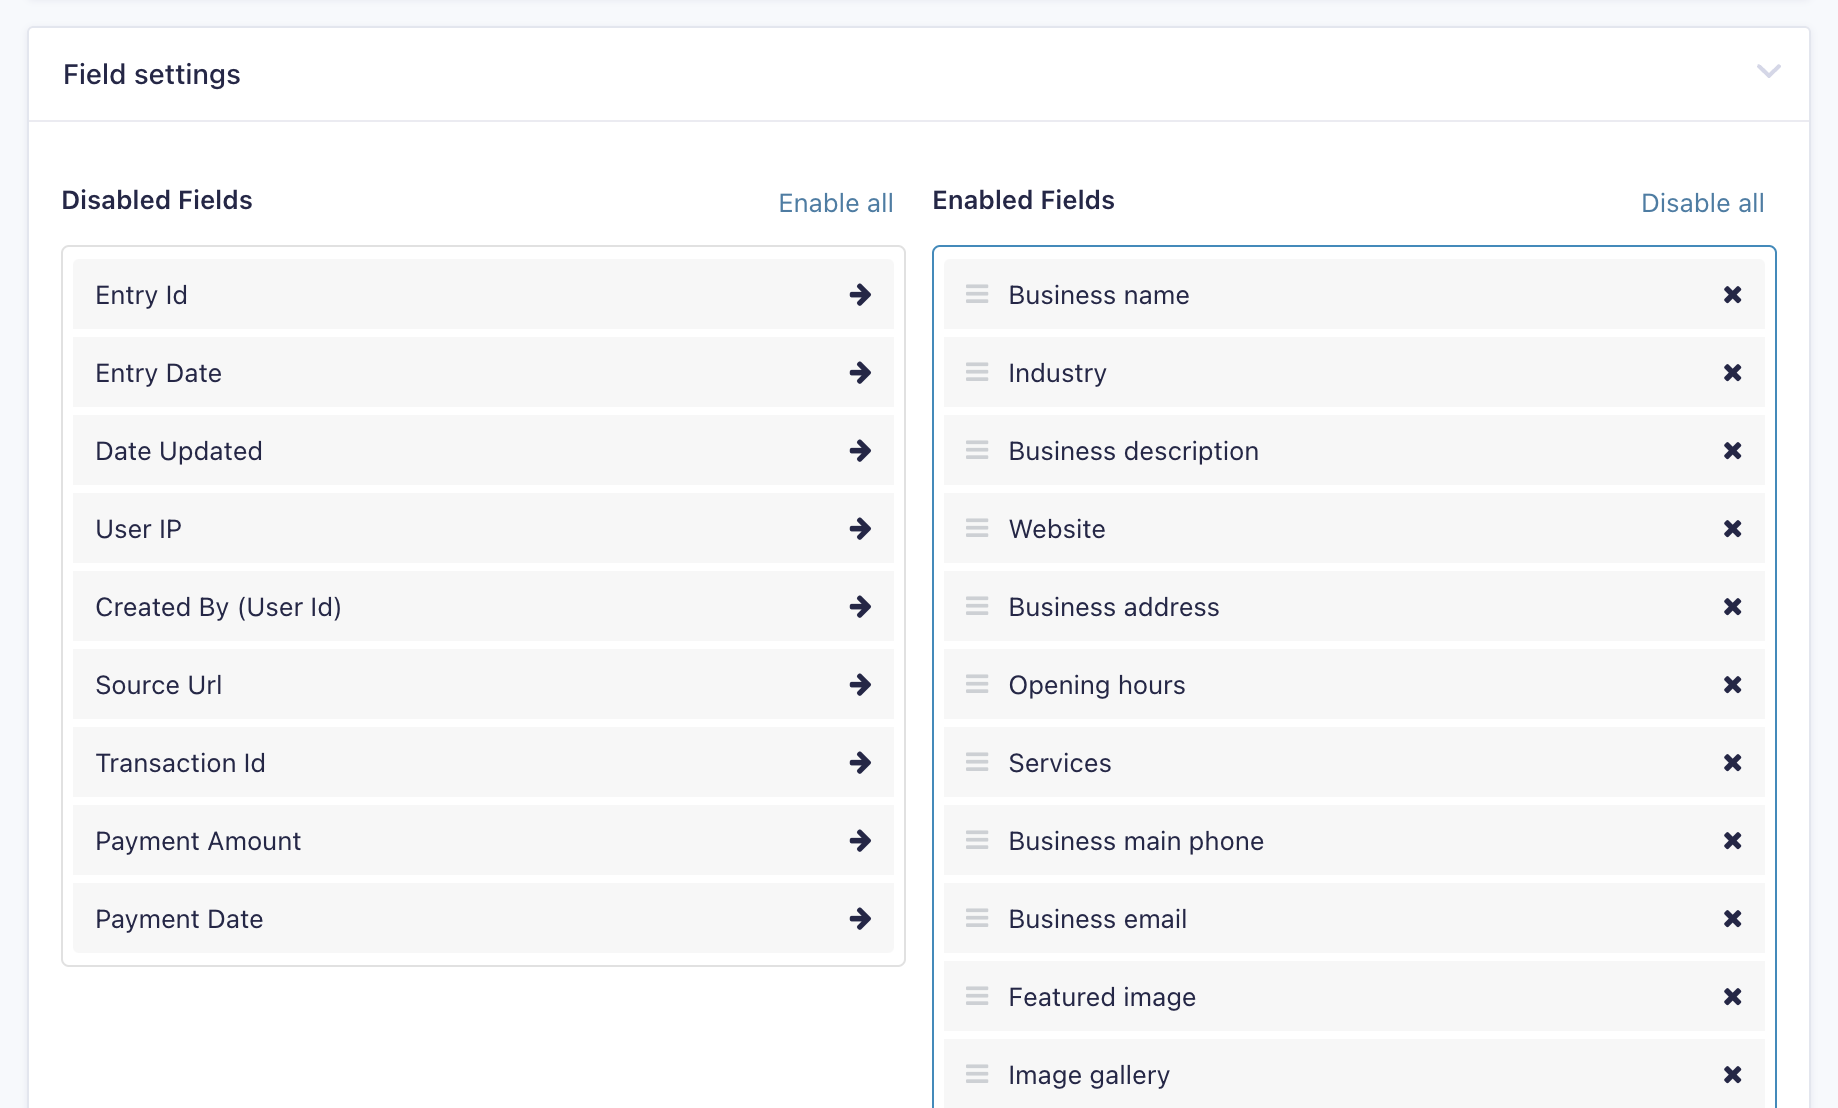
 Finally, you can select which fields to include in your report by disabling fields that you don't want to show up (simply click the "x" icon to disable and the arrow to re-enable).
 That's it!