_1@2x.png)
Installing, Activating, and Updating GravityKit Plugins
This article will show you how to install, activate and update GravityKit plugins and extensions using our new settings framework.
To manage GravityKit products on your website, hover over the GravityKit menu in your WordPress dashboard and click on the Manage Your Kit page.
At the top, you will see an overview of your active licenses. Learn more about license management.
Product Management
Scroll down past the licenses; you’ll see an overview of all GravityKit plugins, extensions, and layouts.

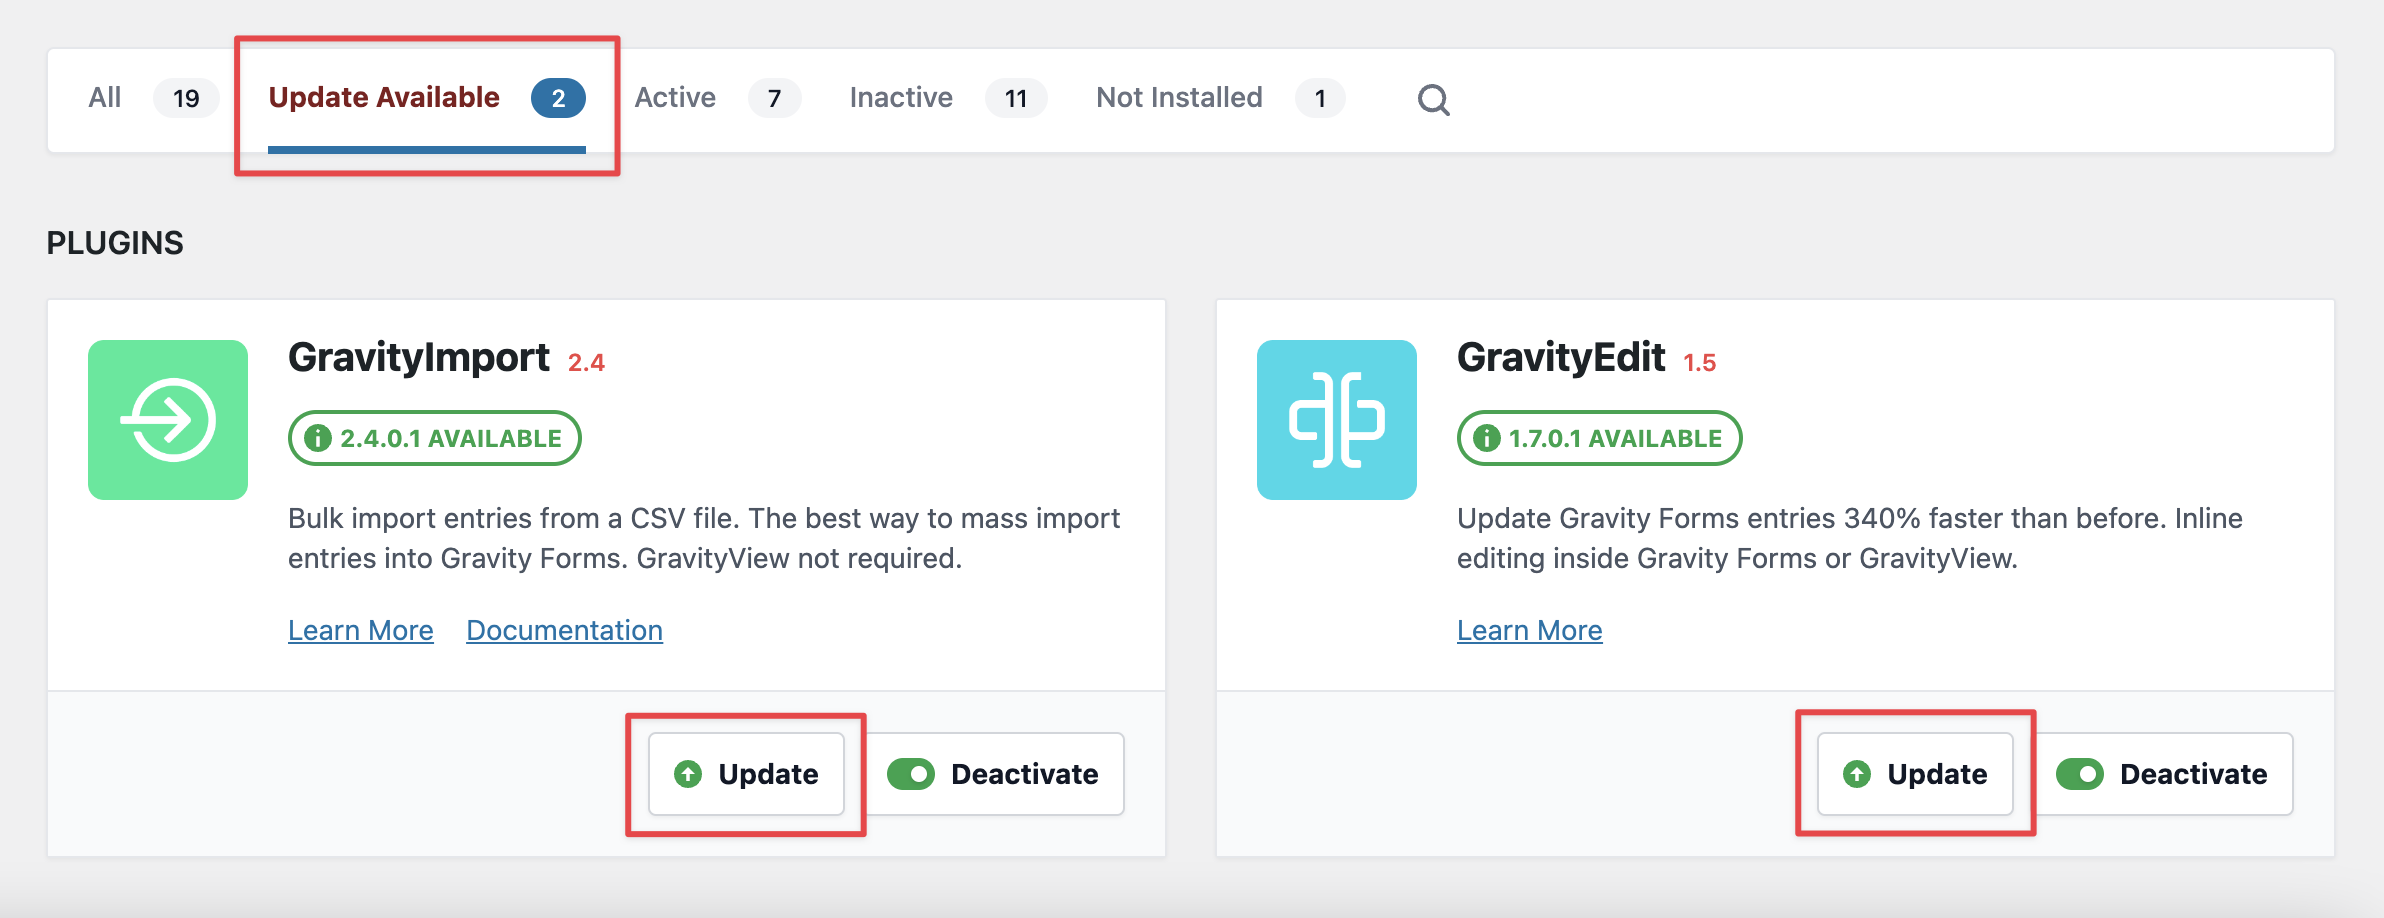
The top bar provides several filters for cycling through products based on their status on your site (i.e. whether they're active, inactive, installed, in need of an update, etc).
If you have access to a product, but it isn't installed on your website, you can install it from this screen by clicking “Install Now” (no need to go to the “Plugins” page in WordPress). Once a product is installed, you can activate or deactivate it using the toggle.
Updating Products
Click on "Update Available" to see all GravityKit products that require an update (or simply look for products where the version number is red). You can run the update by clicking on the Update button. It's as simple as that!
Unlicensed Products
When a product does not have a valid license, you'll see a warning message identifying that product as an unlicensed product. If you already have a license key, click "I have a license key" to enter it and activate it. If you don't have a valid license key, click Buy Now to get one. We cannot provide updates or support for unlicensed products.
