Adding a Link to the Stripe Customer Portal in GravityView
If you use the Gravity Forms Stripe add-on to take payments on your site, you can add a link to the Stripe Customer Portal inside your Views. Clicking on the link will allow users to view their billing history and manage their subscriptions.
If you’re new to the Gravity Forms Stripe Add-On, read this helpful guide to get set up.
Configure Your Stripe Customer Portal
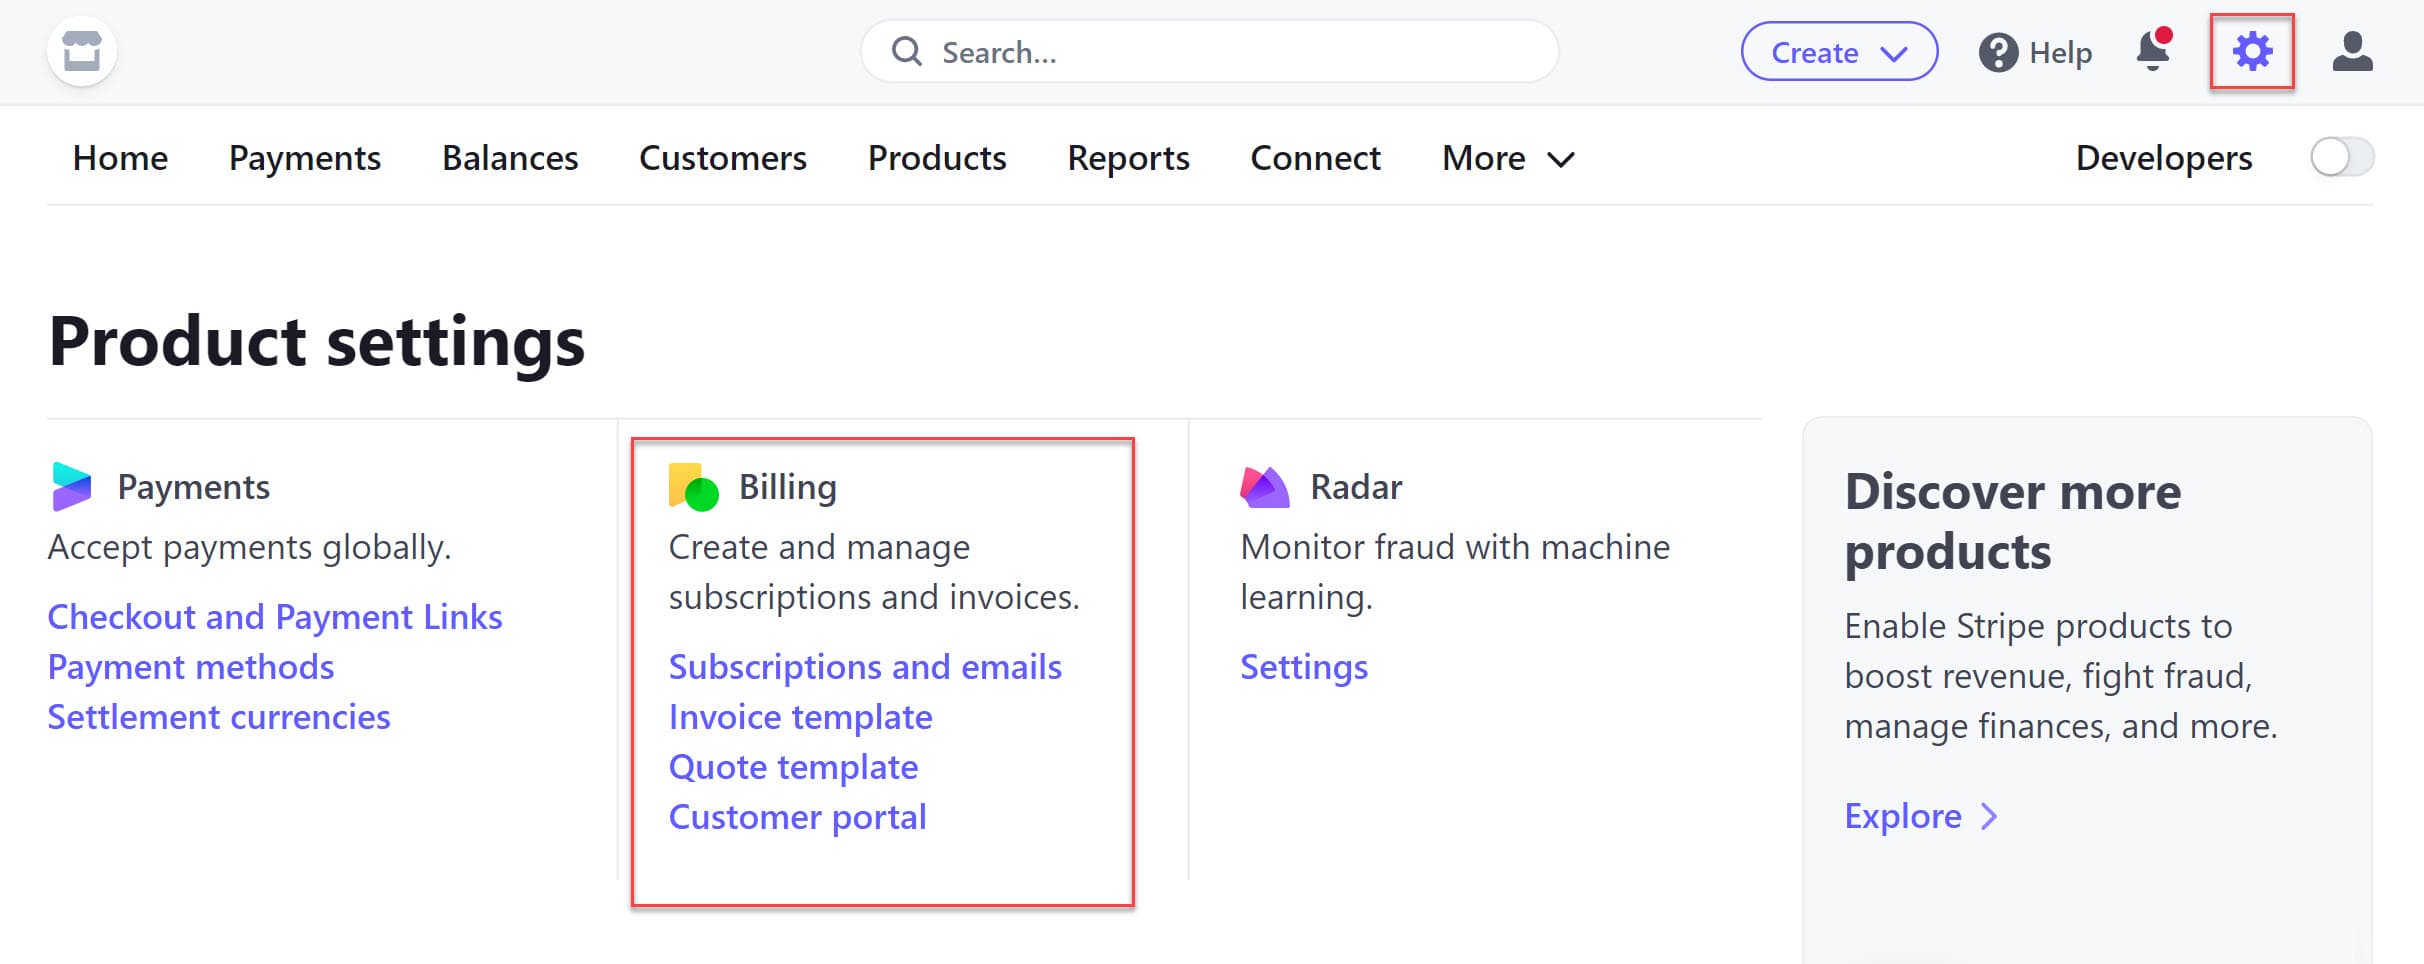
Start by logging in to your Stripe account and configuring the Stripe Customer Portal. To do this, open the Settings page by clicking on the gear icon in the top right. Next, click on Billing under Product settings.

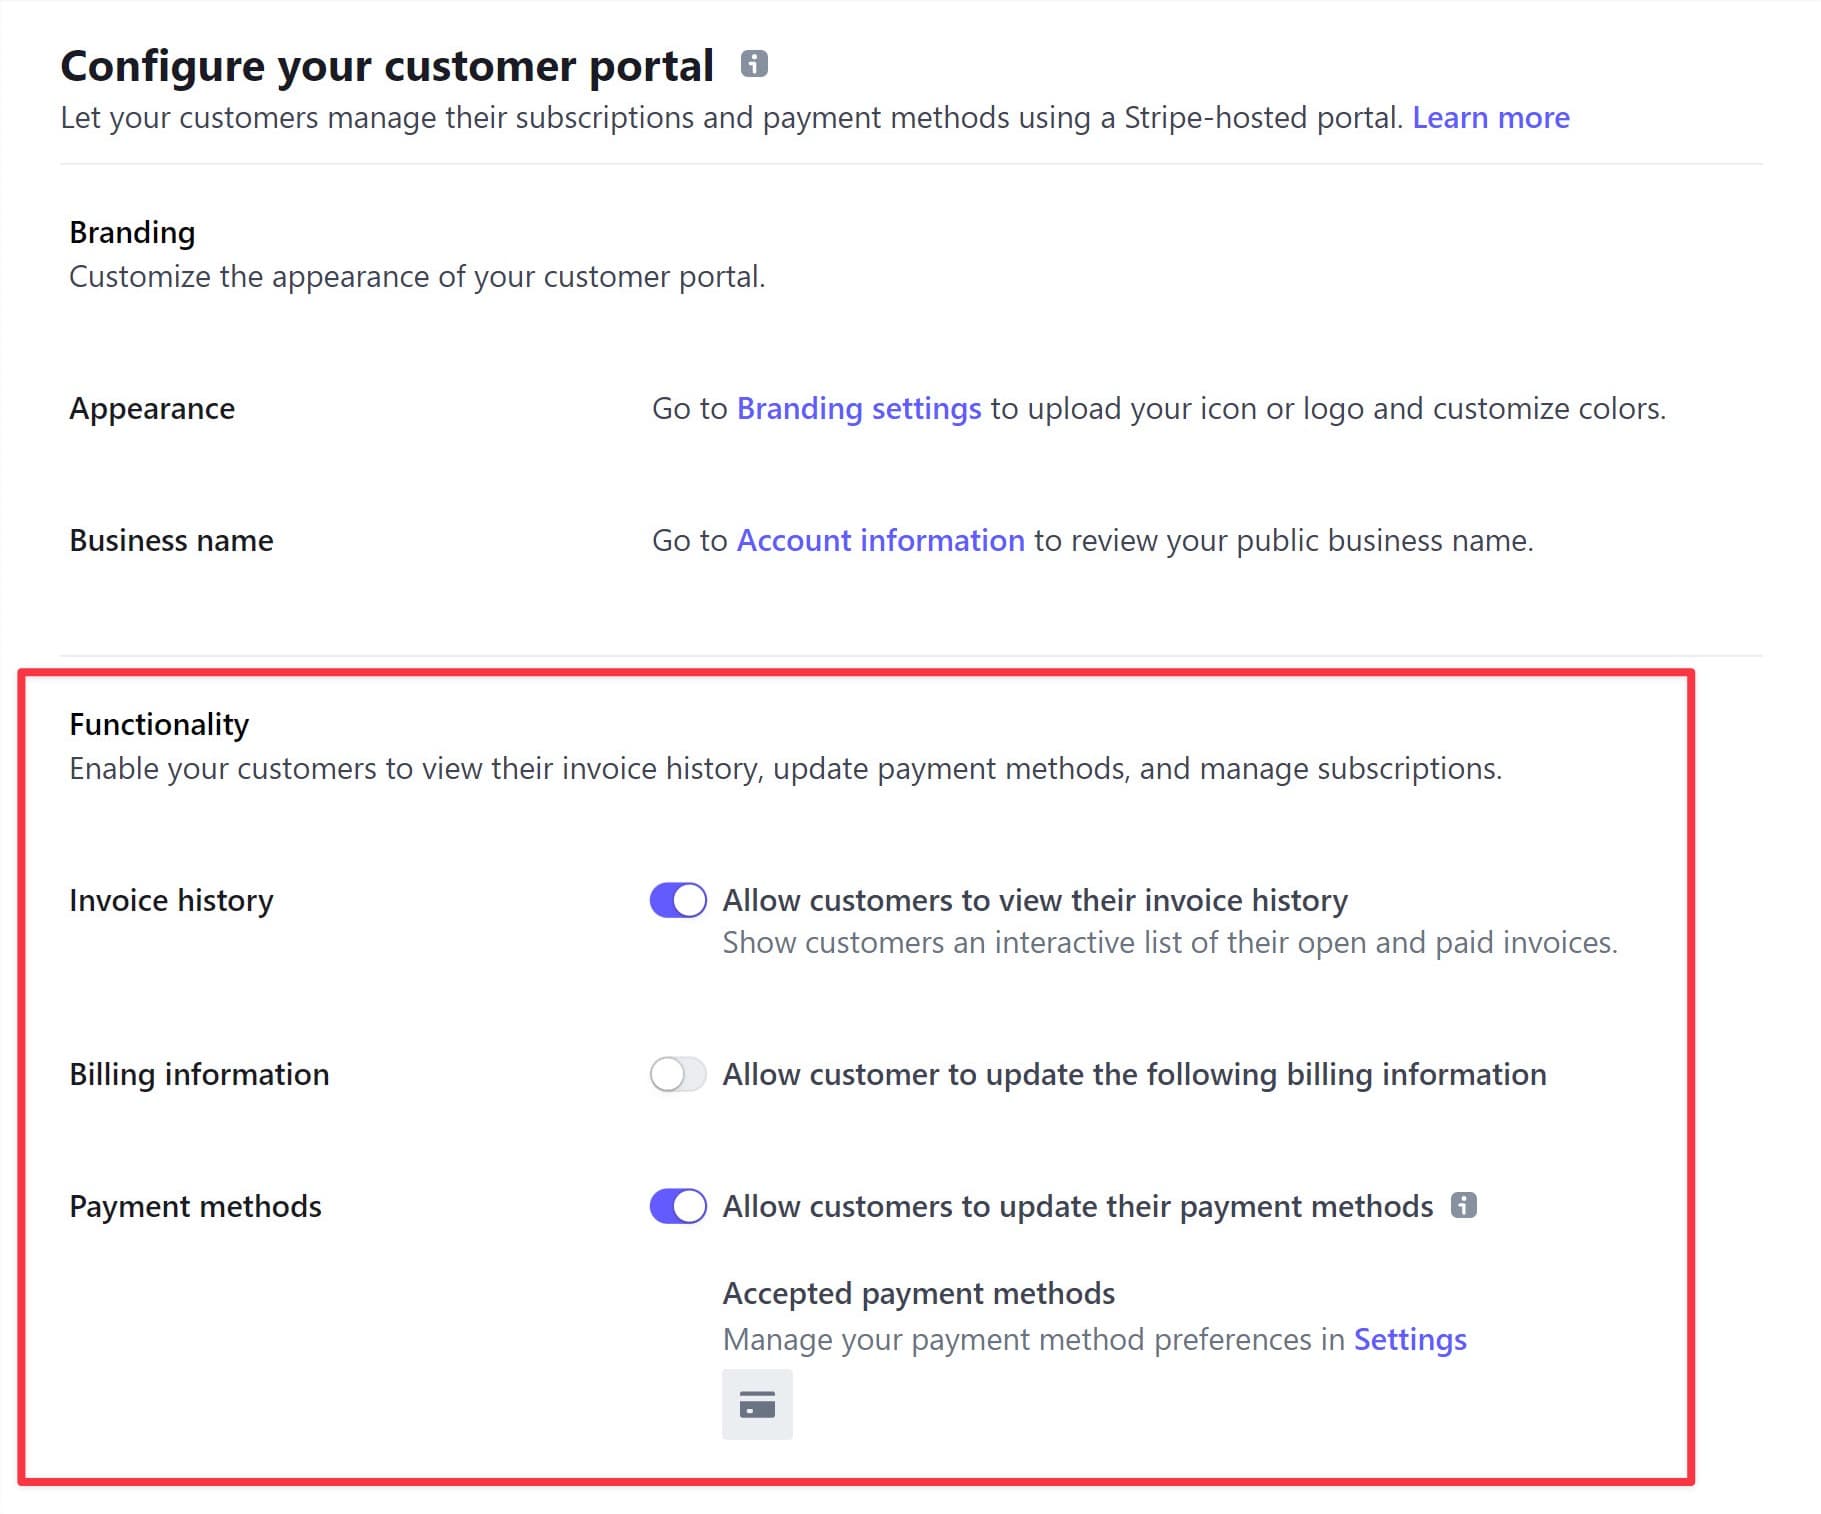
Now you can configure your customer portal by choosing which functions to provide your customers.

When you’re done, save your changes.
Add the Stripe Customer Portal Shortcode to Your View
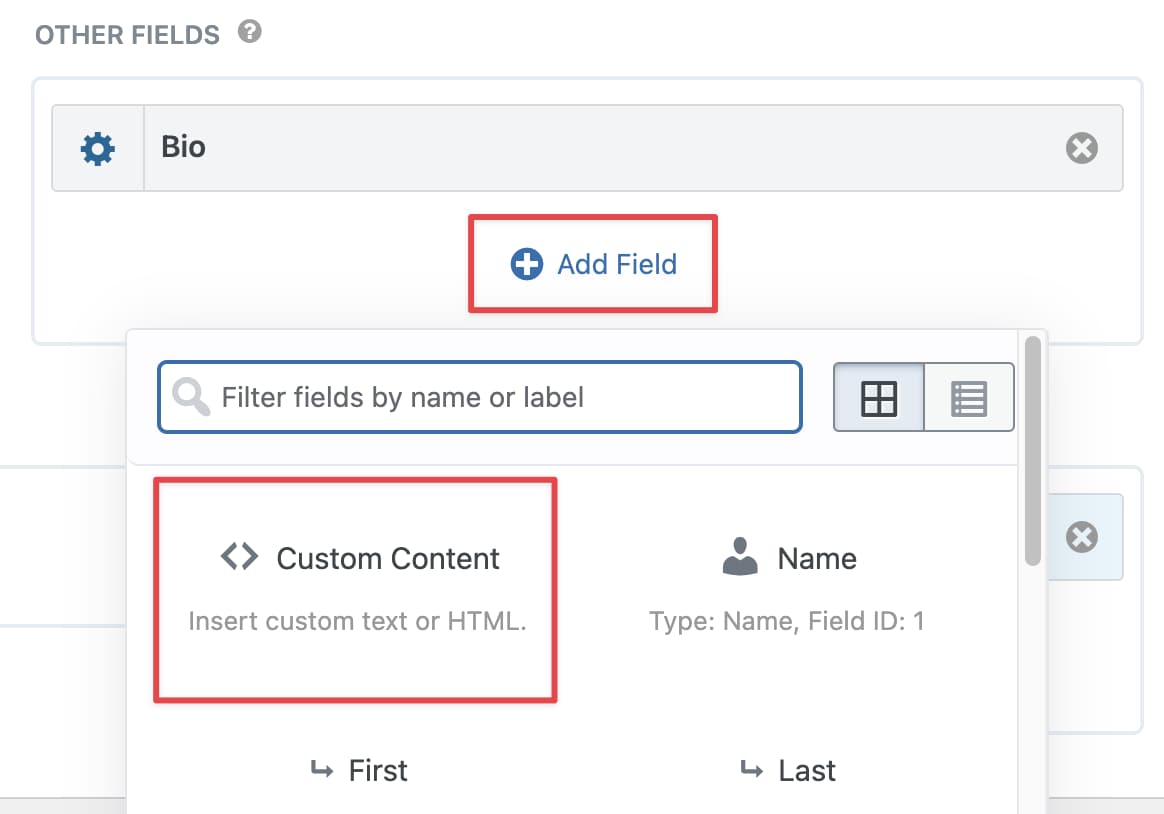
The next step is to add the Gravity Forms Stripe Customer Portal shortcode to your View layout. Start by clicking on the Add Field button and add a new Custom Content field to your View.
 Now paste the following shortcode inside the Custom Content text editor:
[gravityforms action="stripe_customer_portal_link"]

When you're done, update your View!
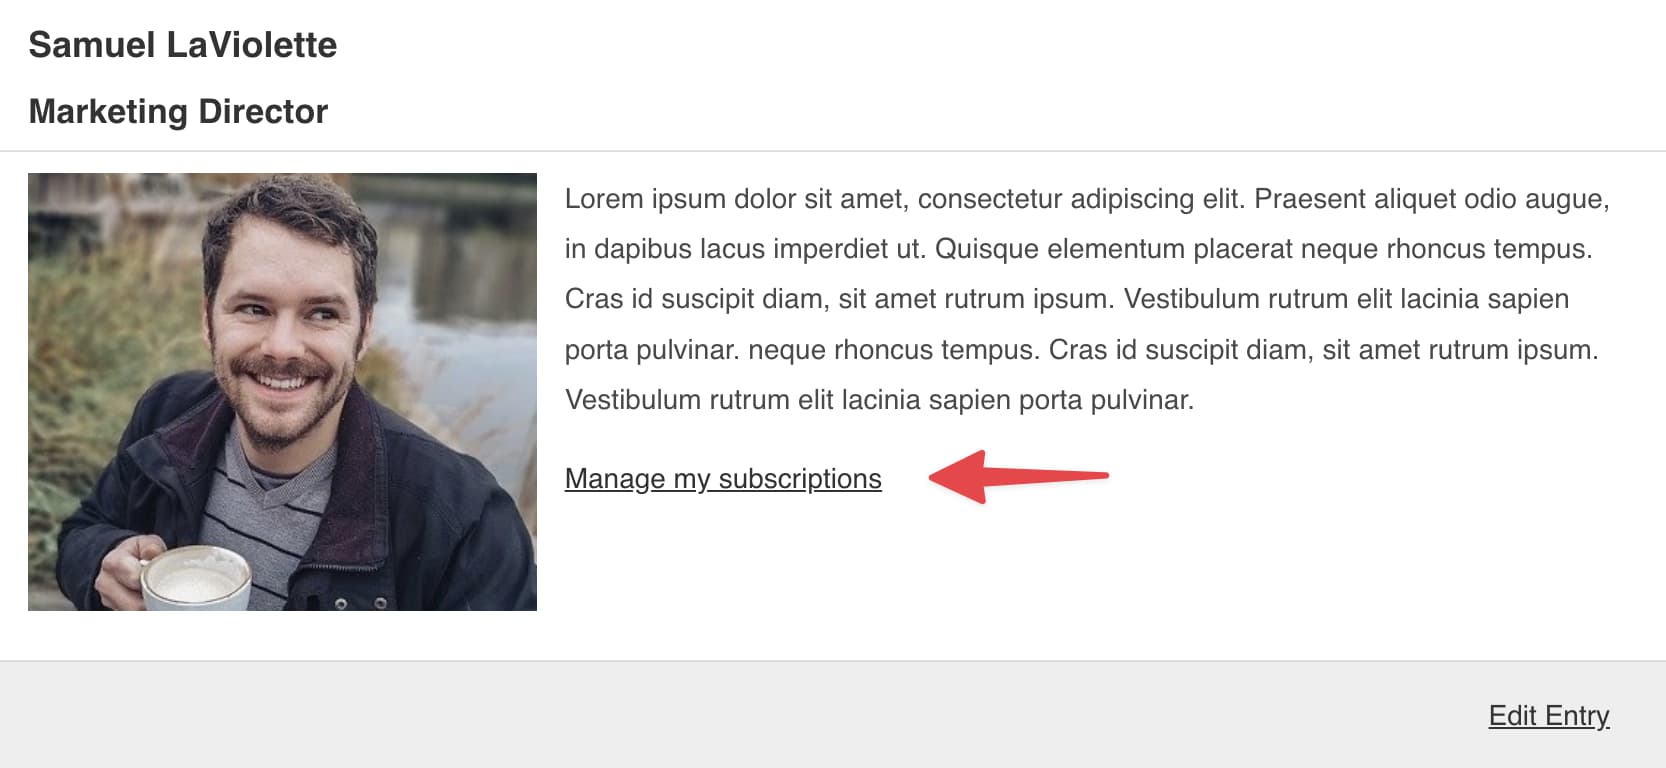
When customers click on the link, they can see their billing history and manage their subscriptions via the Stripe Customer Portal.

For more information about the Gravity Forms Stripe Customer Portal shortcode, check out this article on the Gravity Forms docs site.
_1@2x.png)