_1@2x.png)
Installing standalone plugins
This article will explain how to install standalone plugins purchased without a GravityKit Core or All Access license.
1. Download the plugin
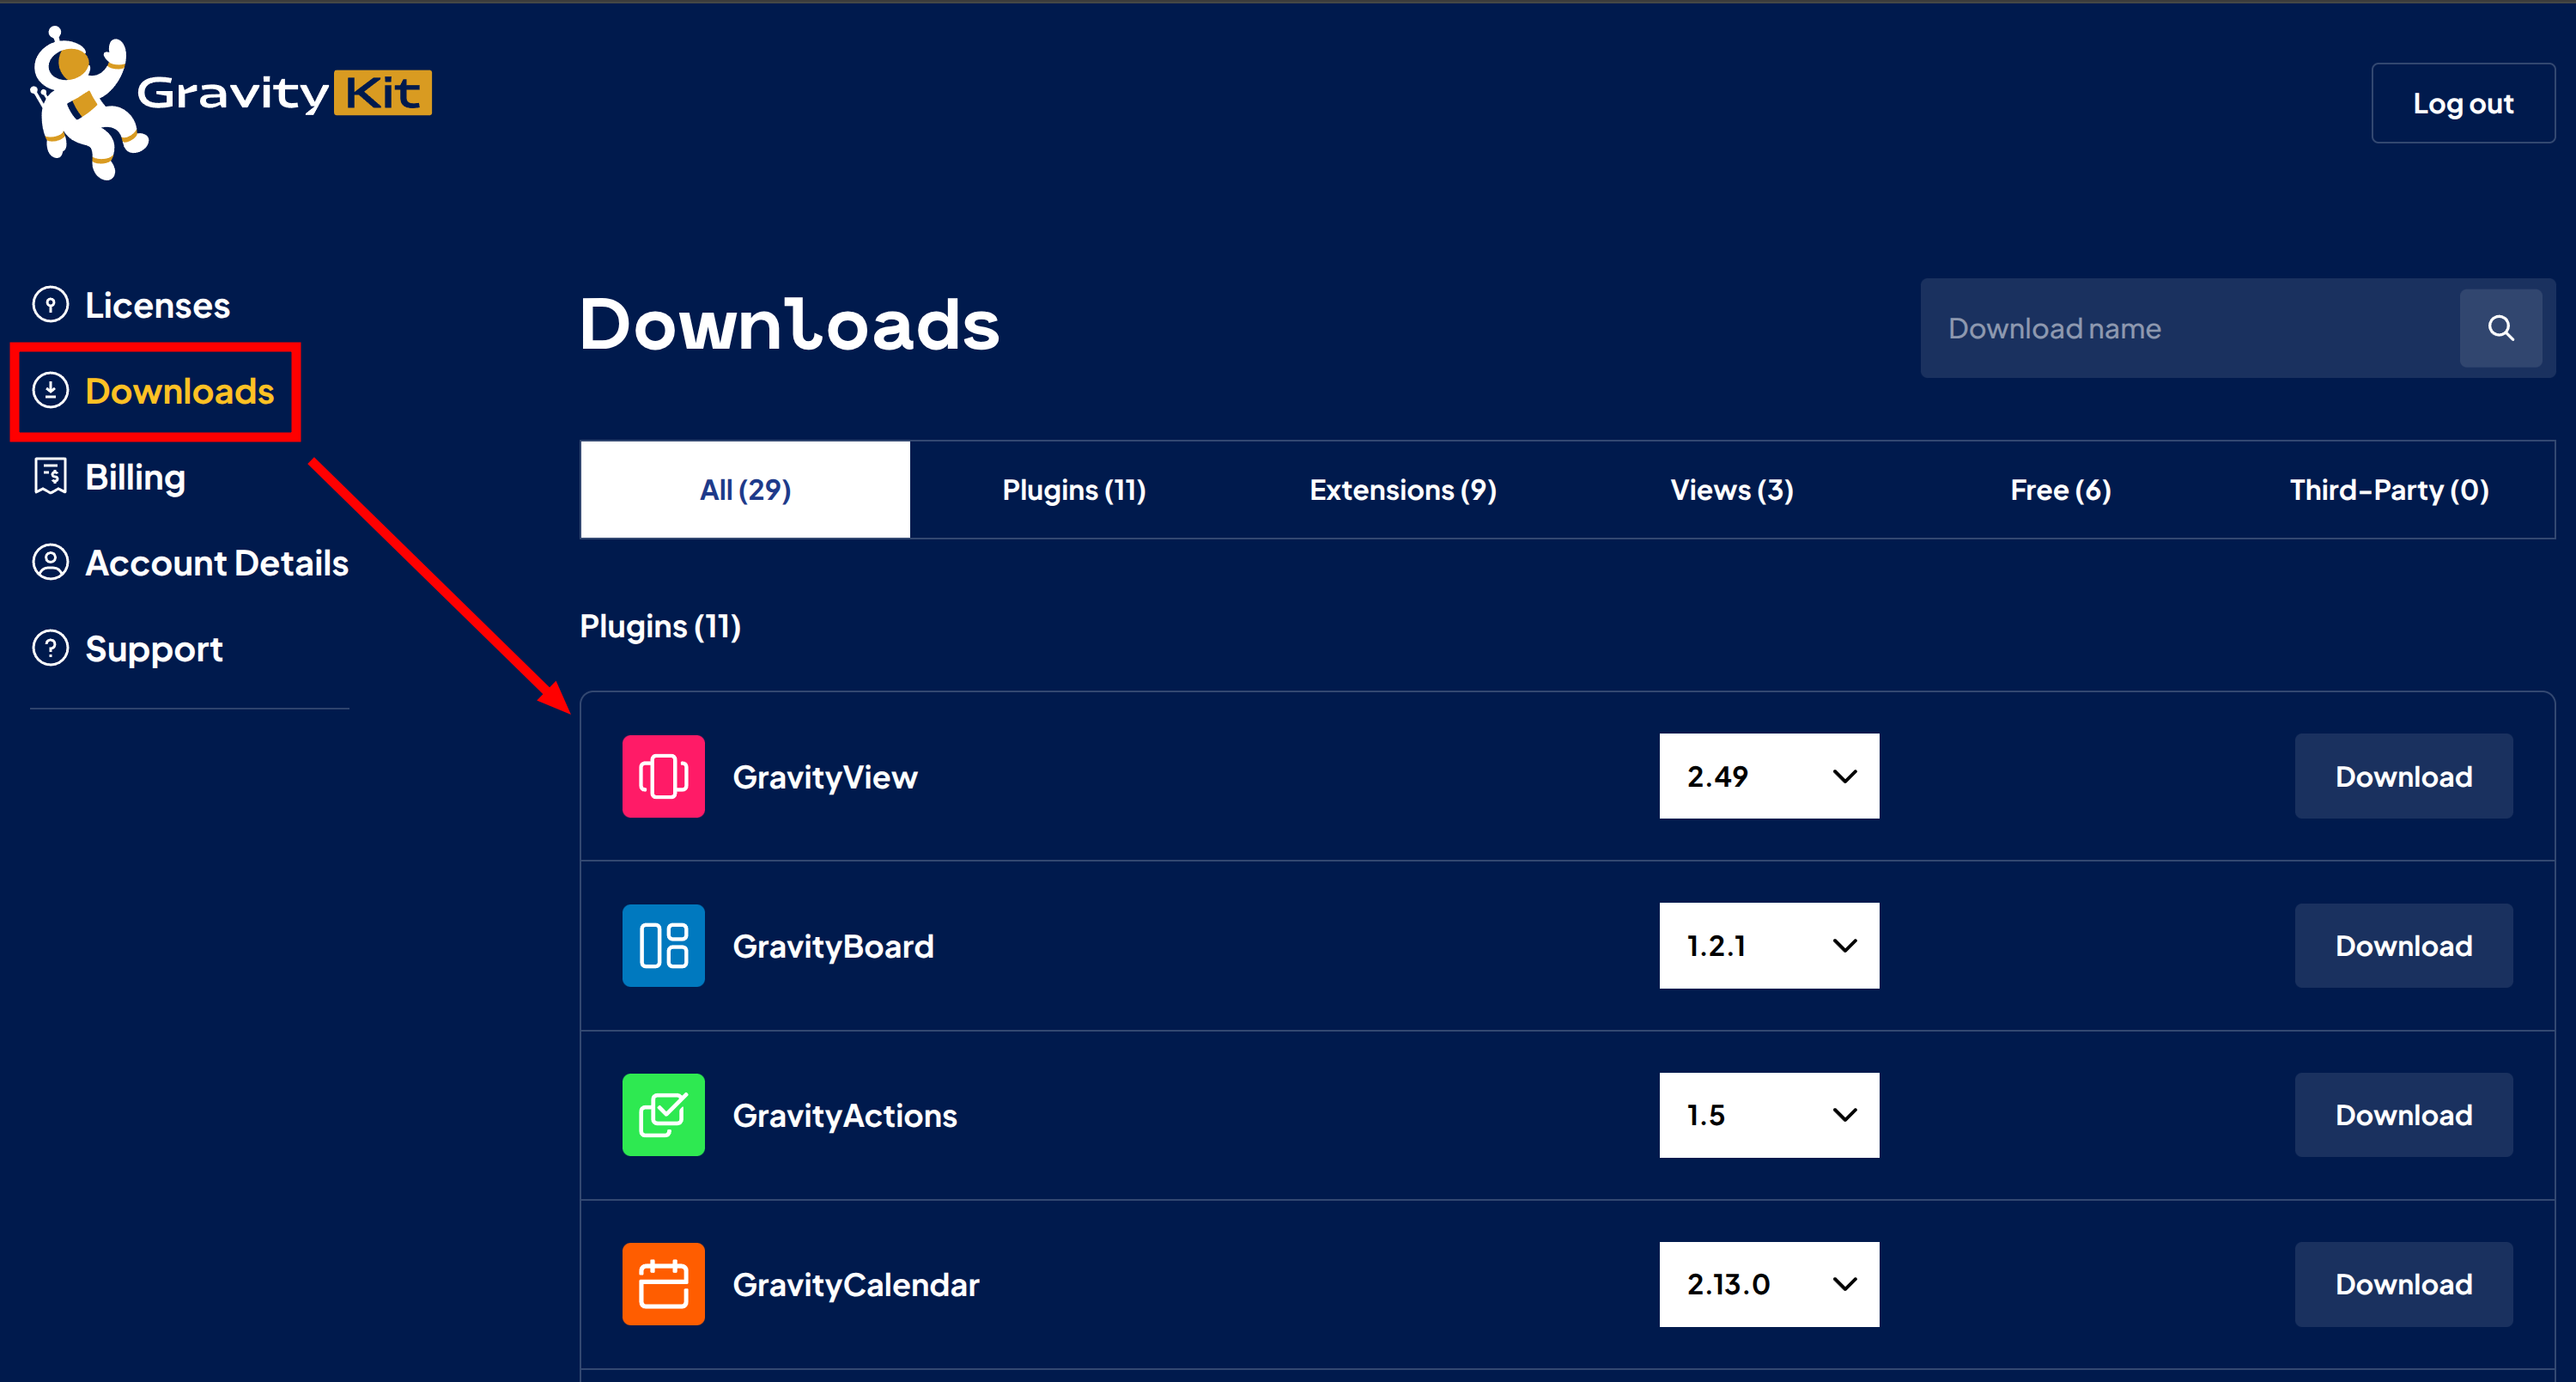
First, go to your GravityKit "Account" page. After entering your login details, you'll be taken to your account page. Click on the "Downloads" link.
Next, scroll down to the plugin you want to install (for example, GravityView) and click "Download Plugin" to download the latest version of the plugin as a ZIP file to your computer.
After downloading the plugin, save it somewhere where you'll remember.
🧭 Safari users
Safari automatically unzips ZIP files after downloading. WordPress requires a ZIP file to install plugins, so you will need to re-compress the folder before uploading. Right-click the downloaded plugin folder and select "Compress" to create a new ZIP file. Alternatively, you can disable this behavior in Safari by going to Safari, then Settings, then General, and unchecking "Open 'safe' files after downloading".
2. Install the plugin on your website
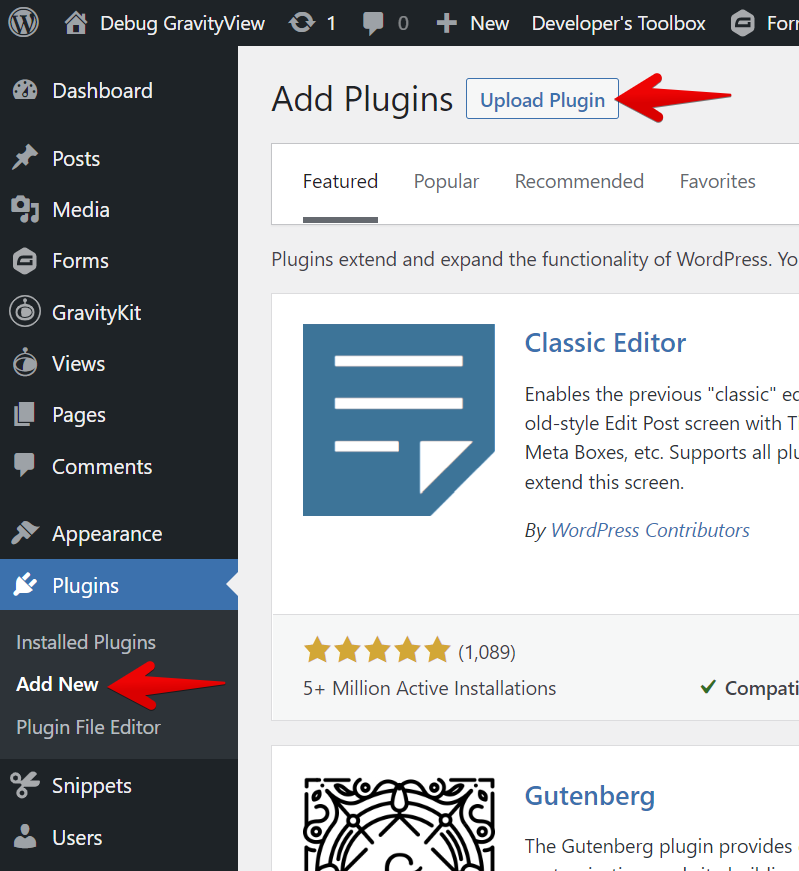
Log in to your WordPress website and click "Plugins" in the left-hand menu. Next, click "Add New Plugin" and then "Upload Plugin".
Now click on "Choose File" and select the ZIP file of the plugin you downloaded from your account as shown in step 1 above.
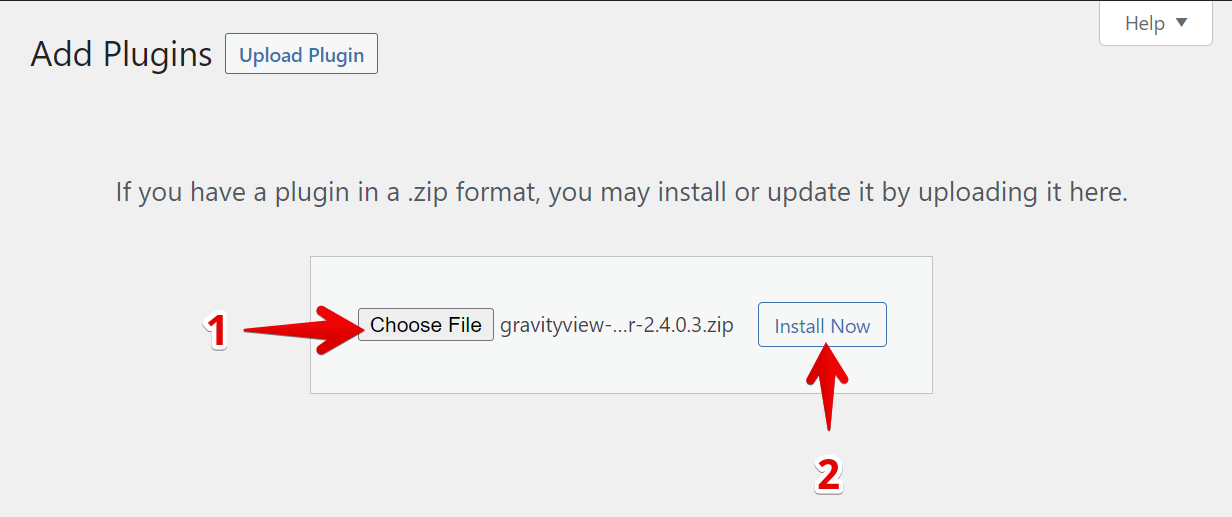
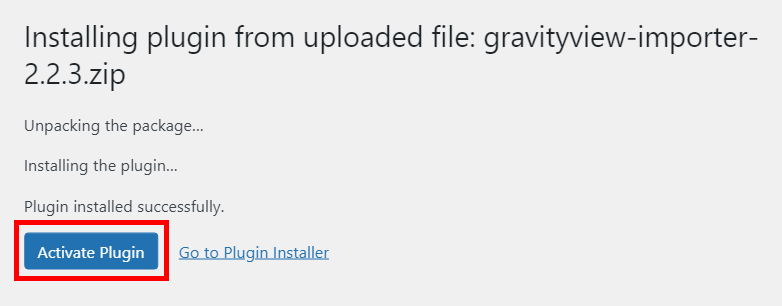
Finally, click "Install Now". After the plugin has finished installing, click "Activate Plugin".
The last step is to activate your license key to enjoy plugin updates and support. We have another article explaining this process here: Managing Your Licenses.