_1@2x.png)
Create a new form in Gravity Forms from a CSV
GravityImport allows you to create a new form when uploading your CSV file. This can save you time when you need to build a new form for a large data CSV.
The New Form functionality is also great if you want to quickly create a new Gravity Form with many radio button choices, checkboxes, drop-down options, and more. When creating a new form, GravityImport will automatically add all the values from your CSV as new form options. This is a huge time-saver.
Prefer to Watch the Video?
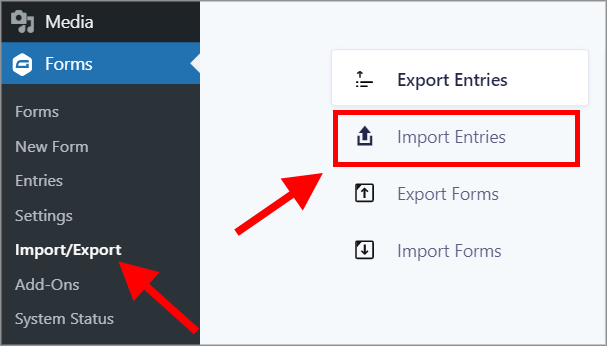
First, Hover over Forms in the left-hand menu, click on Import/Export, and then click on Import Entries.
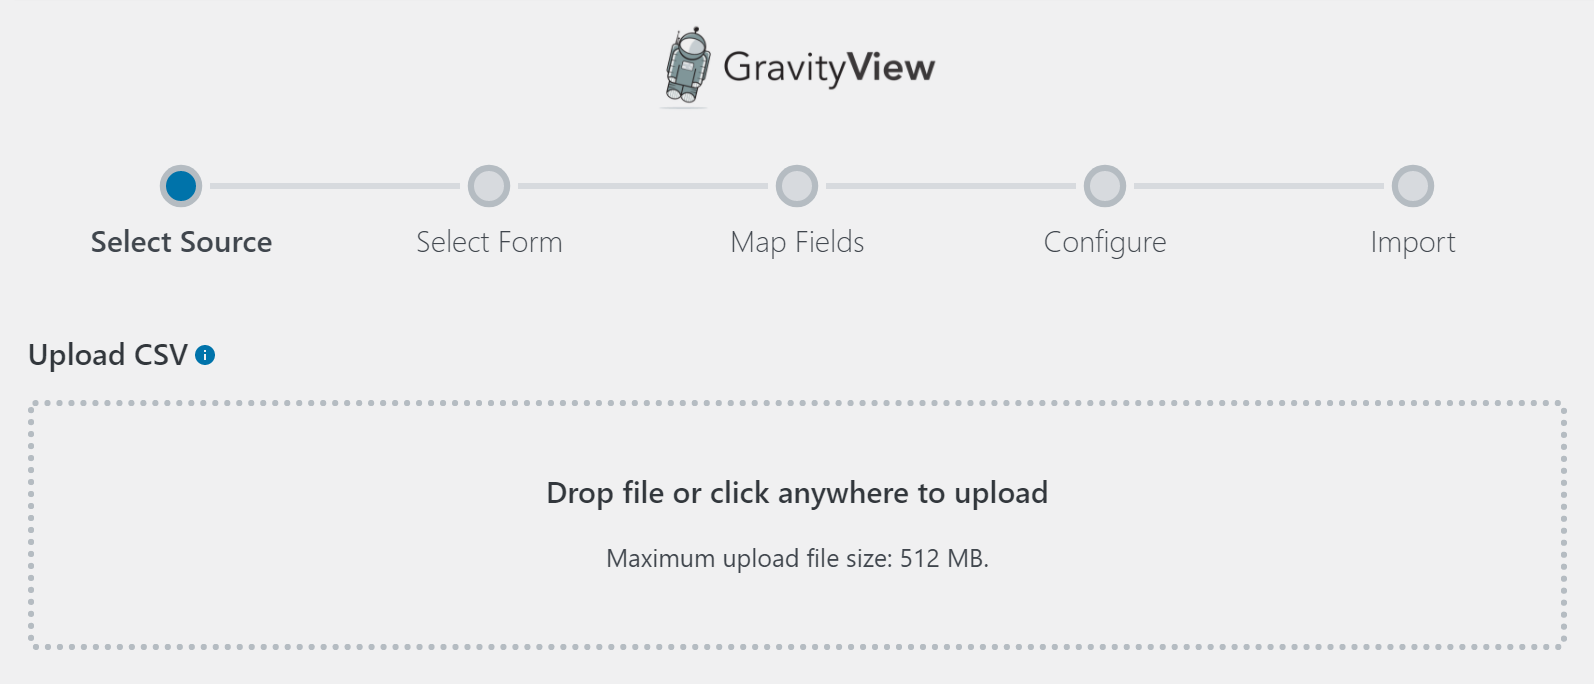
You’ll now see the GravityImport screen. You can click to upload your CSV file, or simply drag and drop it into the upload box.
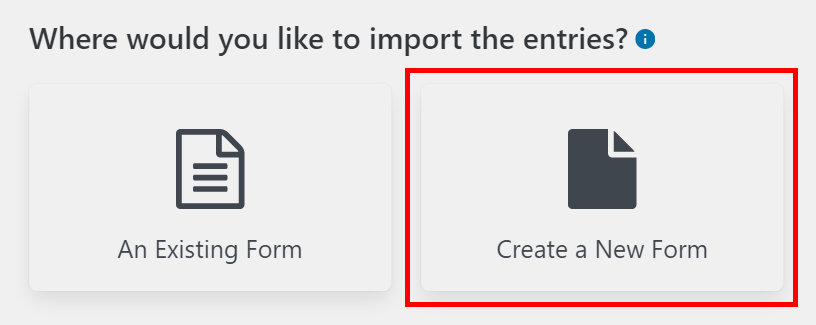
After your file has been uploaded, you have the choice to either:
- Import it to an existing form
- Create a new form
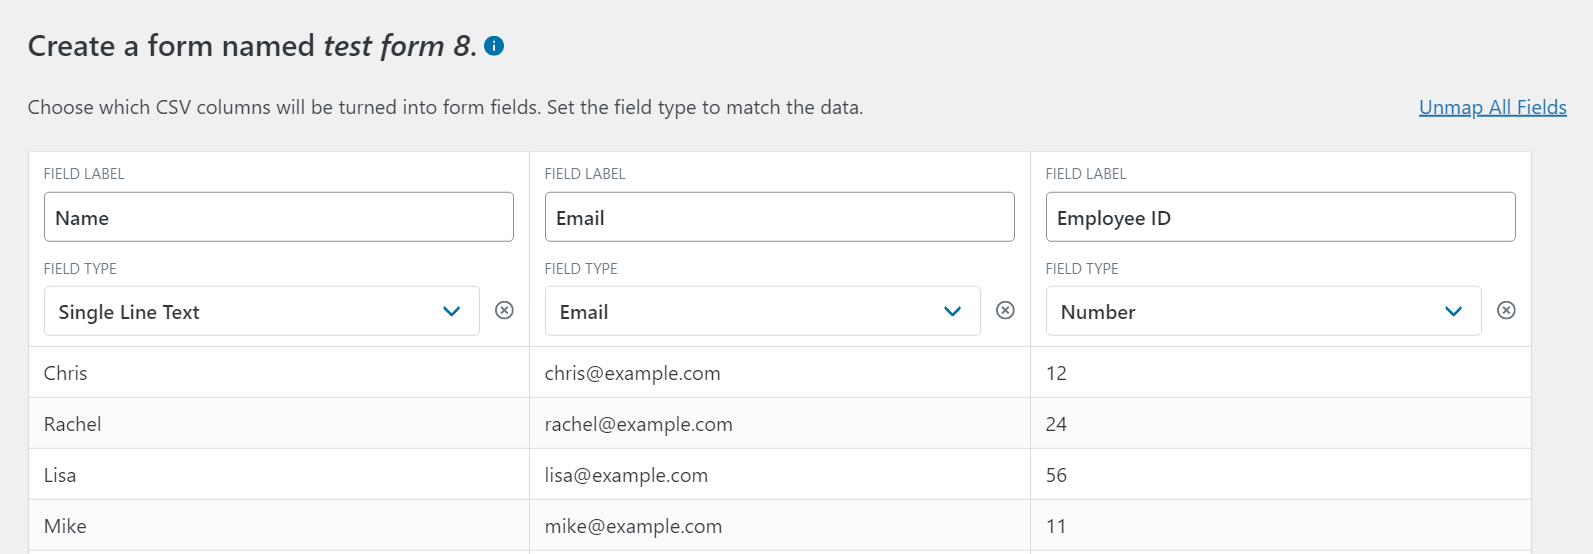
Select "Create a New Form" and give your new form a name.
The importer will automatically detect the different field types in your CSV and match them to the correct type in Gravity Forms. However, you can override this by clicking on the Field Type dropdown menu and selecting the field type manually.
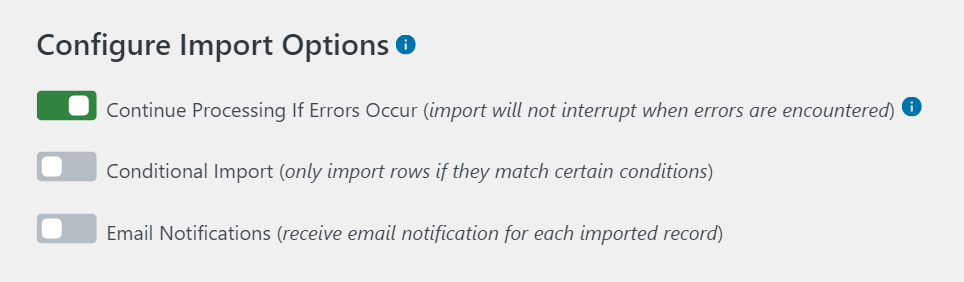
 After mapping your fields, the final step is configuring the Import Options. You can choose to continue processing if errors occur, import entries based on conditional logic, and send email notifications for each imported entry.
 When you're done, click "Create Form and Continue With Import". The importer will now create a brand new form for you in Gravity Forms and import all your entries to that same form.