_1@2x.png)
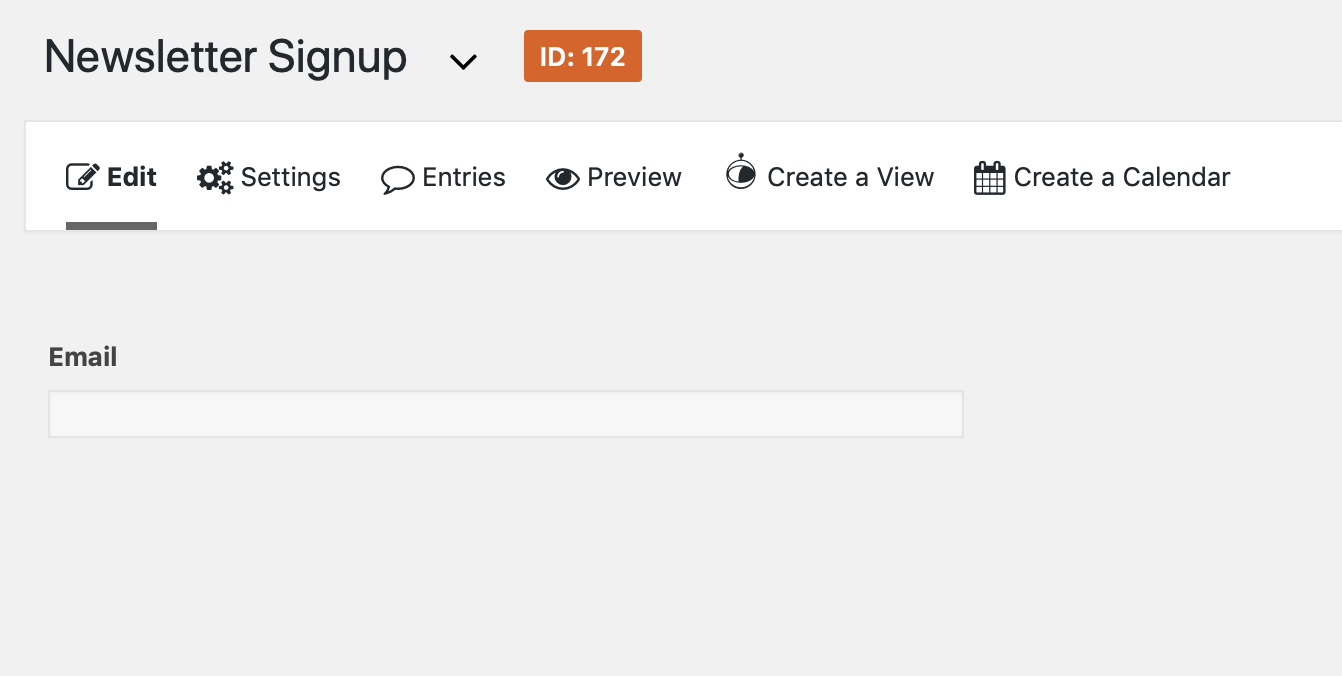
You have a form with just one field, but you want to import more information
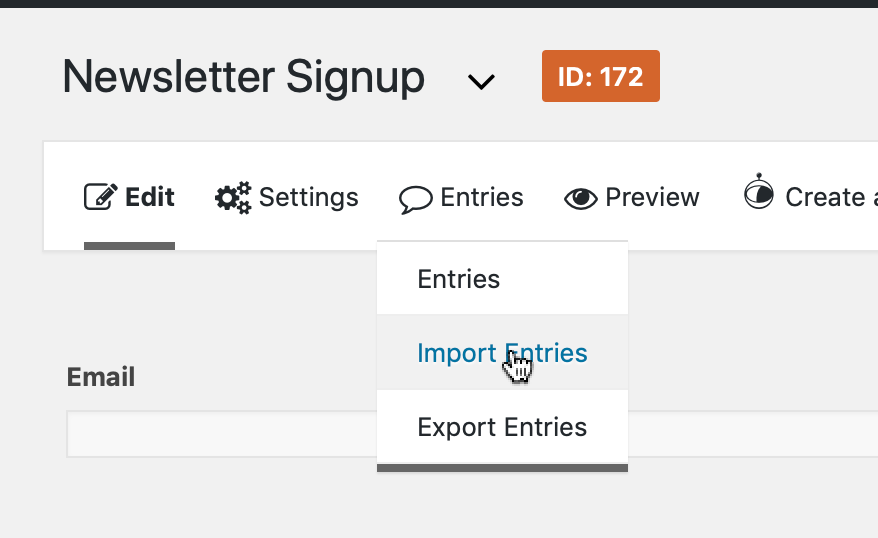
In the Gravity Forms Toolbar, hover over Entries, then click Import Entries
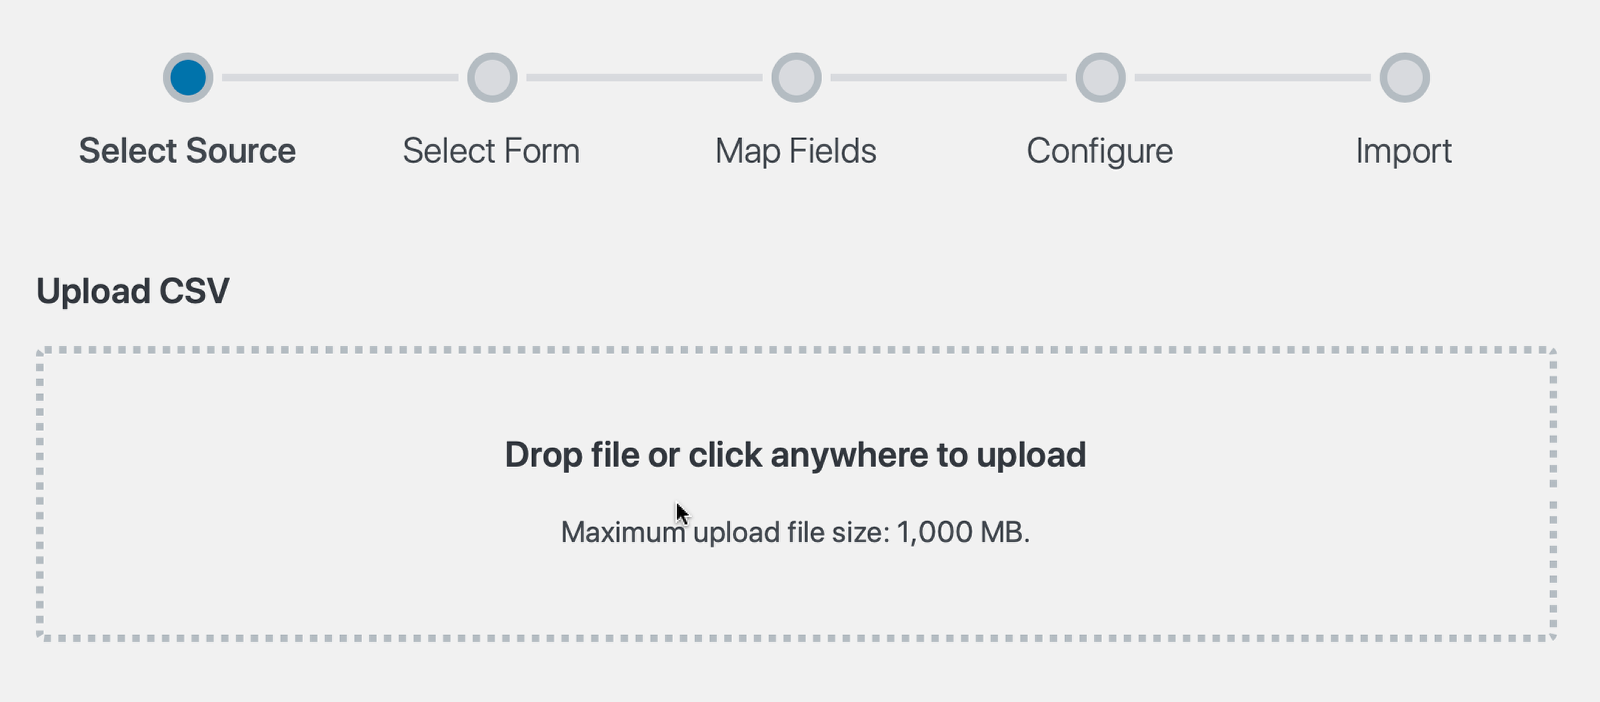
Click to upload CSV from your computer
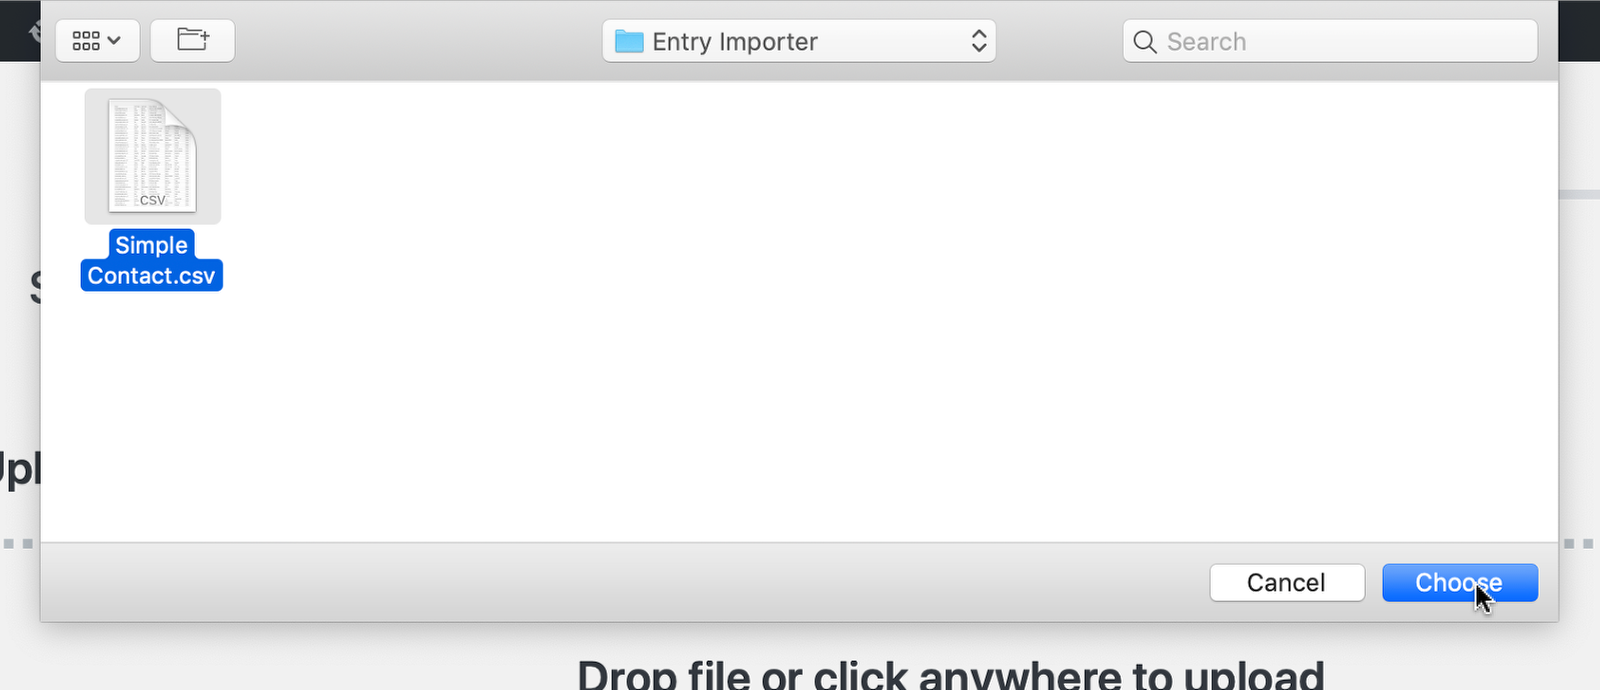
Open the file you would like to import
You will see the Map Fields screen. This is where you choose what columns in your CSV go into what fields.
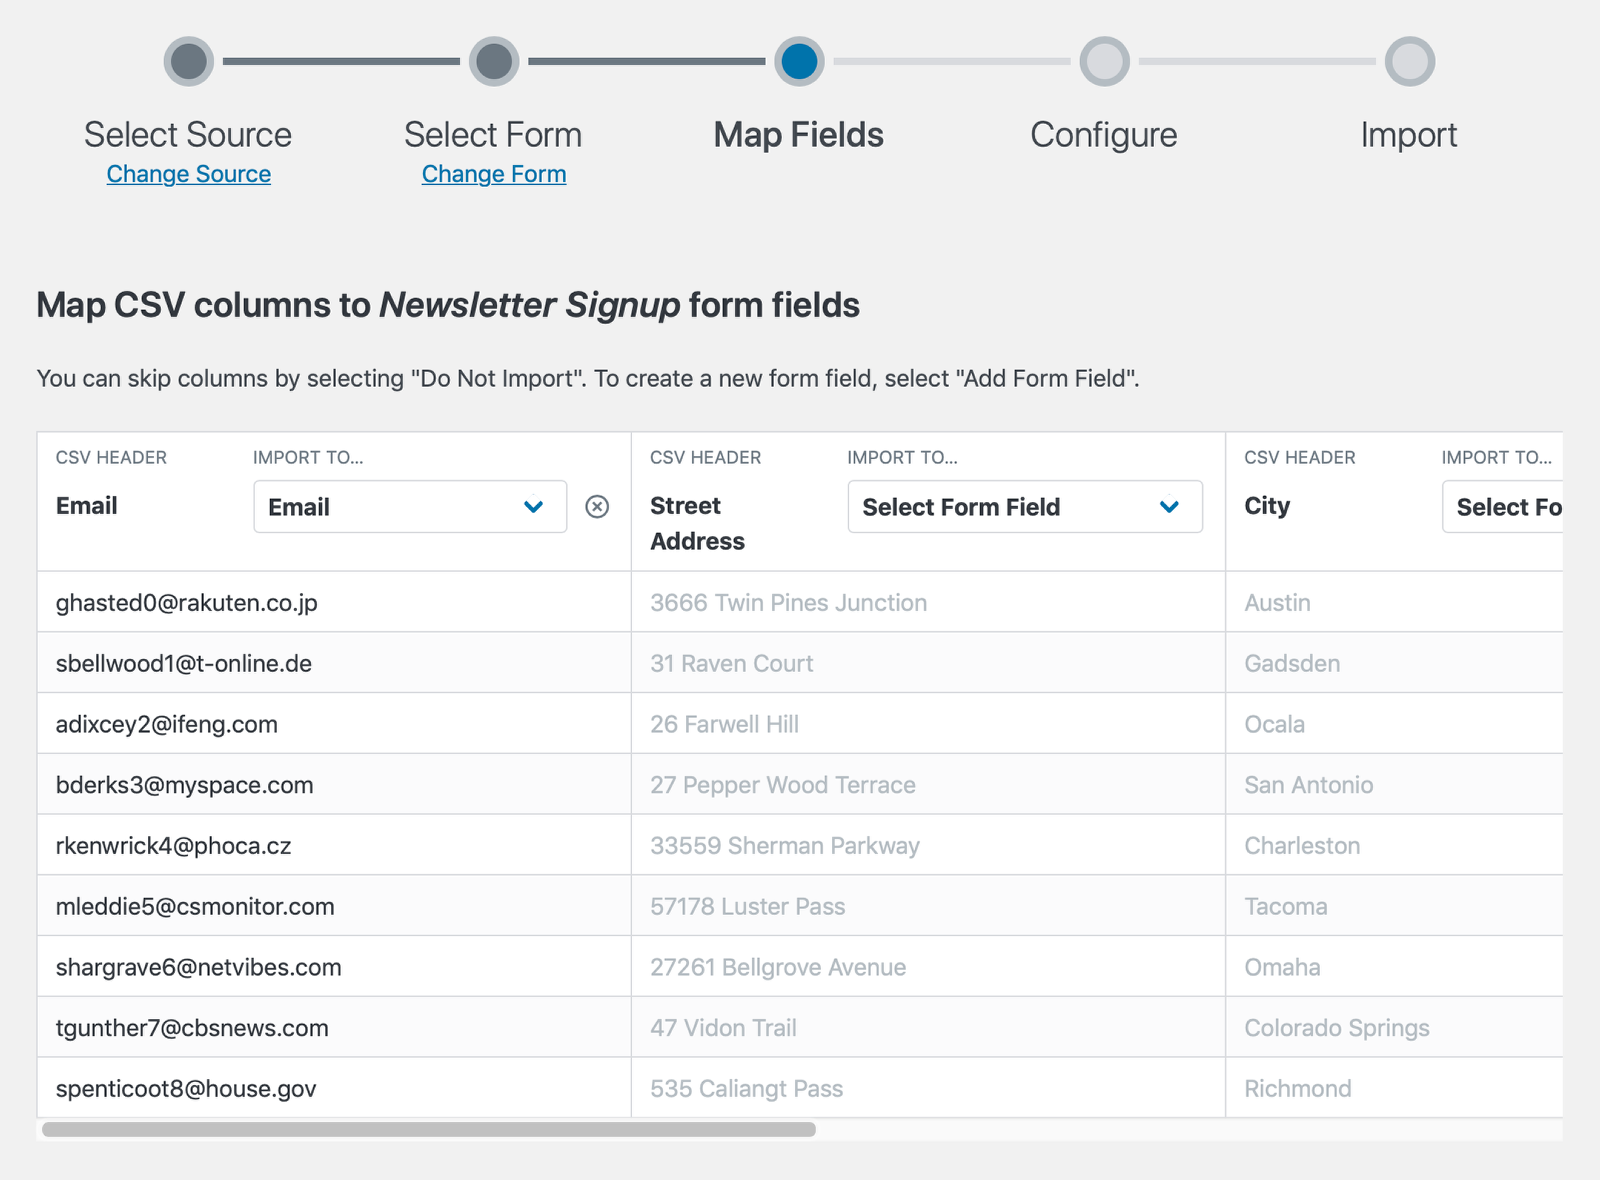
The only existing field in the form is Email. The "Import To…" dropdown already has pre-selected the Email field.
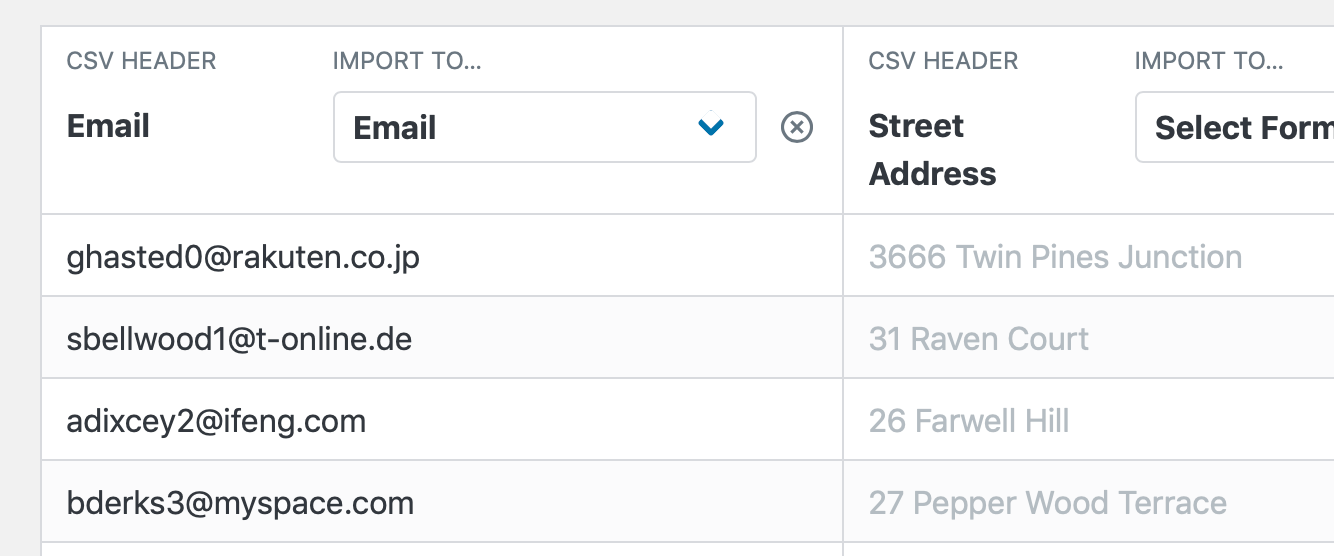
Note that the "Street Address" field to the right is light gray. This is because the field hasn't been mapped yet. It is disabled until you choose to select a field.
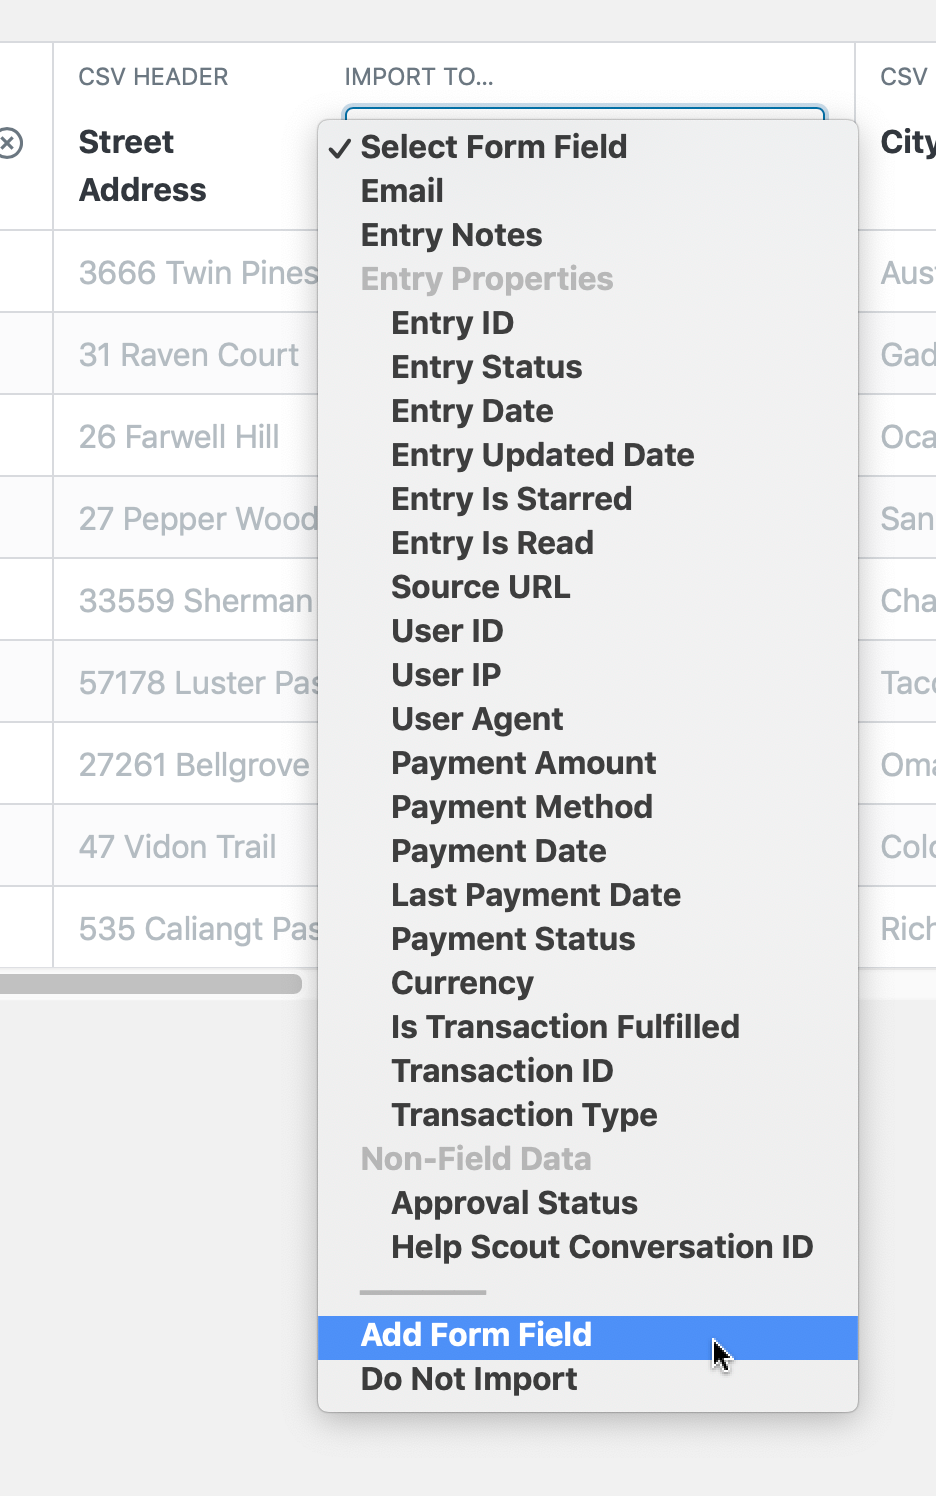
The Address field doesn't exist yet—so create it by choosing the "Import To…" dropdown and selecting "Add Form Field"
Name the Field Label the name of the parent field
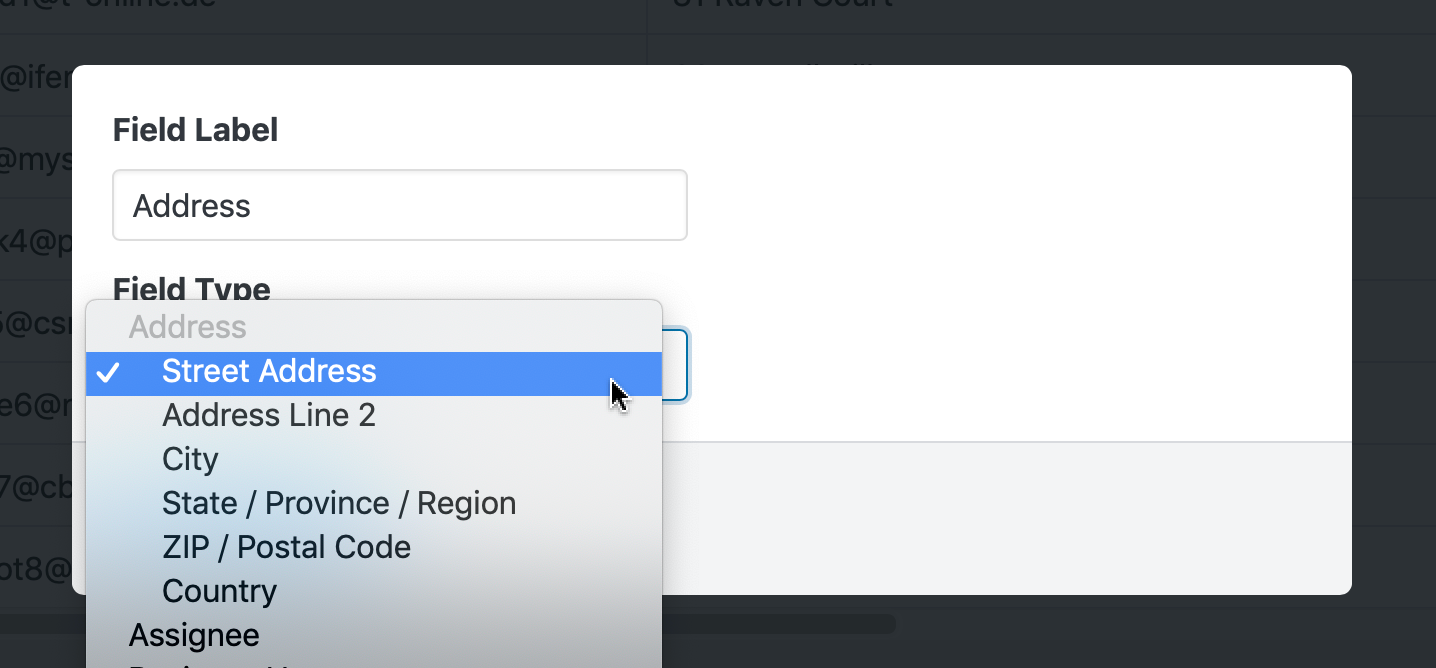
For example, instead of Street Address, use Address. The field will include all the normal address inputs (Street Address, City, Postal Code, etc), so you will want to use the parent name.
Now the Address field is available in the "Import To…" dropdown field. Map the other columns.
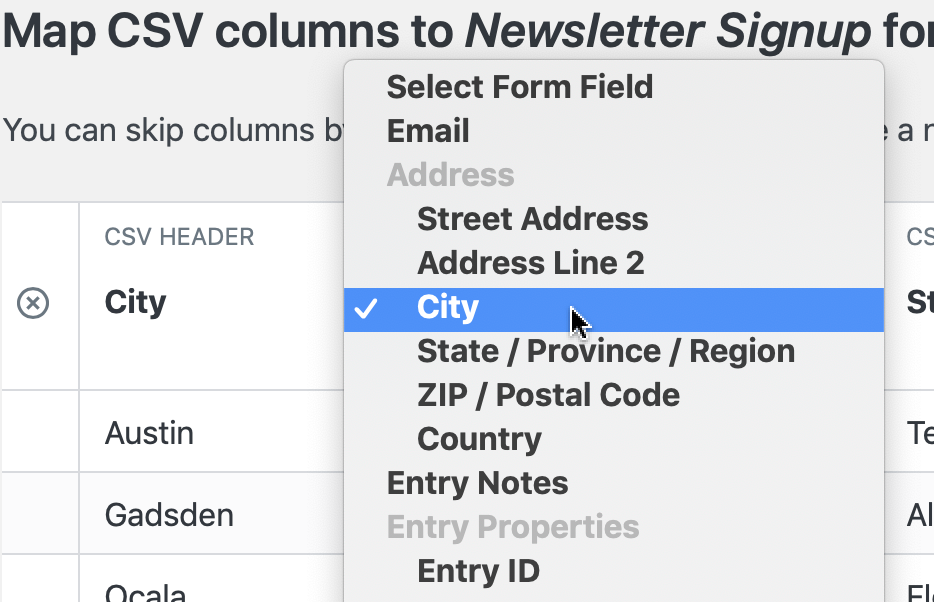
You can see that the "Address" label that we provided earlier is used as the parent field label.
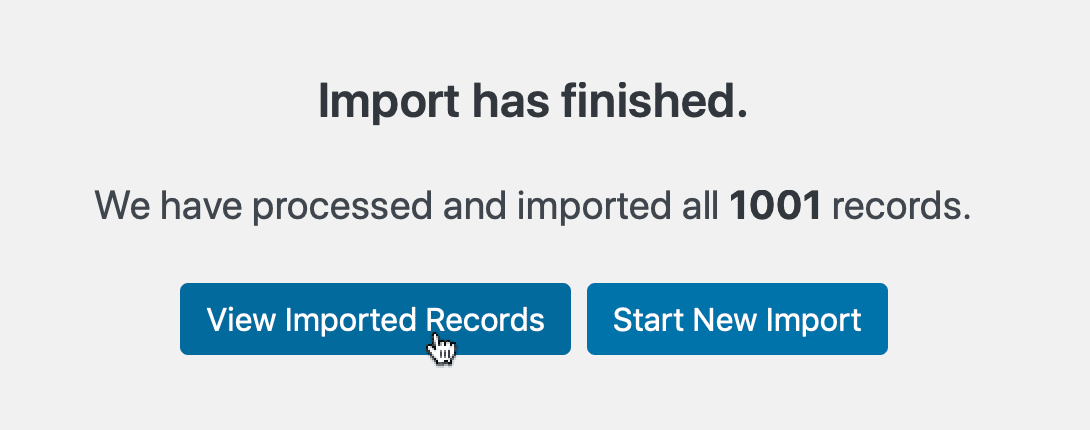
When the import is done, click View Imported Records
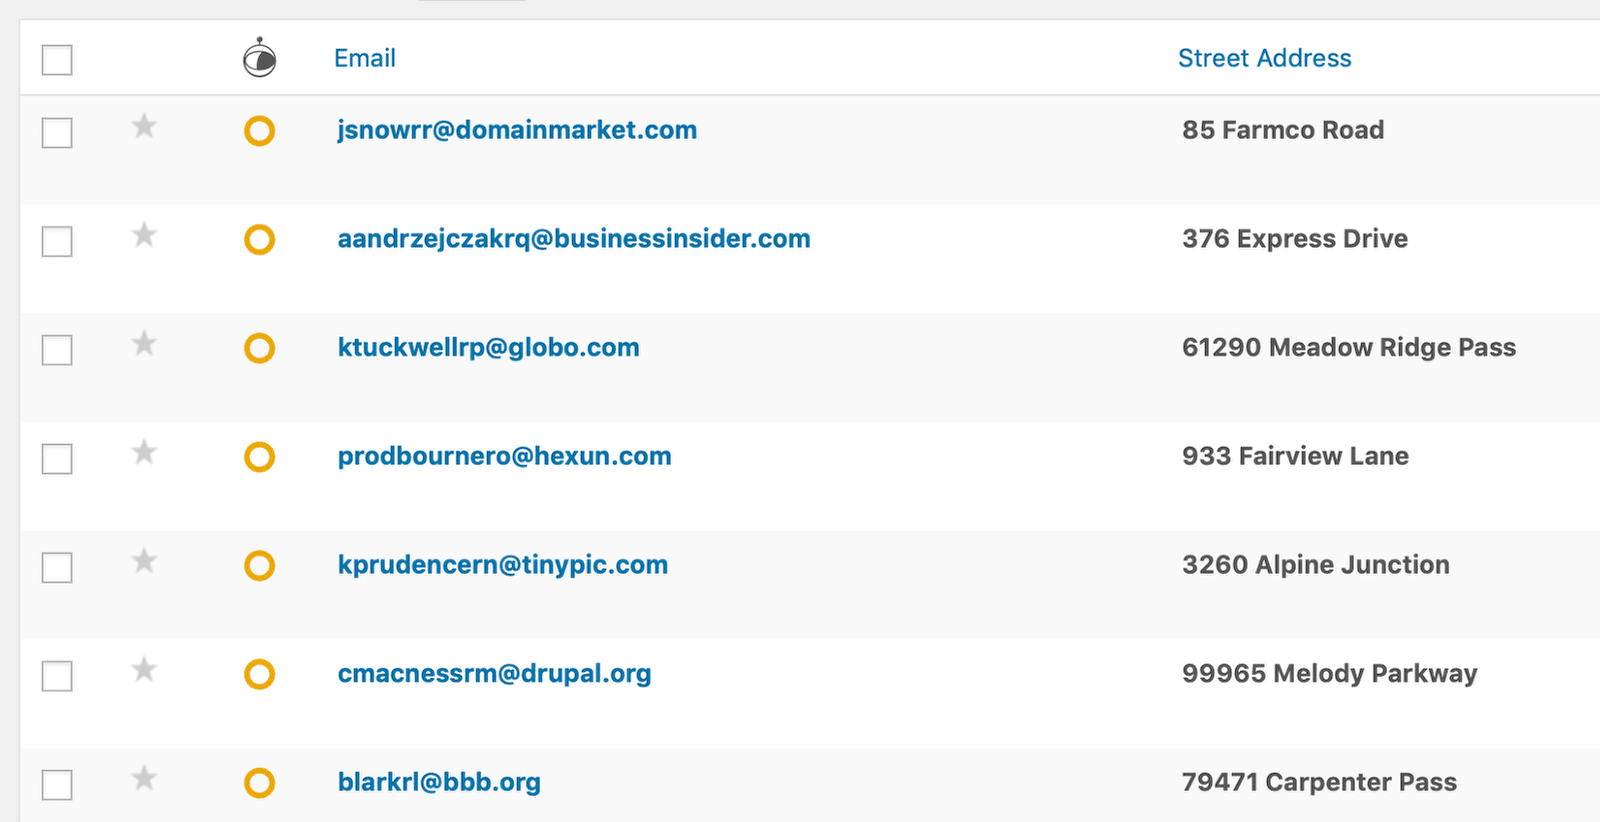
As you can see, the imported entries contain the newly-created Address field data…
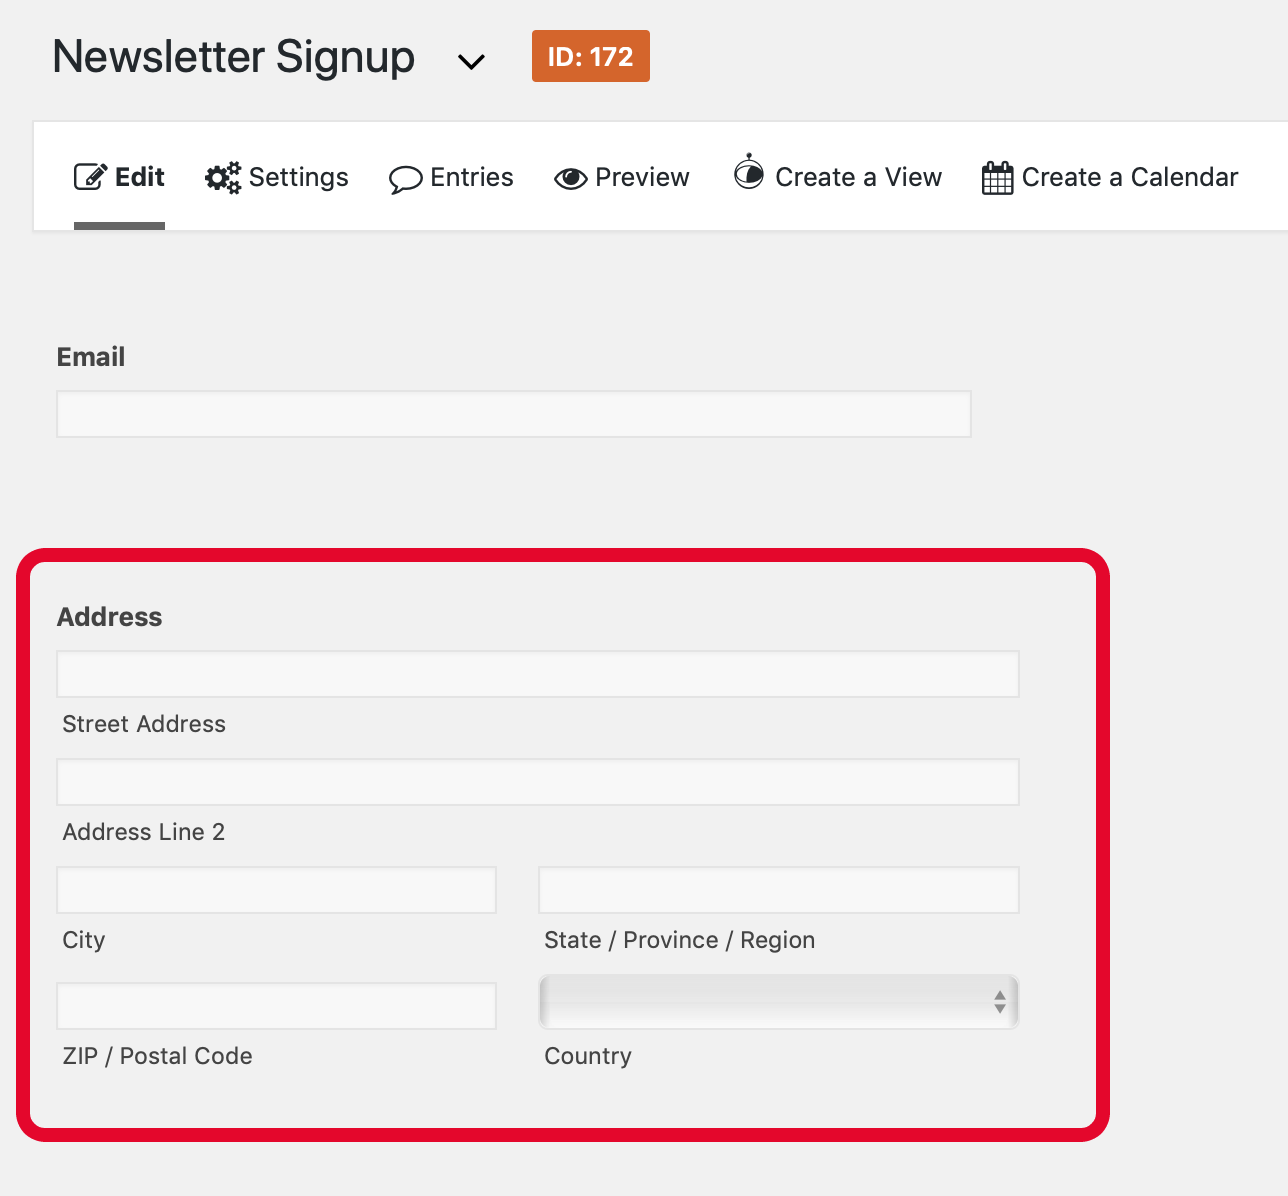
…and when you return to the form, you will see the Address field has been created.
Repeat for as many columns as you need!
You can use this method of creating new fields for existing forms during import to create as many new fields as you want. They can be Advanced fields (that contain multiple inputs, like the Address field type), or they can be simple (Single Line Text).