_1@2x.png)
Getting started with GravityEdit
With the GravityEdit plugin, you can edit entry values directly from the Gravity Forms "Entries" page without having to click "Edit" on each entry individually. In this article, we'll show you how to edit entries quickly using this powerful add-on.
Prefer to watch the video?
1. Go to the form settings page
Hover over "Forms" in your WordPress admin menu and click on "Forms". Now, locate the form where you want to enable Inline Edit, hover over it, and click "Form Settings".

2. Enable Inline Edit
On the Form Settings page, scroll down to the "Form Options" section and check the box that says "Enable Inline Edit".
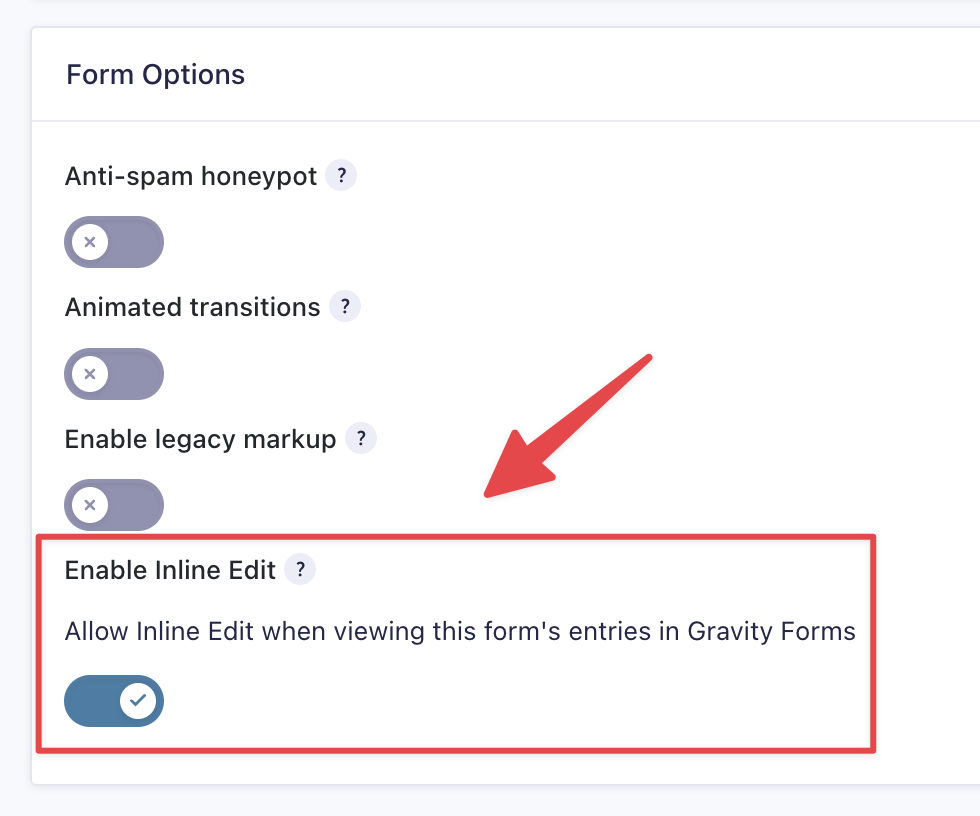
Don't forget to save your form settings by clicking the "Save Settings" button at the bottom.
Note: If you don't see the checkbox, you may not have activated the plugin! Check the "Manage Your Kit" page to make sure.
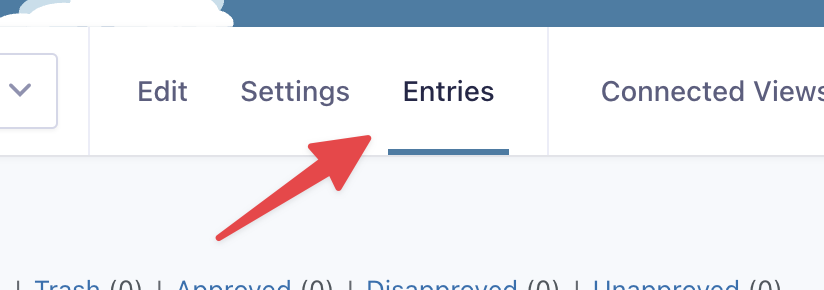
4. Go to the Entries page
After enabling Inline Edit, head over to the Entries page by clicking the link at the top of the page.
5. Click "Toggle Inline Edit"
To enable Inline Editing on your form entries, click the new button at the top right labeled "Toggle Inline Edit".
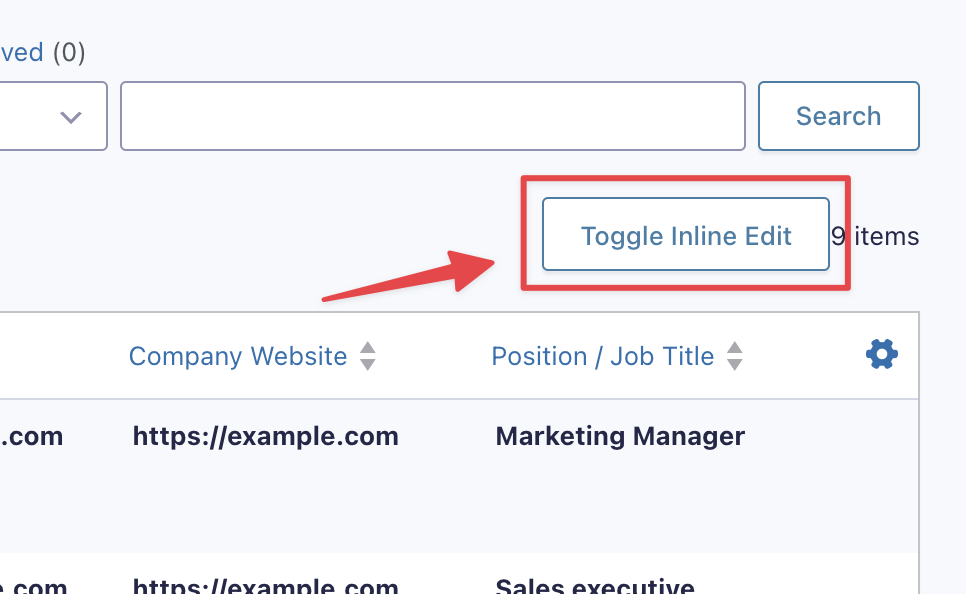
If you don't see the "Toggle Inline Edit" button:
- It may also be labeled "Enable Inline Edit", that's okay, it does the same thing.
- Make sure you saved the form settings correctly (see the beginning of this article).
- You may not have activated the Inline Edit plugin! Hover over "GravityKit" and click "Manage Your Kit" to ensure it's active.
If you have done both of these and you still don't see the button, something's not right! Get in touch with us at support.
You'll see the values are now underlined. That means they are editable!
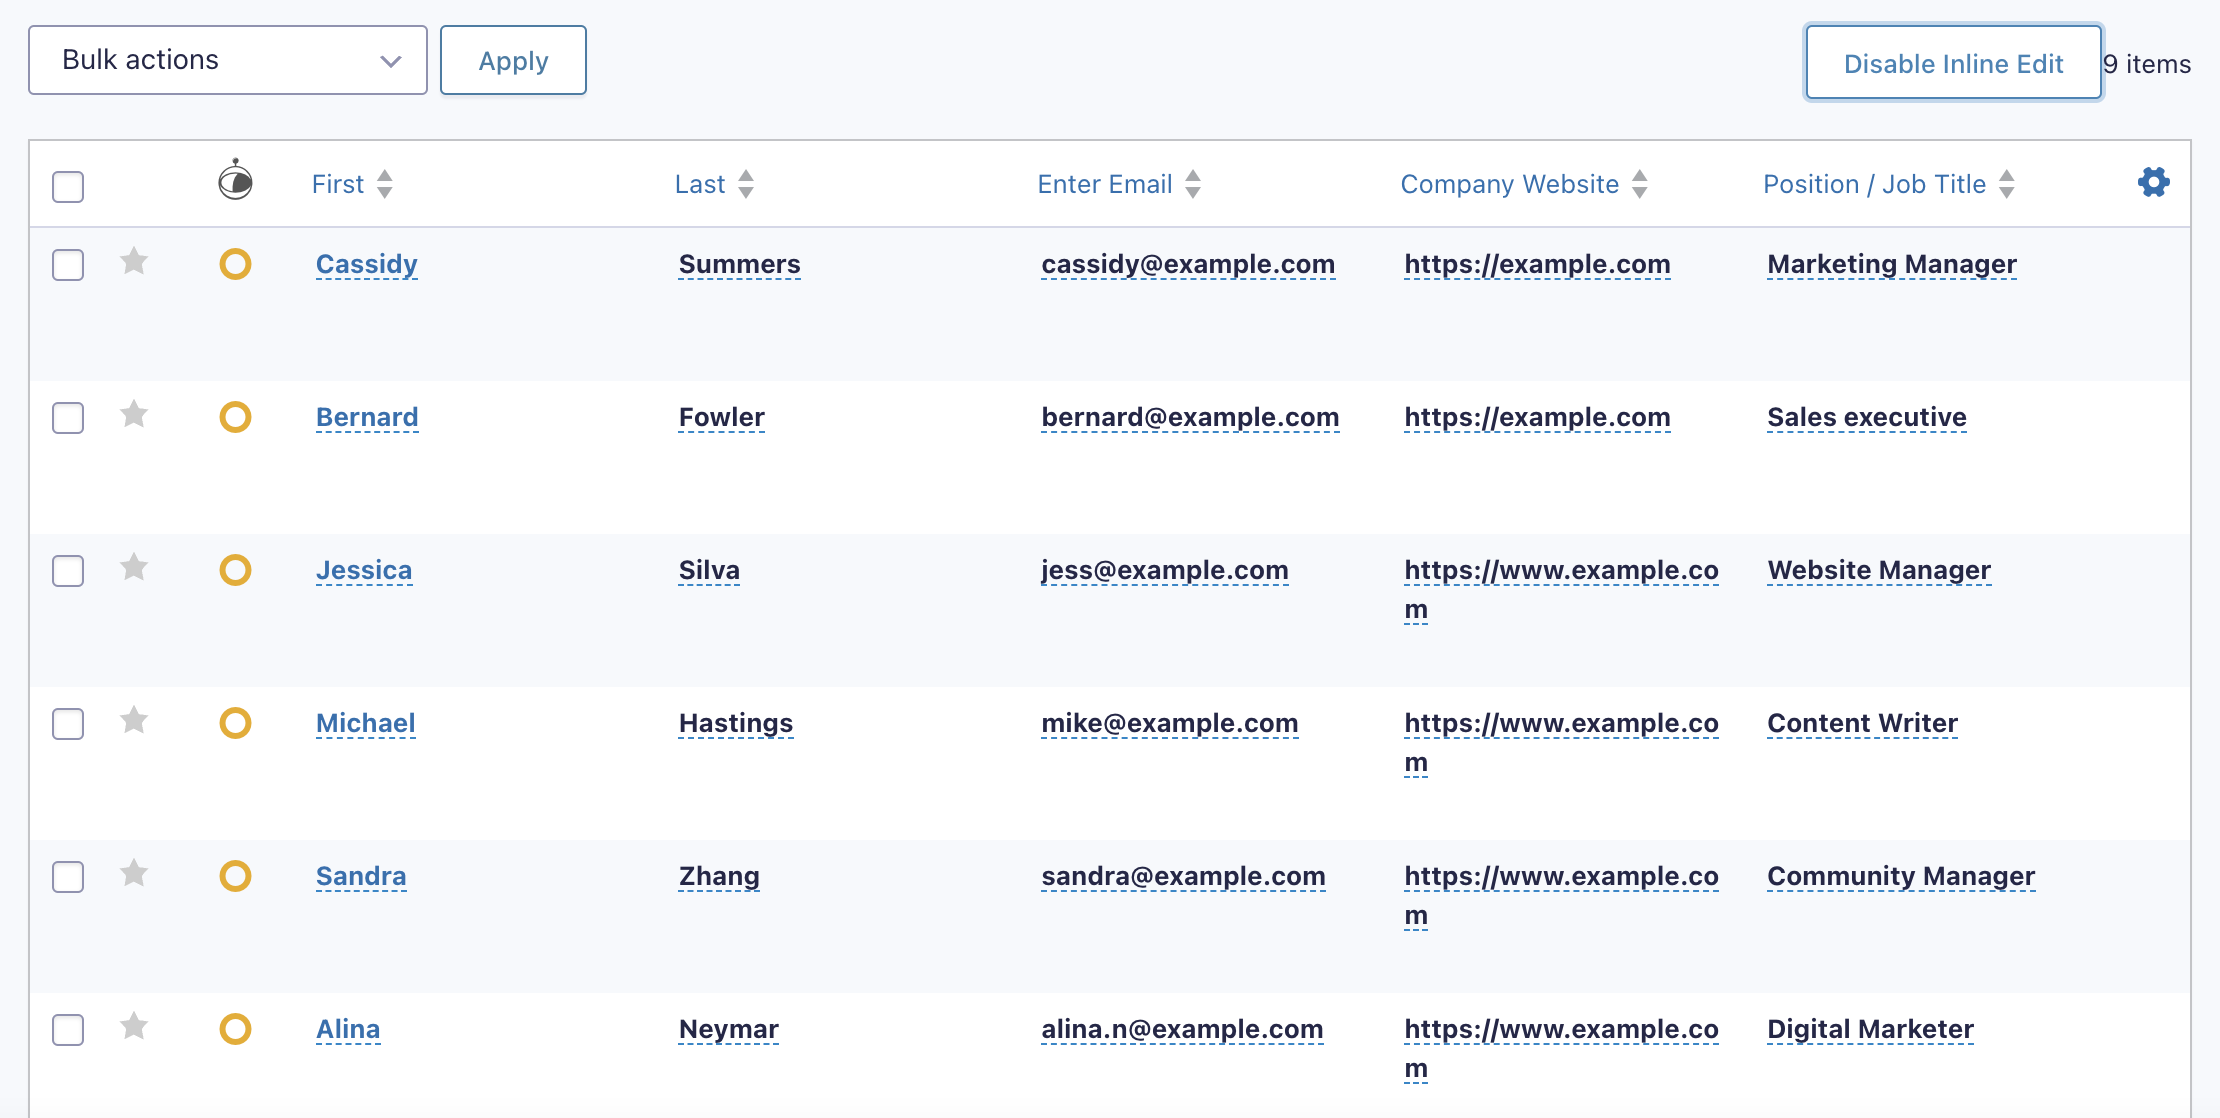
Any fields that are not editable will not be underlined (and will be slightly transparent).
6. Click on a field to edit its value
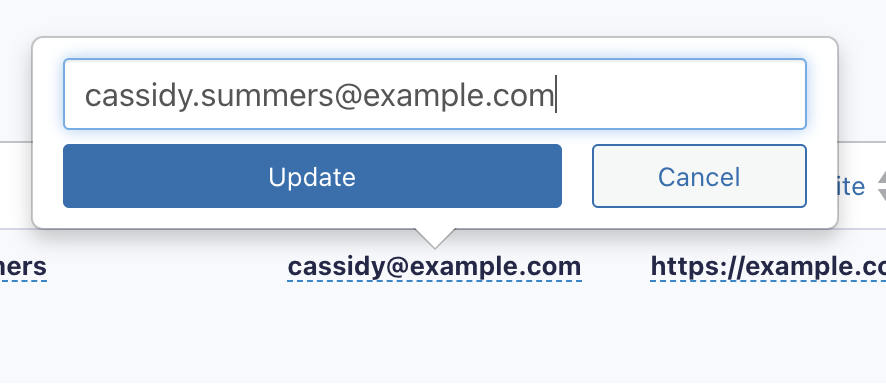
After clicking on an underlined field, an edit box will appear, allowing you to modify the field's value. To save the change, click Update.
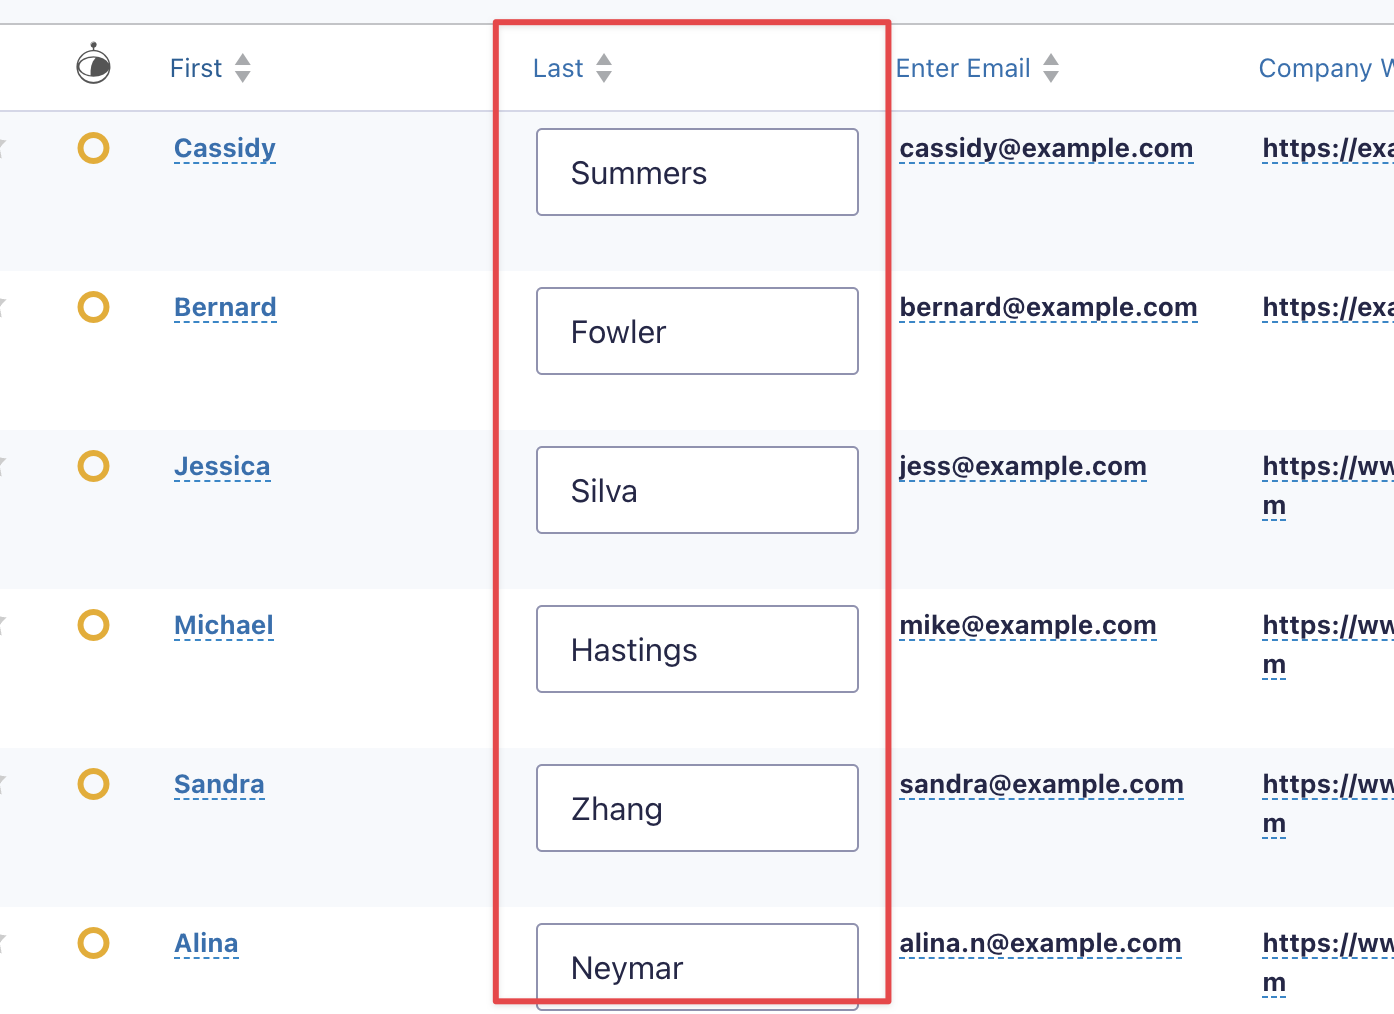
You can also click on a column header to make each value in that column editable. This saves even more time, and allows you to bulk edit entries in that column.
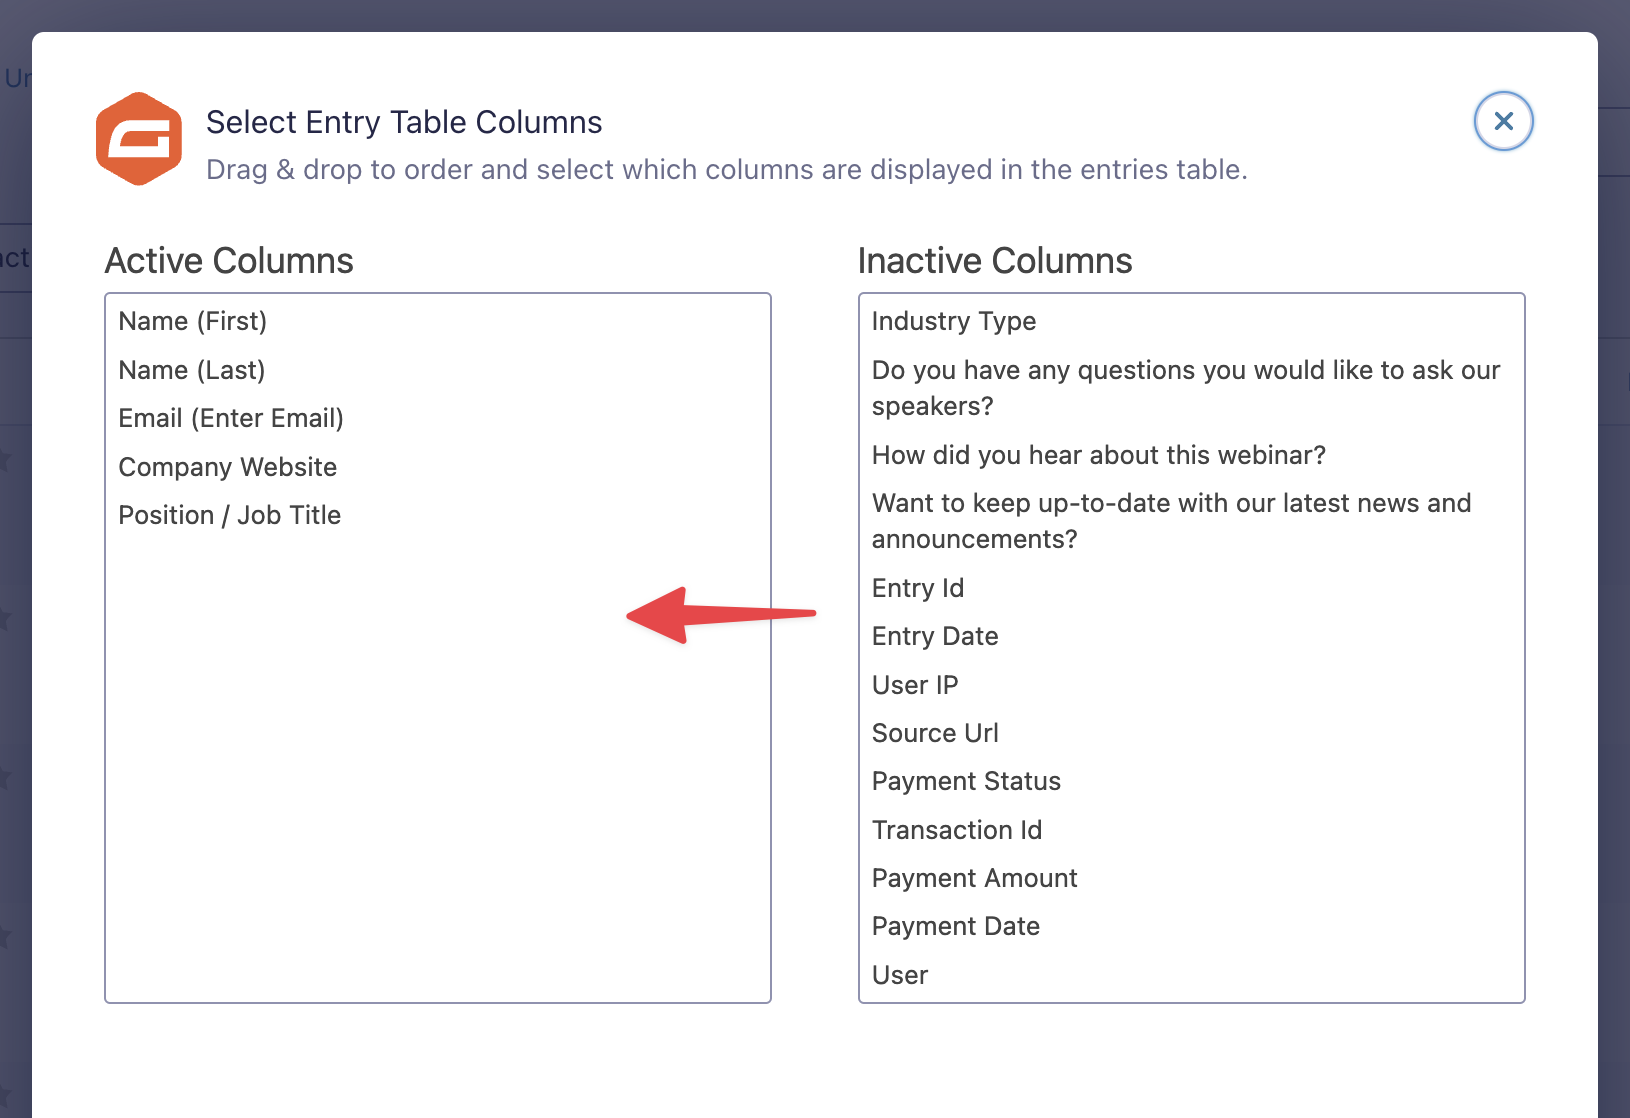
You may wonder why not all your form fields are editable from this page. That's because Gravity Forms only shows the first few fields here. However, you can easily add form fields as active columns by clicking on the gear icon in the top right and moving fields to the "Active Columns" area.
That's it!