_1@2x.png)
How to add row numbers to a View
The simplest way to add row numbers to a GravityView View is with the built-in Result Number field. This dedicated field displays a sequential number for each entry, similar to row numbers in a spreadsheet, and includes options for setting a custom start number, reversing the order, and linking to the single entry page.
For more advanced use cases—such as embedding a row number inside a Custom Content field alongside other text or merge tags—you can use the {sequence} merge tag instead.
This article covers both methods.
Method 1: Using the Result Number field
The easiest way to add row numbers is with GravityView's built-in Result Number field. This is a dedicated field designed specifically for sequential numbering.
1. Open your View for editing
Go to Views in your WordPress admin and open the View you want to edit.
2. Add the Result Number field
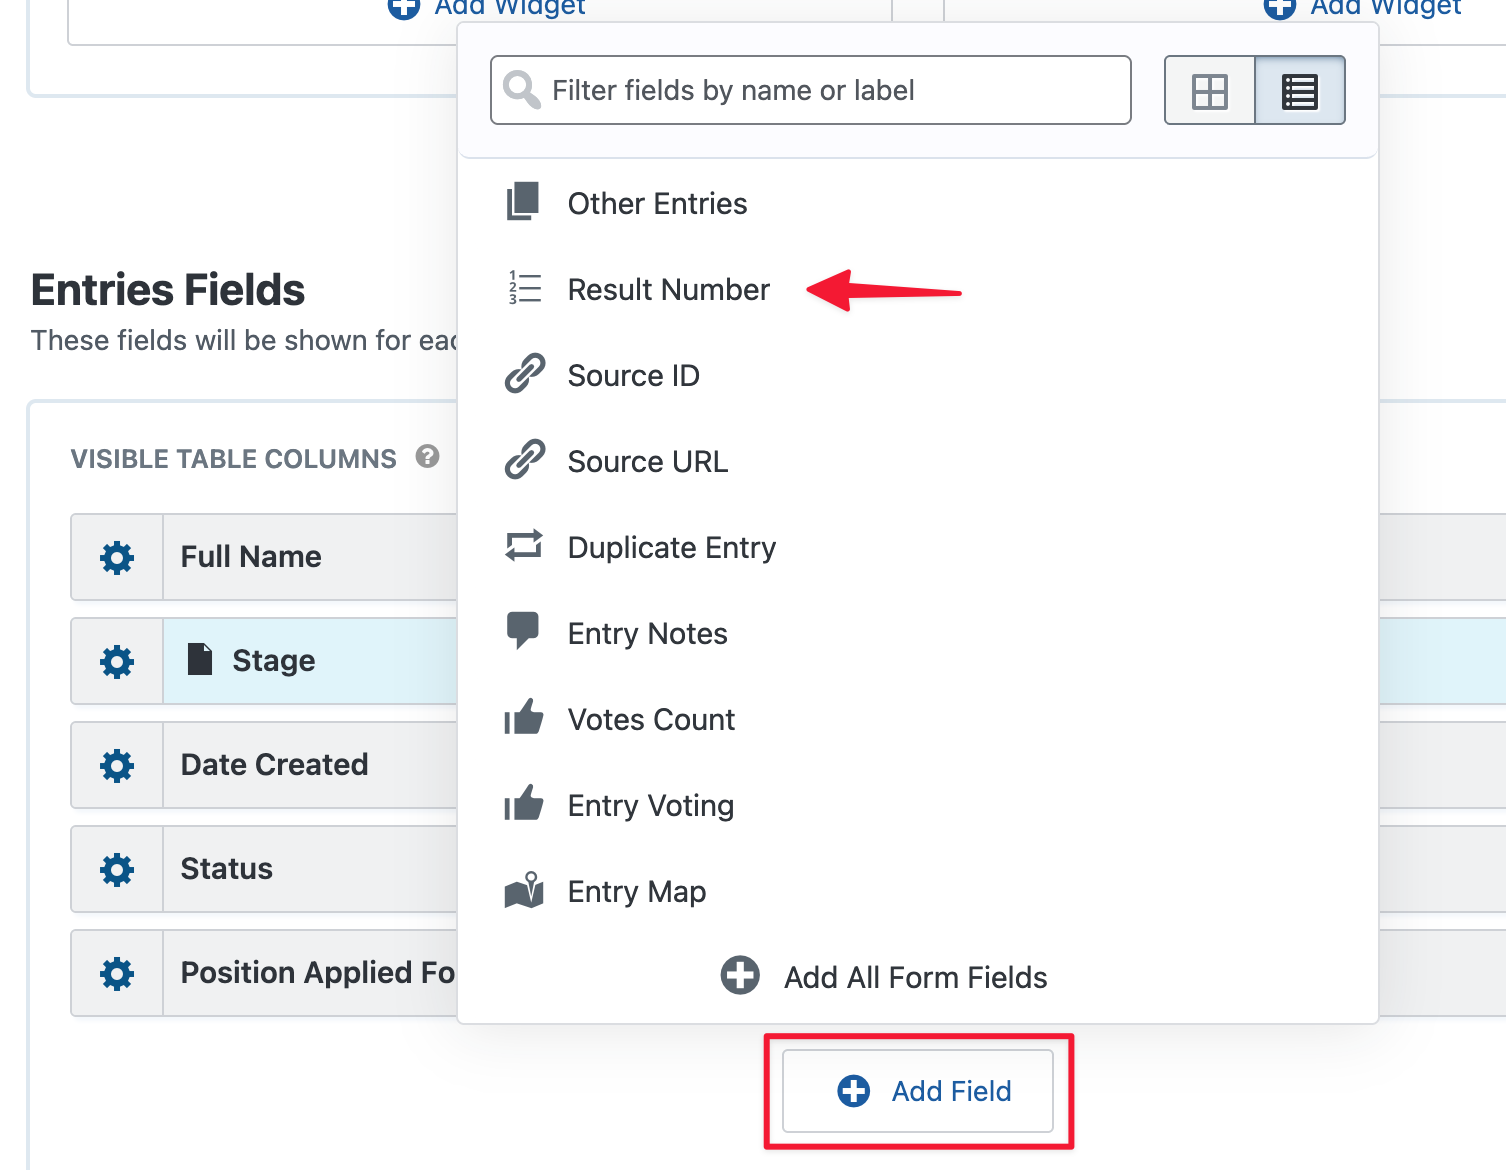
In the Multiple Entries layout tab, click Add Field. Select Result Number from the list of available fields.
3. Configure the field settings
The Result Number Settings panel has several options:
- First Number in the Sequence — The starting number for the sequence. Defaults to
1. For example, set this to101if you want numbering to start at 101. - Reverse the order of the number sequence (high to low) — Check this to count down instead of up (e.g., 10, 9, 8…).
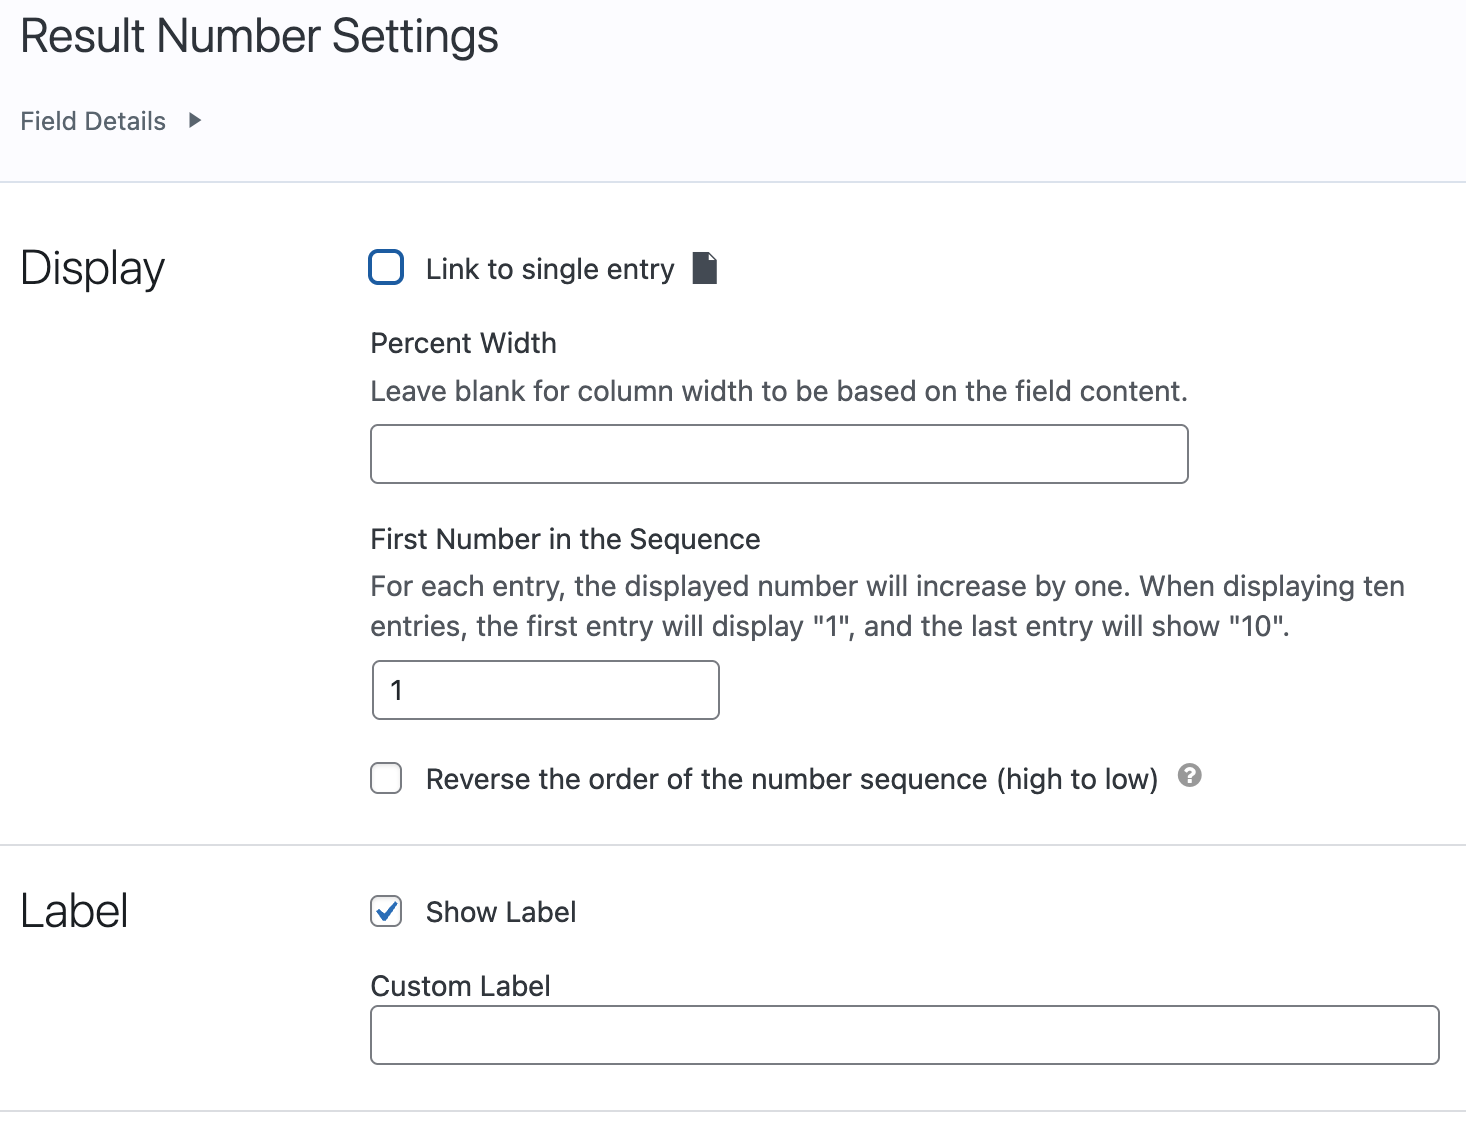
Under Label, check Show Label and optionally enter a Custom Label (e.g., # or Row ).
4. Position the field and save
Drag the Result Number field to the first position in your field list so it appears as the leftmost column, then click Update.
Method 2: Using the sequence merge tag
The {sequence} merge tag outputs an incrementing number for each entry displayed in your View. The first entry shows 1 , the second shows 2 , and so on.
Key things to know about {sequence} :
- The number reflects the current display order, not the entry ID. If a visitor sorts the table by a different column, the sequence still counts
1, 2, 3…from top to bottom. - If your View uses pagination, the sequence continues across pages. For example, if page 1 shows entries 1–25, page 2 starts at 26.
- The merge tag works inside field values only (such as a Custom Content field). It does not work in View widgets or outside of a View (for example, in Gravity Forms email notifications).
Follow these steps to add a row number column using {sequence} :
1. Open your View for editing
Go to GravityKit > All Views in your WordPress admin and open the View you want to edit.
2. Add a Custom Content field
In the Multiple Entries layout tab, click Add Field to add a new field. Select Custom Content from the list of available fields.

3. Enter the {sequence} merge tag
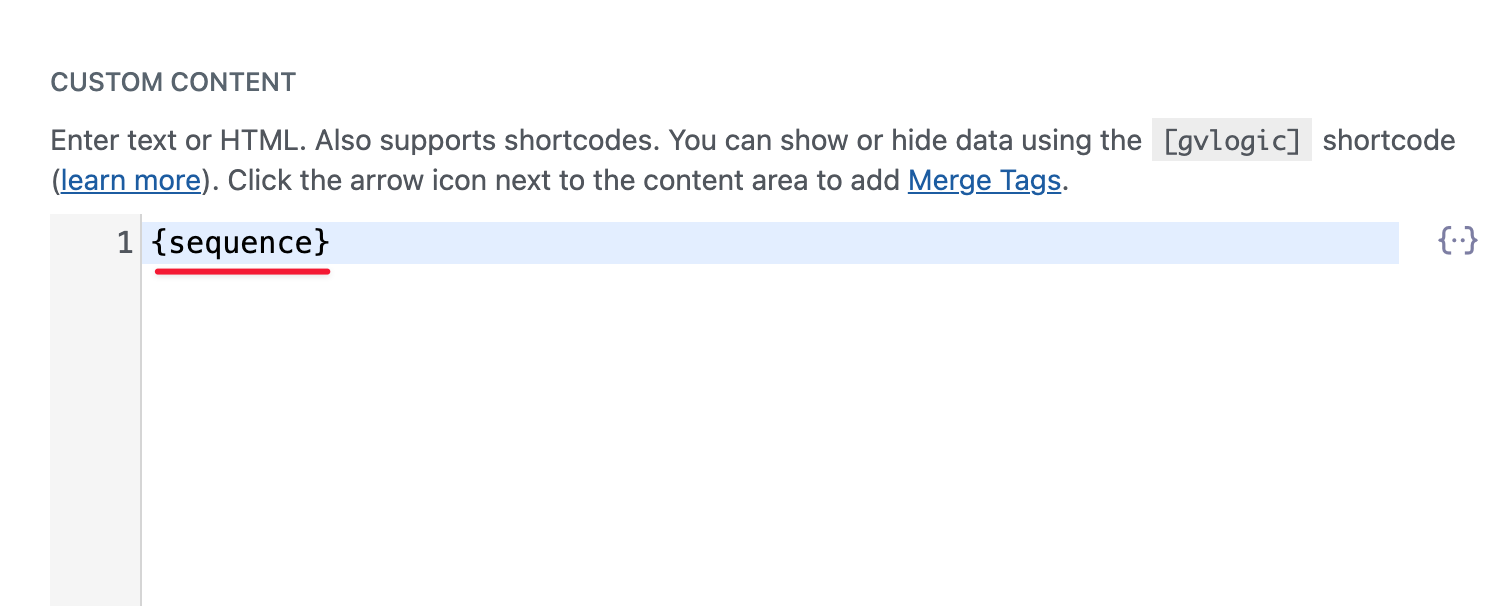
In the Custom Content field settings, type {sequence} into the content area.
4. Set a field label
Give the field a label such as # or Row so the column has a clear header in your table.
5. Position the field
Drag the Custom Content field to the first position in your field list so the row number appears as the leftmost column.
6. Save your View
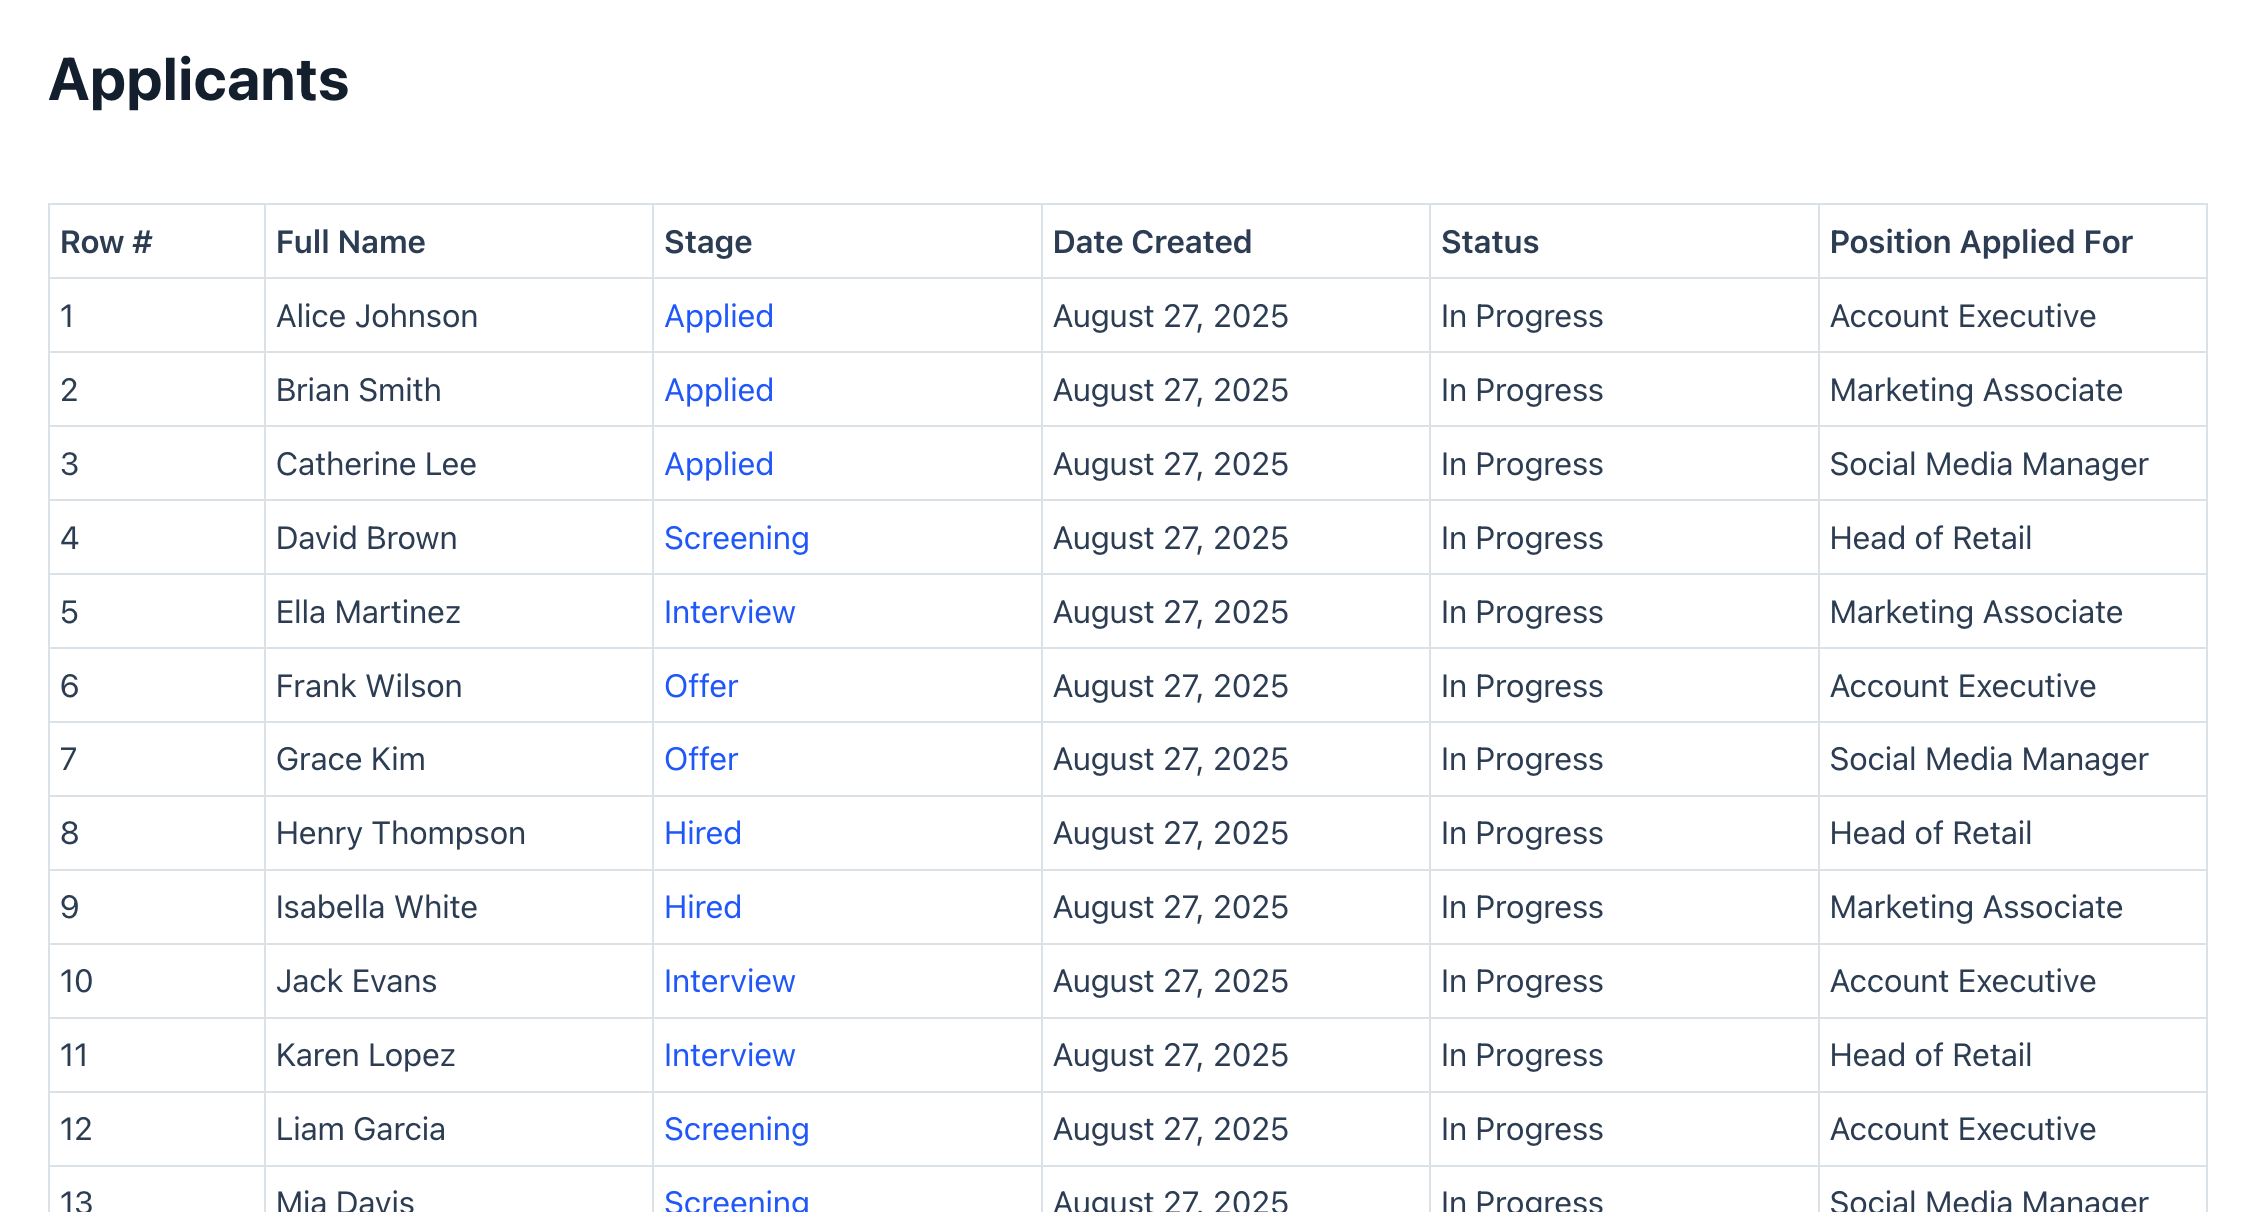
Click Update to save your changes. Your View now displays a numbered row for each entry.
Limitations
- Field values only:
{sequence}works inside field values such as Custom Content fields. It does not work in View widgets (header, footer, or sidebar areas) or outside of a View. - Display order only: The number reflects the order entries appear on screen, not a permanent or stored value. Sorting, filtering, or paginating the View changes which number an entry receives.
- Not available in notifications: You cannot use
{sequence}in Gravity Forms email notifications or confirmations because it depends on the context of a rendered View.
Note: If a visitor sorts the table by Date, the row numbers still display as 1, 2, 3 from top to bottom — they do not stay attached to specific entries.