_1@2x.png)
Using Entry Tags in GravityBoard
GravityBoard integrates with the Entry Tags plugin to display tags on cards. Tags provide a clear, visual way to categorize and organize entries directly on your board.
What you can do with entry tags
When Entry Tags is active, you can:
- See tags on cards: Tags appear at the top of each card with colored backgrounds
- Edit tags from the card detail view: Open a card to add or remove tags
- Control visibility: Show or hide tags using your board feed settings
Requirements
To display entry tags on a GravityBoard, you need:
- The Entry Tags plugin installed and activated
- A form with at least one Entry Tags field
- A GravityBoard feed configured for that form
Setting up tags on your board
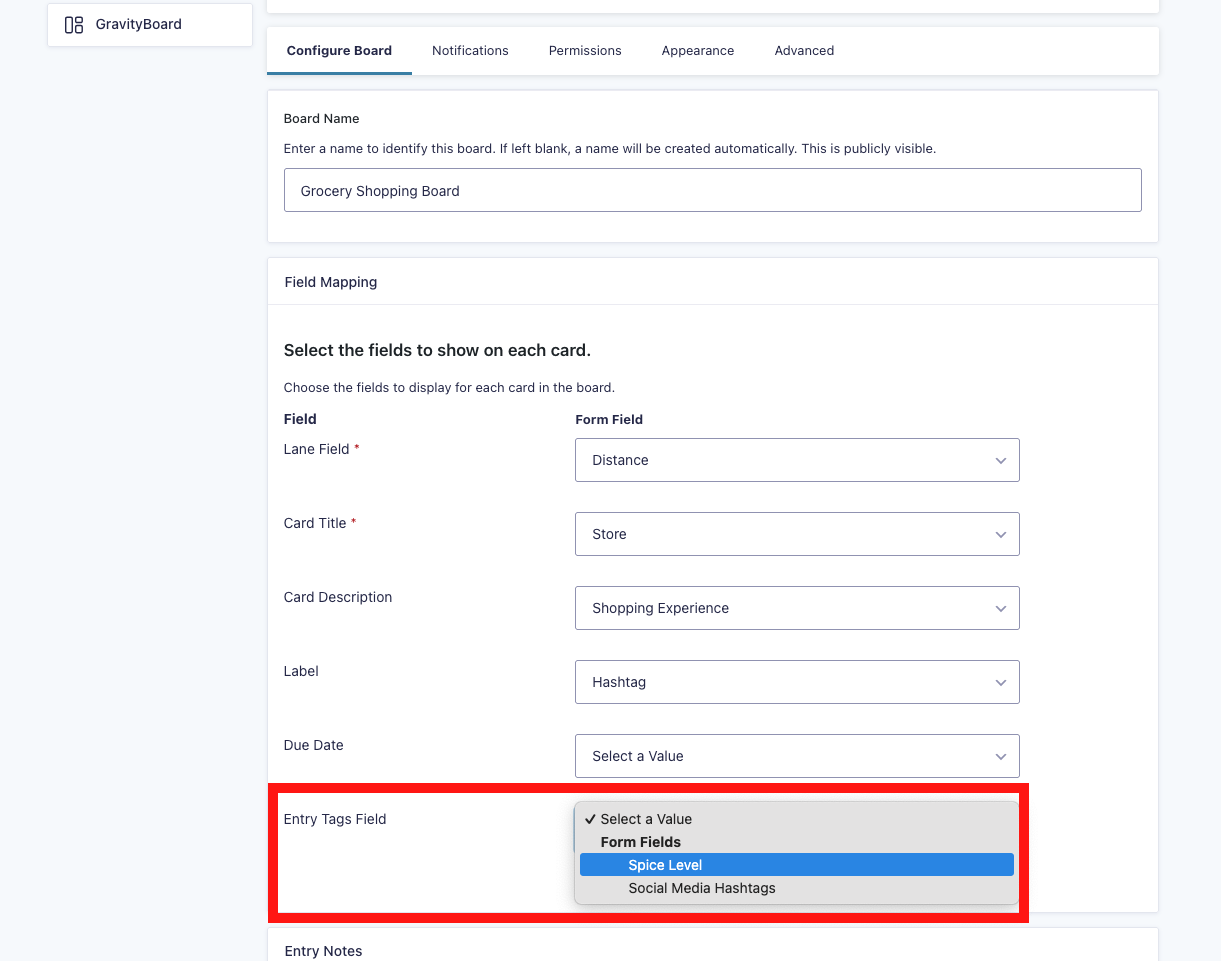
Step 1: Map the entry tags field
- Go to Forms > Boards and edit your board feed
- Open the Configure Board tab
- In the Field Mapping section, locate Entry Tags Field
- Select the Entry Tags field from your form
- Click Save Settings
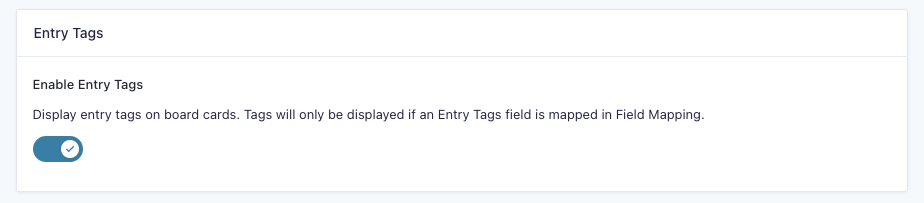
Step 2: Enable tag display
- In the same feed settings, scroll to the Entry Tags section
- Toggle Enable Entry Tags on (enabled by default)
- Click Save Settings
Note: Tags only appear on cards when:
- The Entry Tags plugin is active
- An Entry Tags field is mapped
- Enable Entry Tags is turned on
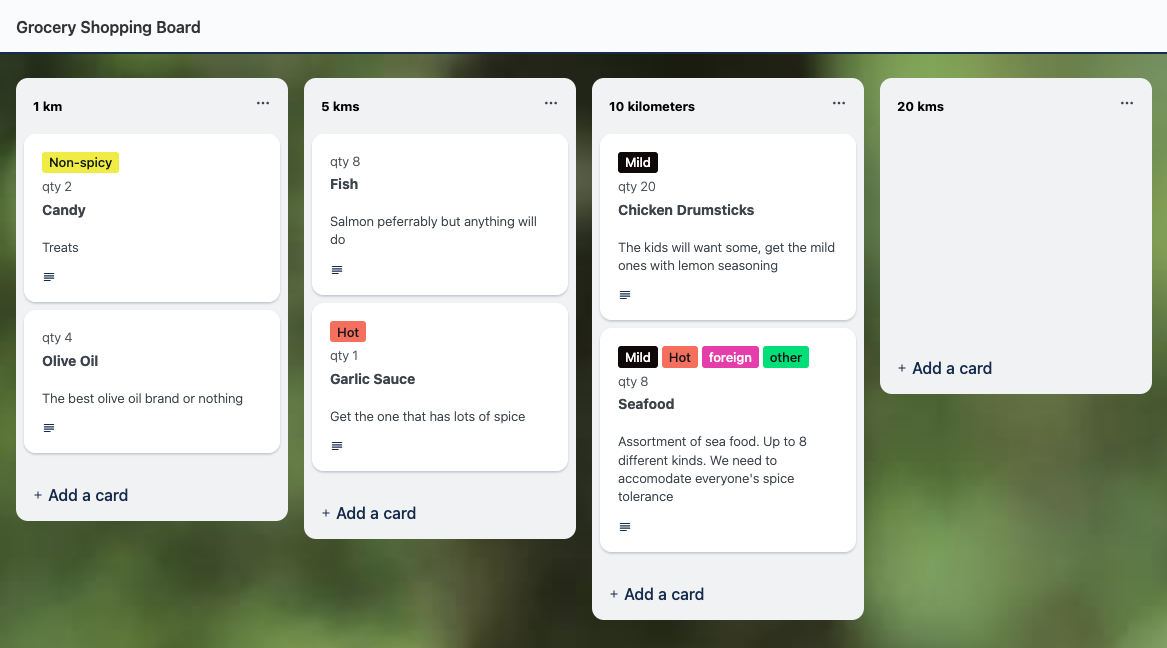
Viewing tags on cards
After setup, tags appear at the top of each card, above the card title.
Each tag includes:
- A colored background defined in the Entry Tags field settings
- Readable text: Text color automatically adjusts for contrast
If an entry has multiple tags, they display side by side and wrap to additional lines as needed.
Editing tags
You can add or remove tags directly from GravityBoard without opening Gravity Forms.
To edit tags on a card
- Click a card to open the card detail view
- Locate the Tags field
- Click the field to open the tag dropdown
- Select a tag to add it, or click the × icon to remove a tag
- Click Save
Changes sync immediately, no page refresh required.
Note: GravityBoard does not support creating new tags. You can only select from existing tags or remove tags that are already assigned.
Troubleshooting
Tags are not appearing on cards
- Confirm Entry Tags is active: The integration requires the plugin to be installed and activated
- Check field mapping: Ensure an Entry Tags field is selected in Field Mapping
- Verify the toggle: Make sure Enable Entry Tags is turned on
- Confirm tags exist: Entries must have tags assigned
Tags are not saving
- Check your permissions: You need edit access to the card
- Verify the form field: Confirm the Entry Tags field still exists on the form
Tag colors look incorrect
- Update tag colors: Colors are controlled in the Entry Tags field settings
- Clear your cache: Your browser may be displaying cached styles
Related articles
If you need help or have questions, contact our support team.