Dynamic Widget Placement
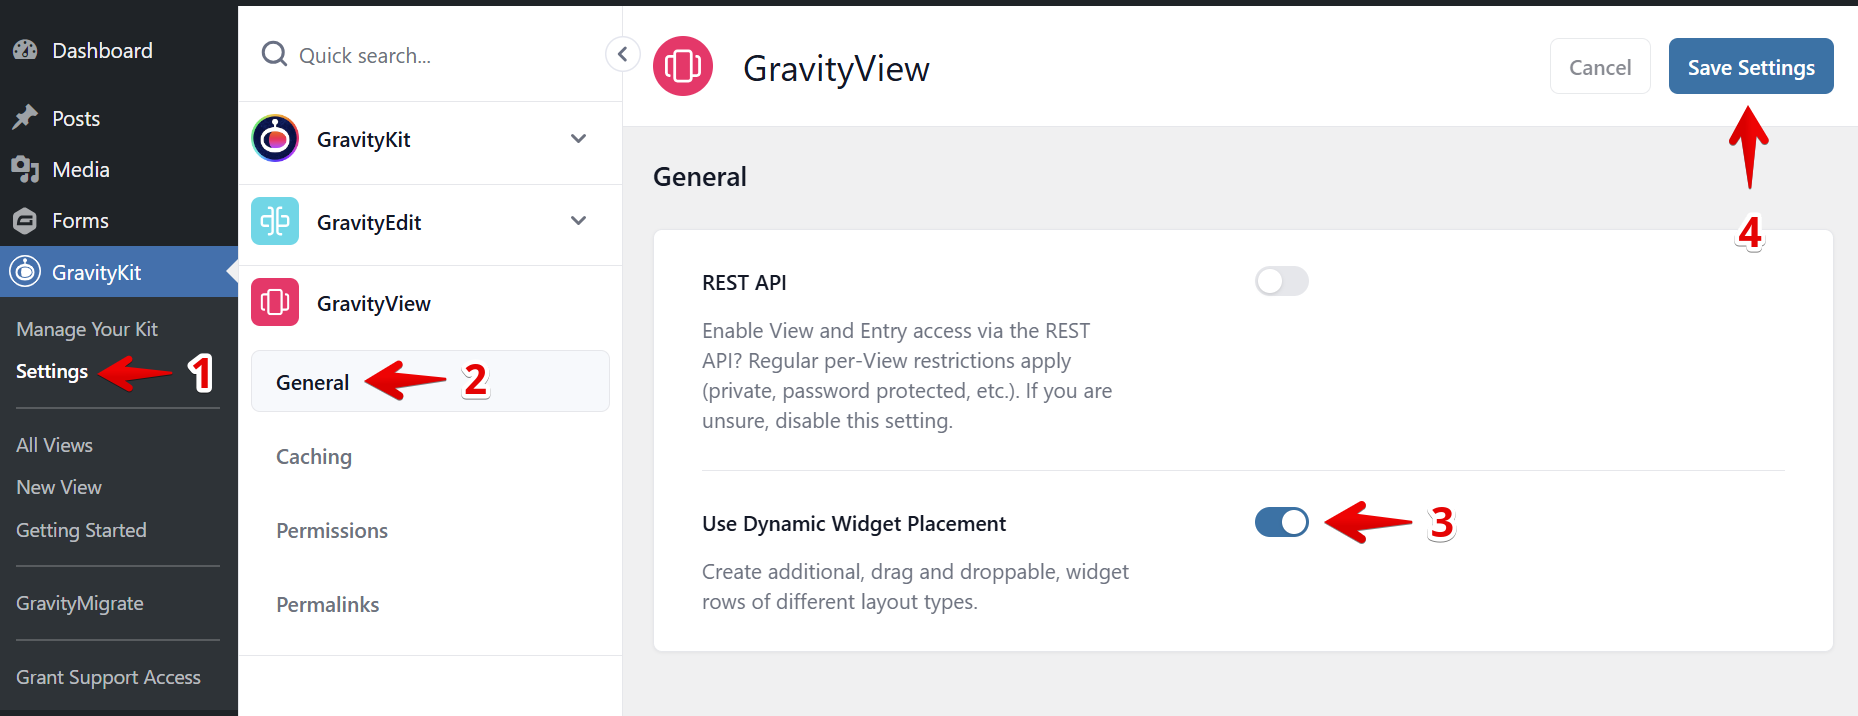
GravityView can create custom widget layouts using rows and columns. To enable this functionality:
- Go to the GravityKit Settings page;
- Under the GravityView tab, click on the "General";
- Click on the toggle to activate the "Use Dynamic Widget Placement" setting;
- Save Settings.

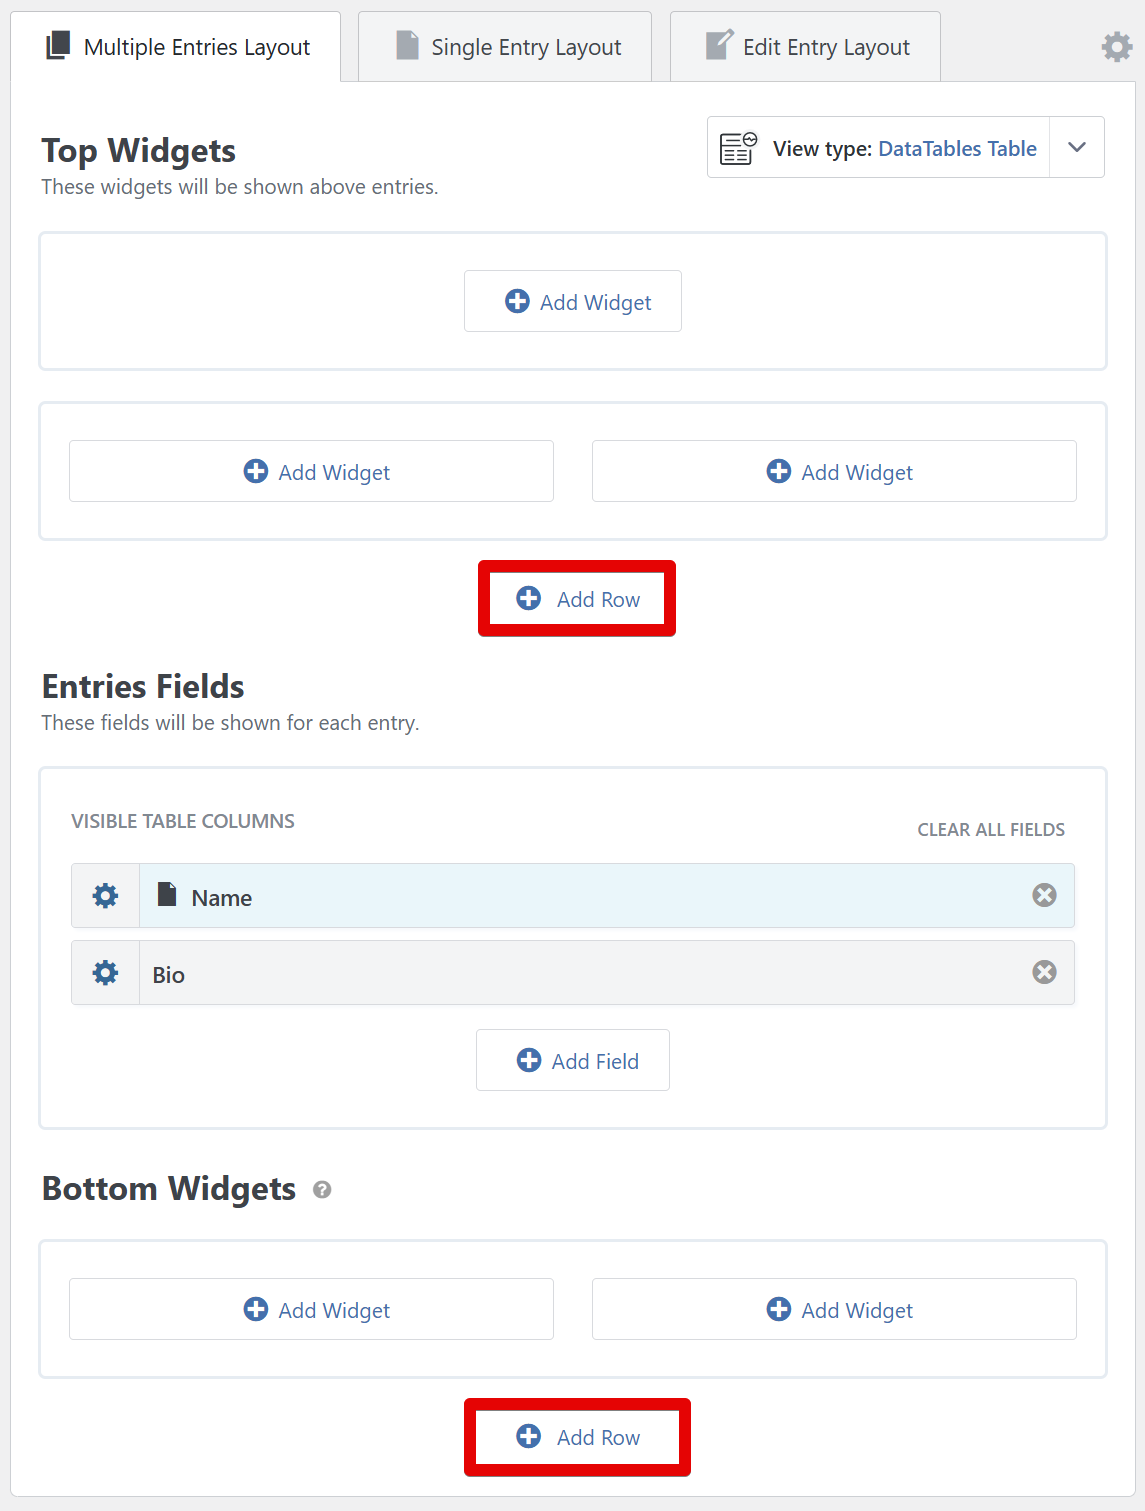
Once it's activated, open the View editor and look for the "Add Row" link in the Top and Bottom Widgets area.

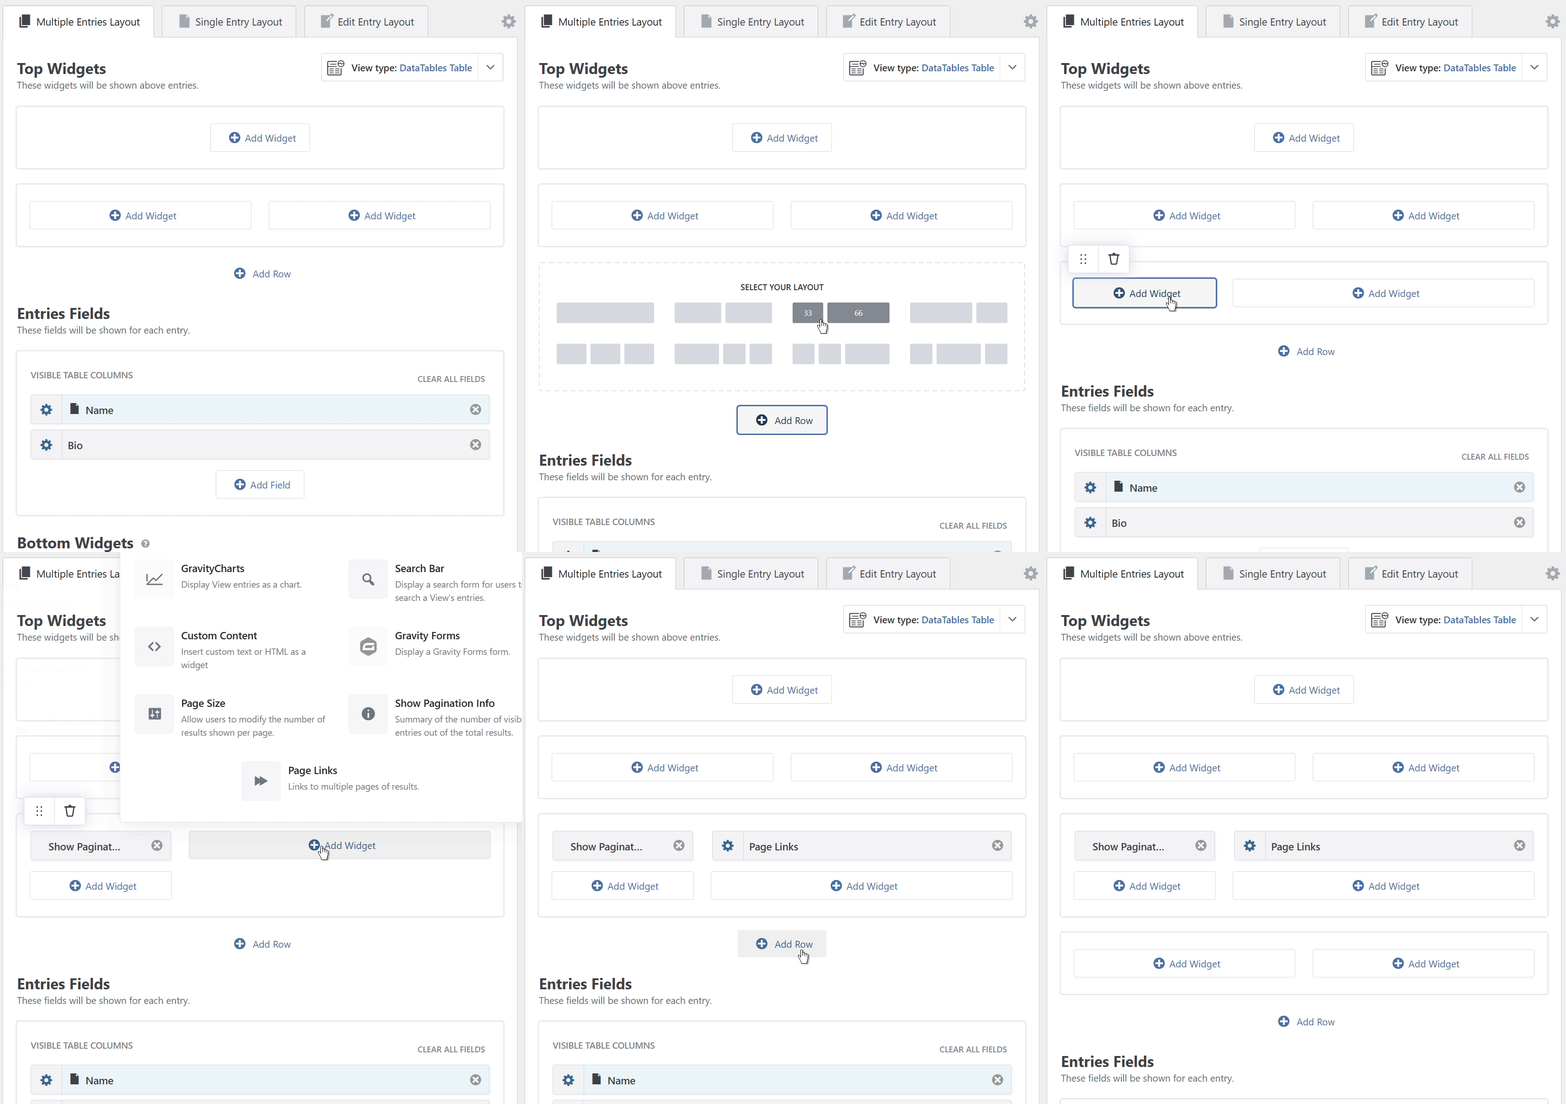
Clicking on that link will open the layout selector, where you can select different layout templates for your View widgets.

It is possible to add multiple rows to both widget zones of the View.
Once you've positioned the widgets in the way you prefer using the layout builder, remember to save or update your View to see the results reflected on the front end.
_1@2x.png)