_1@2x.png)
Getting started with Gravity Forms Zero Spam
In this article, we'll show you how to get set up with our free Gravity Forms Zero Spam plugin.
Enabling anti-spam protection
After installing and activating the plugin, you can enable anti-spam protection for each of your forms from the "Form Settings" screen. To find this option, click on "Forms" in your WordPress menu. Next, hover over one of your forms and click the "Settings" link. Now, scroll down to "Form Options" where you'll see a new setting labeled “Prevent spam using Gravity Forms Zero Spam”. Enable this for spam protection!
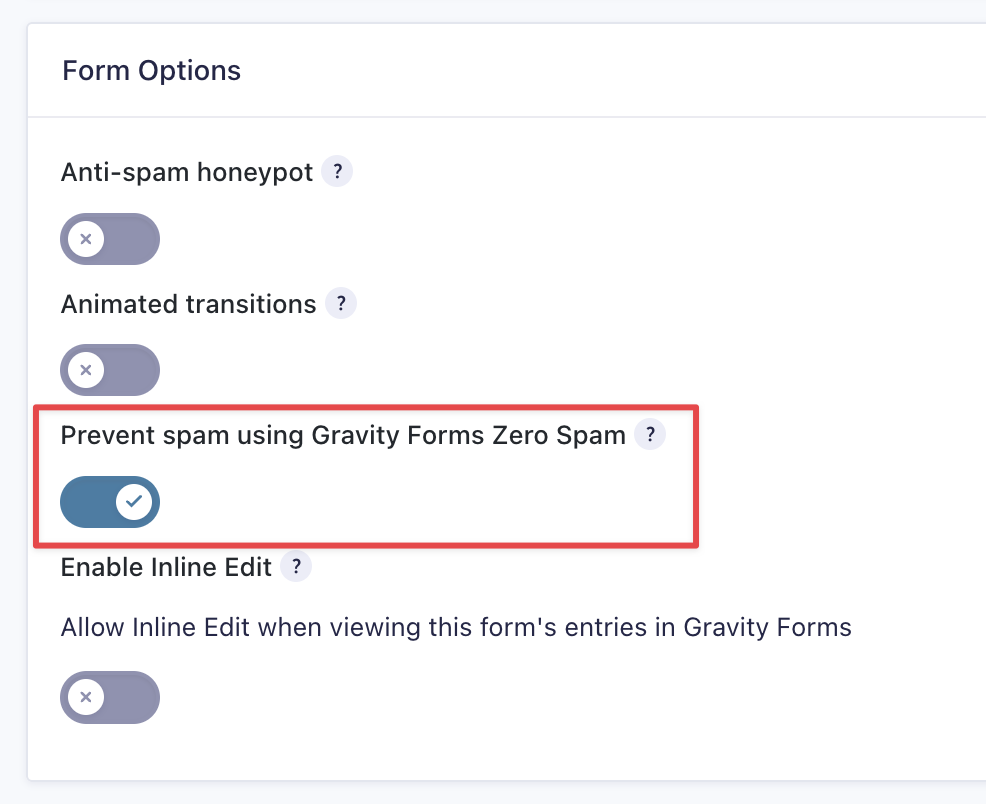
You can also turn this option on by default for all new forms from the Zero Spam global settings on the Gravity Forms "Settings" page.
Configuring spam summary email reports
Gravity Forms Zero Spam also enables you to receive automated spam reports over email. To enable this feature, hover over "Forms", click on "Settings", and then click on "Zero Spam". Next, scroll down to "Spam Report Email" and choose how often you would like to receive spam reports.
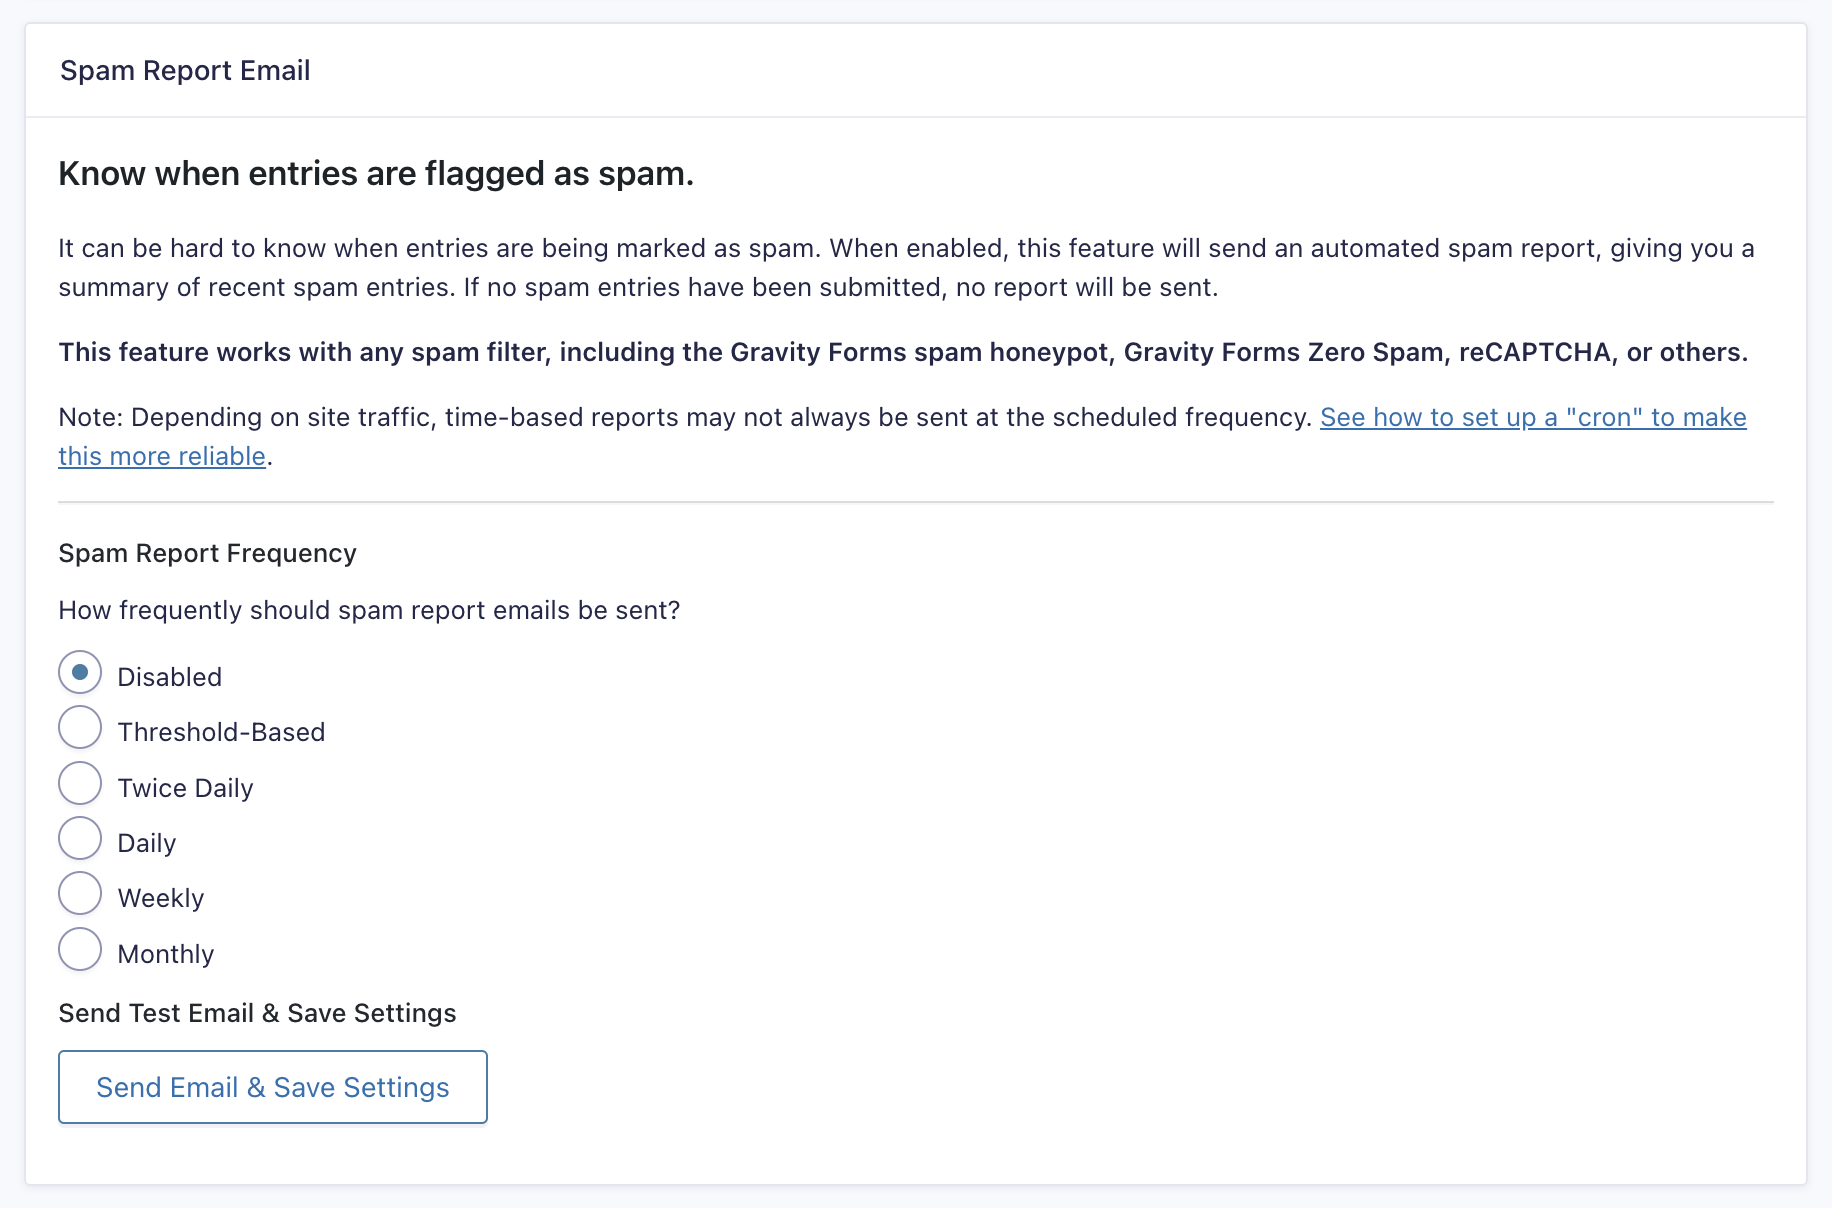
After selecting a frequency, you can configure the email settings, and customize the email body using custom merge tags to pull in dynamic content.

When you're done, click "Send Email and Save Settings" to send a test email to your chosen email address. Check to ensure your email is set up correctly and then click the "Save Settings" button below.